What do you do when you’re intimidated by cleaning out a closet or tackling a project?
Sometimes when I’m intimidated by a project it’s very hard to begin. One of the things I’ve read recently was that you don’t have to complete the project, you just have to start. This was a novel concept to me.
I read the following article which was about doing something for 2 minutes to break a habit or to start a new one. Check out this motivational article here: https://lifehacker.com/use-the-two-minute-rule-to-stop-procrastinating-and-get-1521792128
2 Minute Rule
Anyway, I have used this advice to complete several other projects since first reading the article.
I have learned that I can tackle anything as long as I’m committed for 2 minutes.
So determining how and where to begin a project is the starting point.
Remember you don’t have to complete the project, you just need to start the project and commit to being diligent for 2 minutes.
I’m talkin 2 minutes minimum per day. The idea behind this is that you will stay on task longer. You’ll be like, “I can do this!”
Easier Start
Also, you don’t have to take on your most intimidating project first. Sometimes starting with something slightly easier helps develop the confidence and skills to tackle a bigger task.
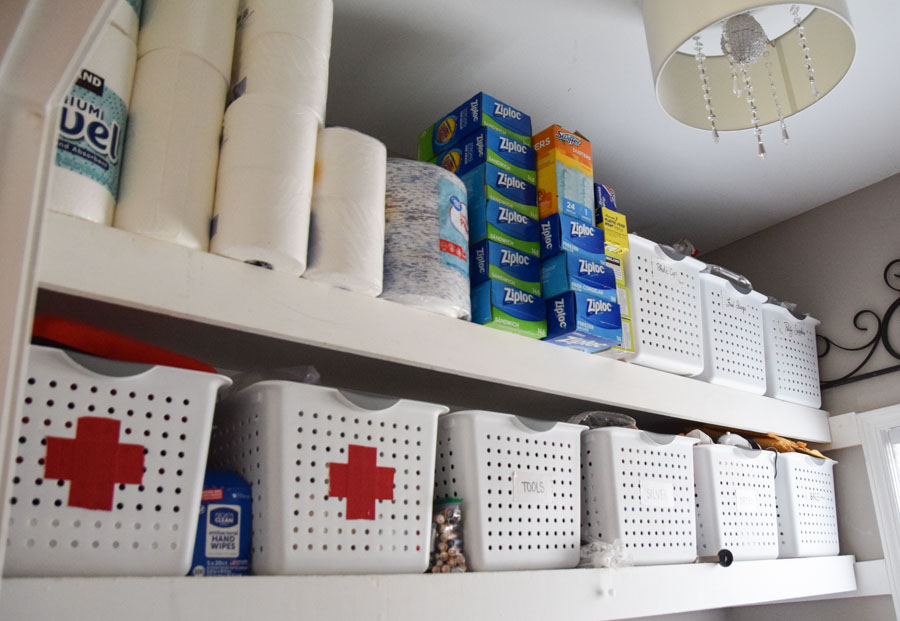
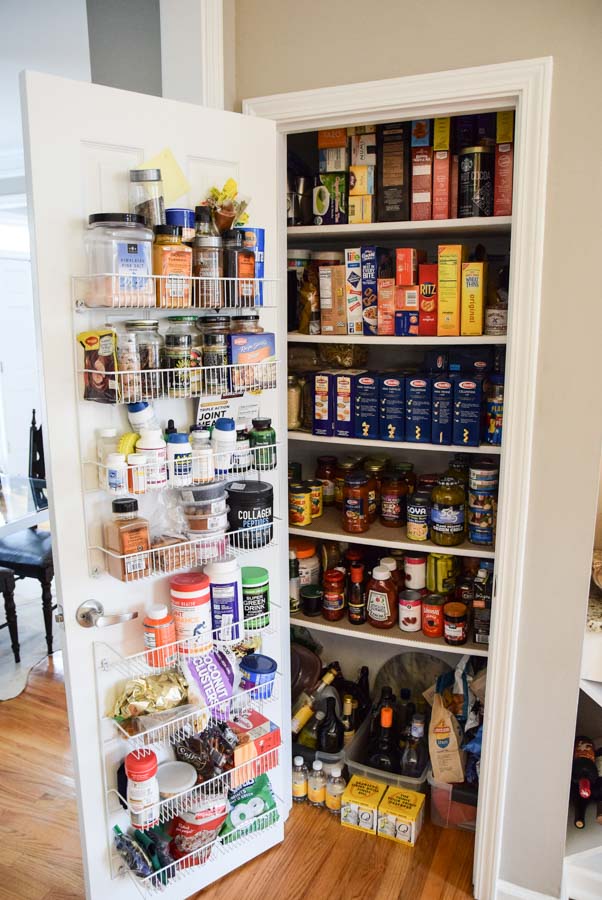
For example, I organized both my laundry room and pantry as stepping stones before beginning this project.
Face the Dragon
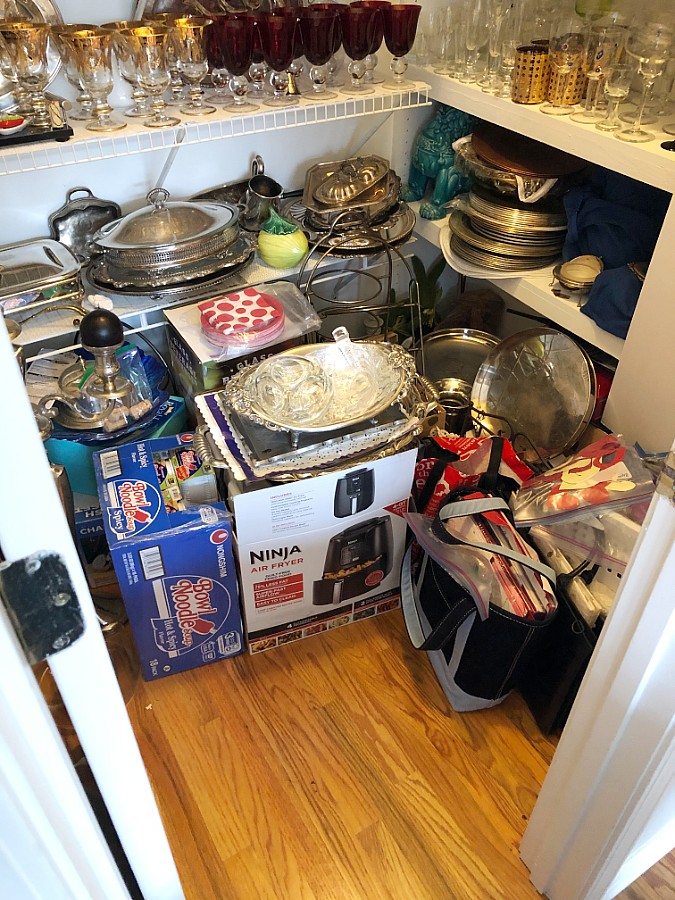
The project I am currently intimidated by is my silver closet. This isn’t just a silver closet, this is a closet that catches all of my things that I don’t know where to put.
Things that I use on rare occasions for entertaining. Things like a giant punch bowl, a crock-pot, a large beverage decanter, and a large container of spicy ramen that my husband wanted to have.
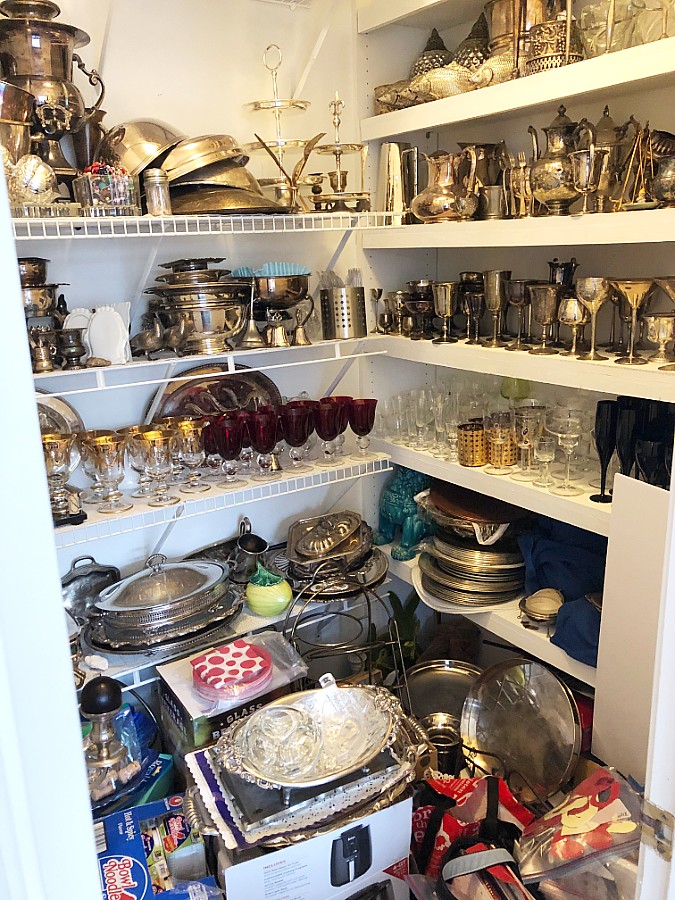
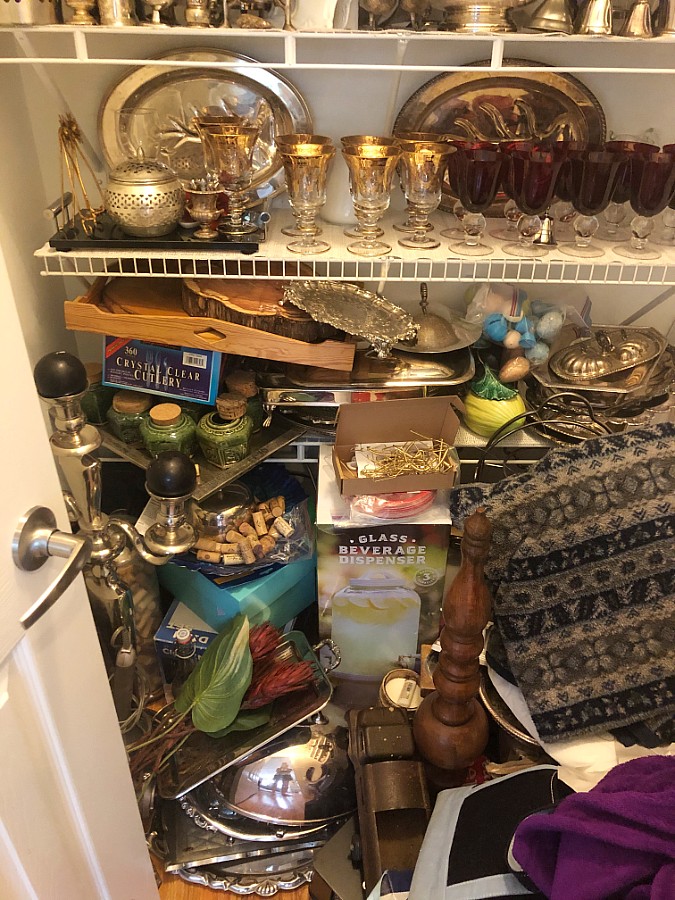
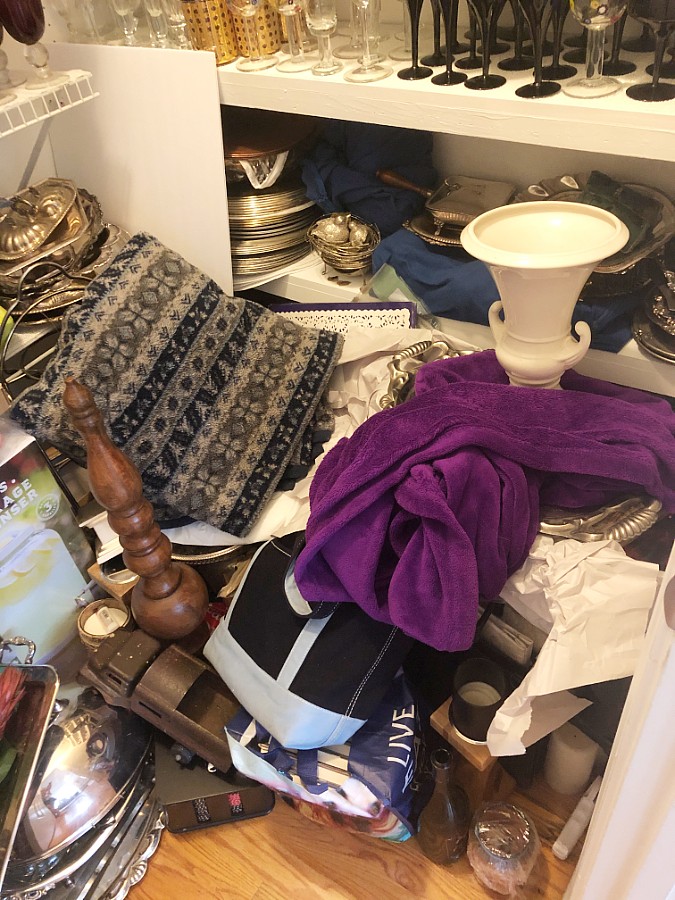
So basically things that don’t necessarily go together, or are otherwise too large to store in my cabinets, or I only used on rare occasions.
Assess the Space
For me, after getting over the initial overwhelming feeling, I had to assess the space that I was working with and how I wanted to organize it.
How to Organize the Space
There are many ways to organize a space, sometimes you want to arrange things categorically. Sometimes you want to put things in an ease-of-use method, breakable things up high or small appliances together.
Having a closet or butler’s pantry to store all of these things can be a dream, but if your house didn’t come with one, you can turn a closet or cabinet area in to this kind of resourceful space.
I have seen some pictures of beautiful walk-in pantries where people have Instant Pots and crock pots that are organized according to size.
They have rice cookers and fondue sets and amazing things for entertaining, all logically organized.
In my case, I have acquired a large silver collection, which I love, but it is in complete disarray.
It also contains many items that I do not use on a regular basis, and that require polishing, if I do want to use them. So this room is far from what I would call a practical space.
Determining how I want to organize the space is the first thing that I need figure out.
One thing I know is that I definitely want to keep all of my glassware together as well as keep things that are similar to each other near one another.
Now to organize!
Using Wall Space
Another thing I’ve seen on Pinterest is people hanging things on the wall.
For example, I have some beautiful silver lids and trays that I think would be lovely to hang on the wall.
I’ve been weighing some ideas with how to do that.
I ended up ordering some 12” size plate hangers that I’m going to use.
If they don’t work because the items are too heavy, I will try to hang them with ribbons.
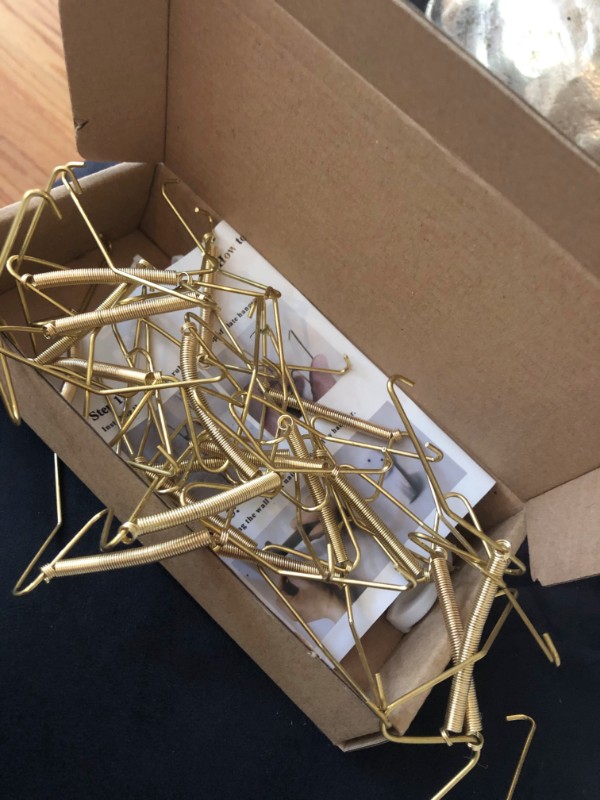
After hanging them, I will be able to see what I have and enjoy them at the same time.
It will also alleviate these things from taking up additional space on my shelf as they presently are.
Shelving
Determining the best layout within the space you have and making sure that the shelves are strong enough to hold the weight of the items that will be sitting on them would be the next step.
Some of the existing shelves that I have are wire closet shelves. They won’t hold wine glasses and other things without them potentially tipping over.
These are considerations. Some of the shelves I have are wood boards and are a better suited surface for smaller or fragile items.
Implementing the Look and Functionality of the Space
Once you have determined how you want to organize the space, implementing the look and functionality of the space is next.
In my case, I have a top shelf that’s taller so I’m using that to put things that do not fit on the shorter spaces and/or are rarely used. Things like tall vases and candle holders.
I like to separate my glassware from my serving dishes, serving pieces and trays. I also have things that are kept inside of silver bags like a bunch of silver cocktail plates, LOL!
I also have a number of silver chargers and trays, so determining the logical placement of each of my items is certainly a consideration.
I am still overwhelmed by this project, but guess what? I’m going to play the 2 minute rule and tackle this task!
So Where to Begin?
Should I pull everything out of this room and start fresh or should I try to do one shelf at a time? Should I begin by pulling everything out that’s on the floor and start there, so that I have a place to walk, and then do one shelf at a time?
I don’t know, I don’t know, I don’t know! I’m going to look at it again. I’m simply going to stand there and look and see if anything comes to me as far as logically organizing it, as I am overwhelmed.
After contemplating this, I chose to clear the floor first so I could at least walk in the room and begin reaching things on the shelves.
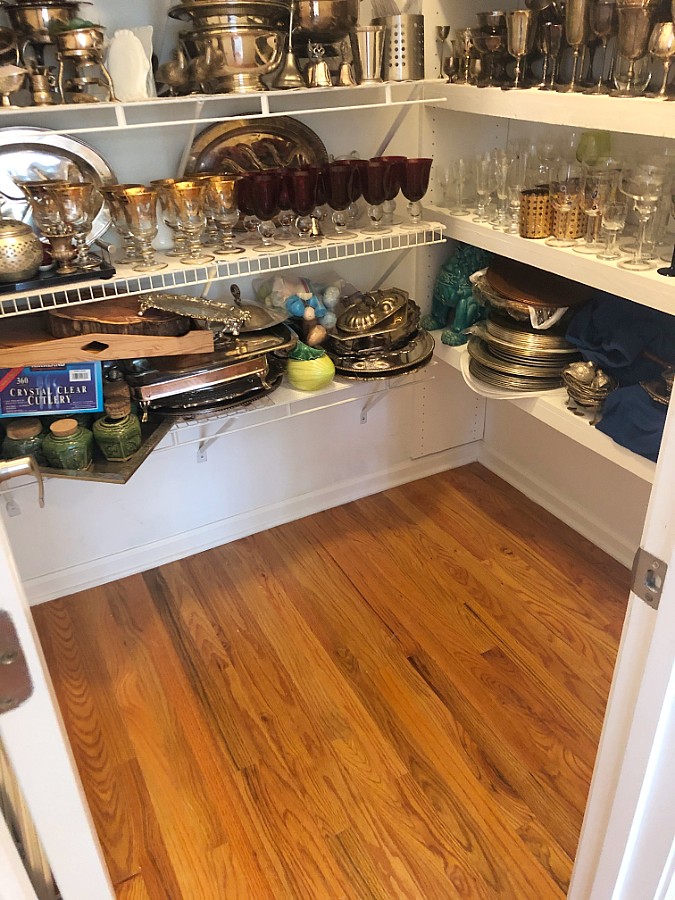
Determining Your Objective
After looking at this space, I realized the important thing to me was that I really want to use this stuff. I love this stuff. This stuff makes me happy.
I want to be able to access this stuff and know what I have to work with. If I can see these items and they are organized, this will be much more likely to happen.
I’m not planning on polishing all of my silver ahead of time only to have it sit in there and get tarnished. If I tried to do this during the organizing of this room it would likely take me an extra week.
I’ve decided to organize first and polish as needed. If I’m planning on using a particular piece I will plan ahead and polish it then.
Another Concern
Another concern is where to put all of this stuff while I am in the process of organizing it. If I put it all in my living room, I am going to have to walk around it until the job is done or I may have to get it all done in a more timely fashion.
So determining the length of this project could be a factor. I know that if I want to do this job well I will need to empty the space.
My thoughts are that I still want to be able to walk and live in my house, so I’m planning to only take on one section at a time.
I’ve decided I will pull everything out that’s on the floor so that I have walk space. Then I will proceed from the top shelves and work my way down.
I know that I want to have my glassware together. I know that I want to have my serving pieces together. And I will determine the rest as I go.
Unexpected Happenings
Well, just when I was about to take on this project, Covid-19 occurred and my son and his family decided they would move in with us along with two more kids coming home from college. This also included a two-year-old grandson.
That means this project was delayed. I couldn’t really pull all of these things out and have them be in my living space while I had several additional people in my home.
This also meant I added extra items in here as a way to remove them before the 2 year old got into them. Translate- a bigger mess!
Sometimes when we’re delayed by a project it just means we need to reevaluate our priorities. In my case, spending more time with my family and making sure we all remained healthy.
Tackling the Project
The first thing I did was to make sure that I had at least a three-day window where I knew I could leave everything laying around.
The next thing I did was to empty everything off of the floor and haul it out into my living room. As I was doing this, I decided I wanted to do a major purge.
I needed to determine what I really wanted to keep, what I loved, and to get rid of anything else. I want to live lighter and I want to decrease my stuff by about 25%.
As I was pulling things out of the closet, I started separating the items I was no longer going to keep by placing them on my kitchen table and counter. I planned to see if my kids wanted anything before I got rid of it.
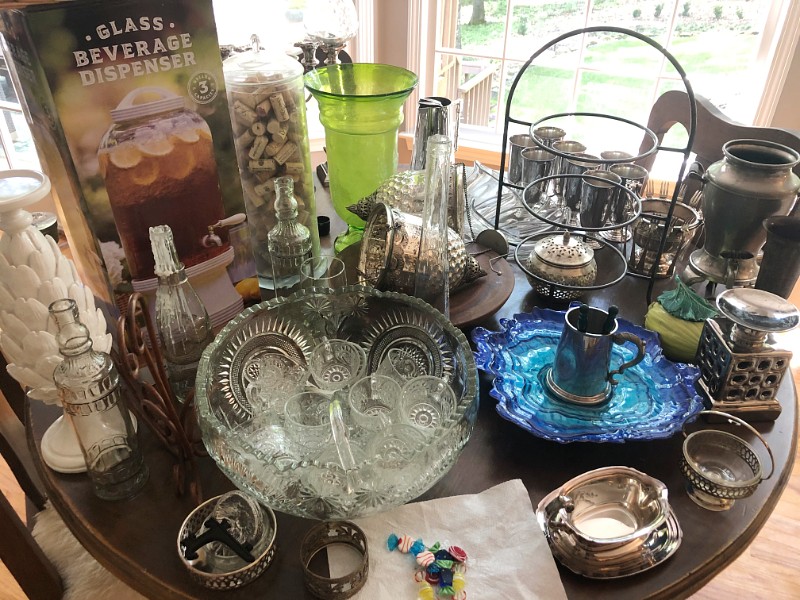
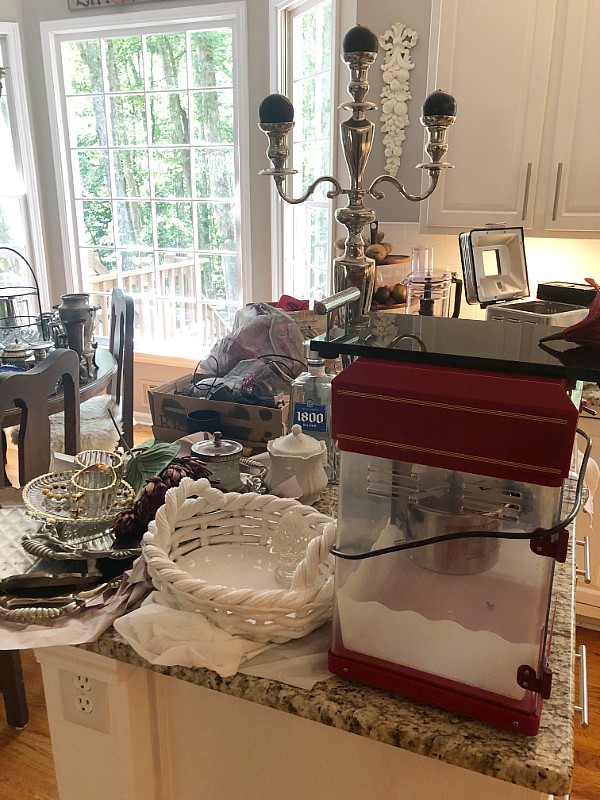
I will likely look some of these things up later and see if they are worth listing on eBay or to just list on the local virtual garage sale site. But one thing is for sure is that they are not going back in the closet!
Different Shelving
Looking at my wire style shelves that were to the left of the wood shelves, I noticed they were not perfectly lined up with each other.
I asked my husband about changing the shelves from wire to wood because that would actually look the nicest.
We brainstormed about it for a little while. Considering whether we could put up more pegboard and how we could reinforce it if it went up against the existing shelves.
We were not sure the edge that went up next to the existing shelves could support heavy items without bowing.
We considered reinforcing it by adding an additional board behind it. If it were right next to the existing shelves would they still be able to be adjusted to different heights in the future.
At the end of the day we decided we would just go ahead and keep the wire shelving. We would adjust some of the wood shelves to line up better with the existing wire shelving.
We chose to add additional little boards to the facings of the wire shelves to give it a faux wood look to match the other shelves.
Giving Wire Shelves a Faux Wood Look
After determining we were going to add wood to the front facing of the wire shelves, we needed to match the wood to the best of our ability for size and shape.
The shape of the ones on the wooden side were sharp edged. Some of the pre-primed wood that you can buy comes with a rounded edge.
At least the ones that matched closer in size. We chose to use a squared edge pre-primed board that is about a quarter inch larger than the other boards, but not noticeably different to the naked eye.
My husband drilled through these pieces of wood, went through the little opening of the wire shelf, and used a large washer and a bolt in order to keep them in position.
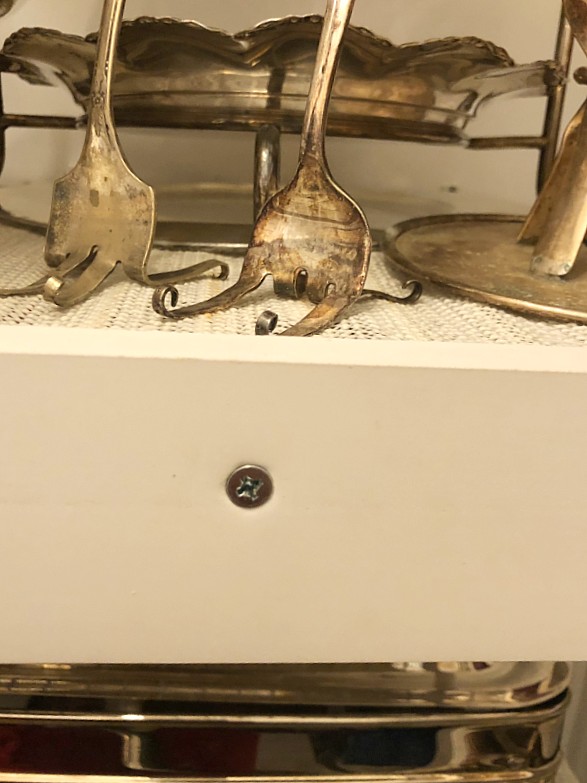
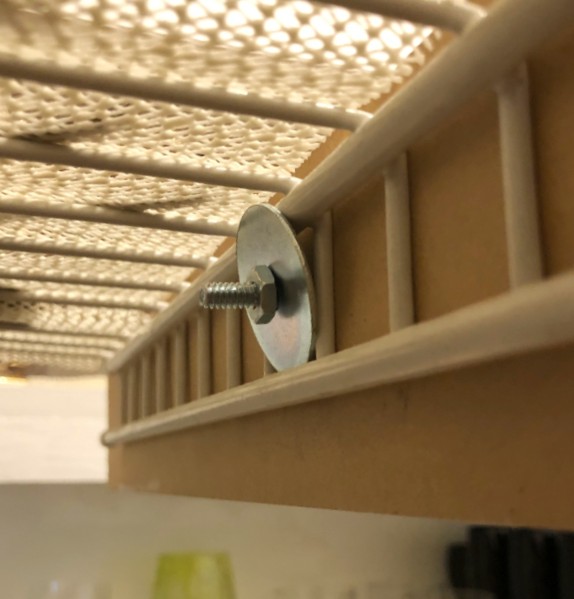
As you can see the completed look, after touching up the paint, makes them appear more polished and refined for this room.
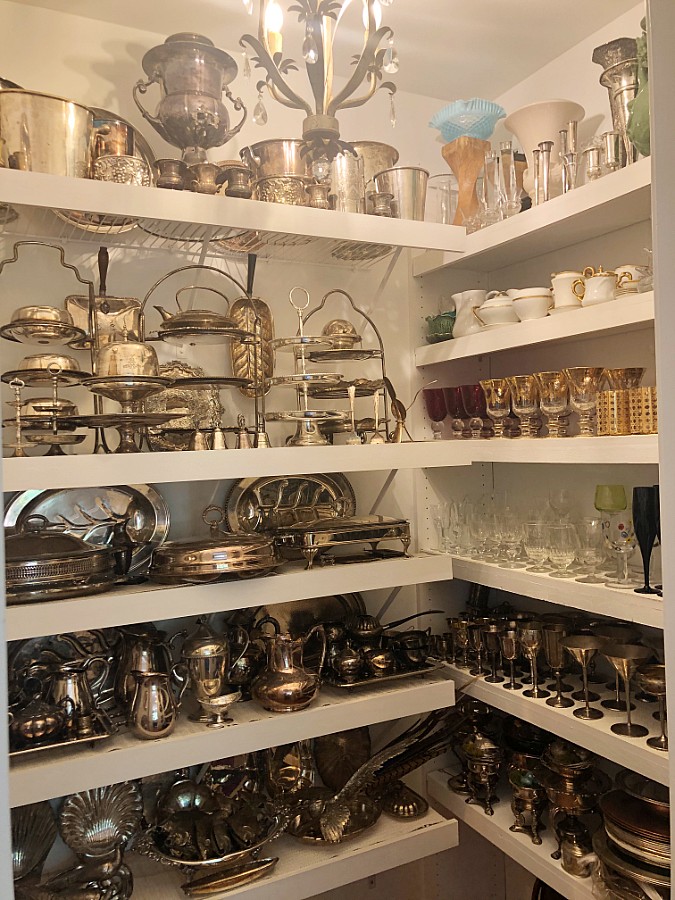
Placement of Items
One of the things that I did to determine how I wanted to lay out my shelves, was basically assessing what I currently had, and estimating the space it would require.
For Example: Knowing that instead of two shelves for glassware that I wanted to have three.
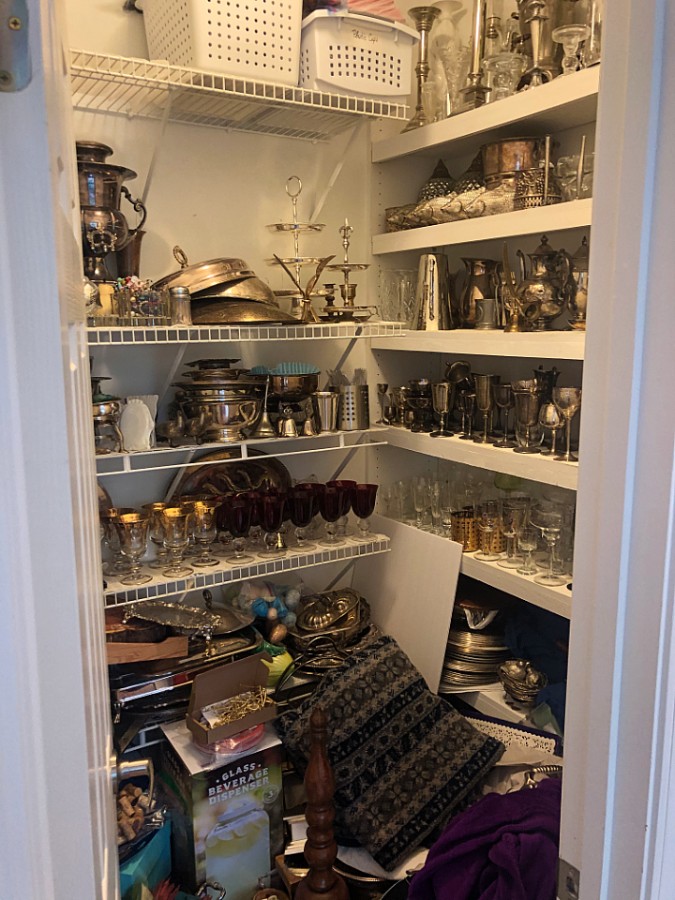
I went ahead and used Post-it notes and wrote on them what my plans were for each shelf and placed it on the shelf. This way I could move a Post-it note around instead of all the items if I had everything already sitting on the shelf.
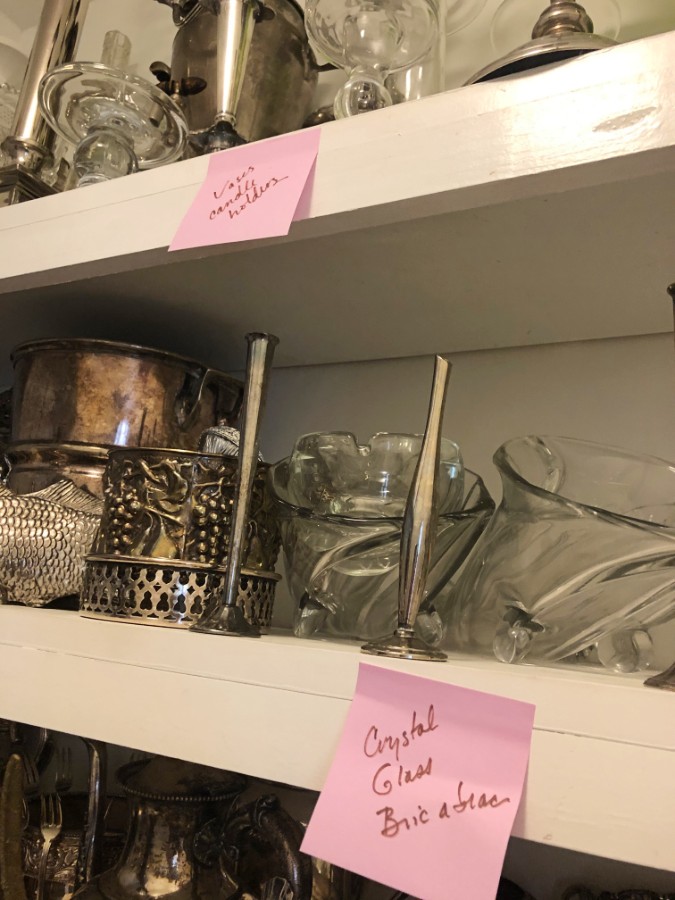
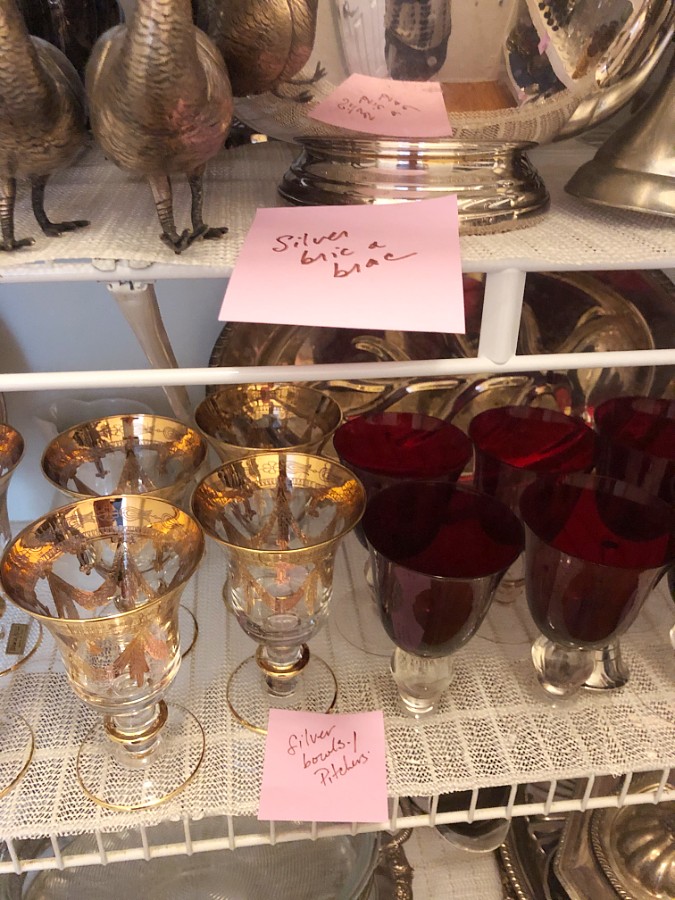
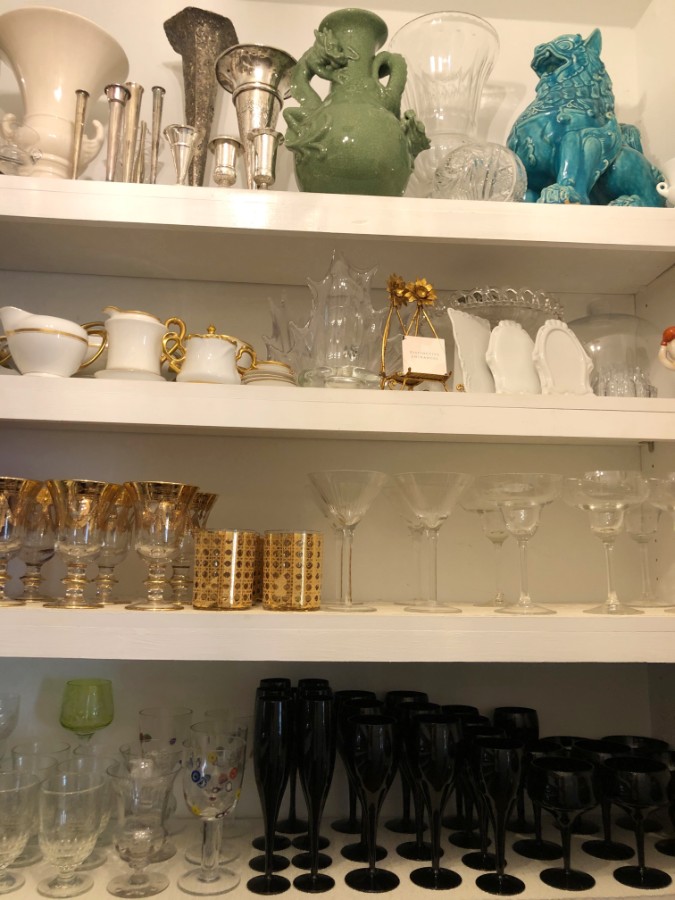
My top shelf I labeled ‘Vases and Candle Holders.’ My next shelf I labeled ‘Crystal /Glass Bric a Brac’ which I ended up using for tea sets and crystal serve ware.
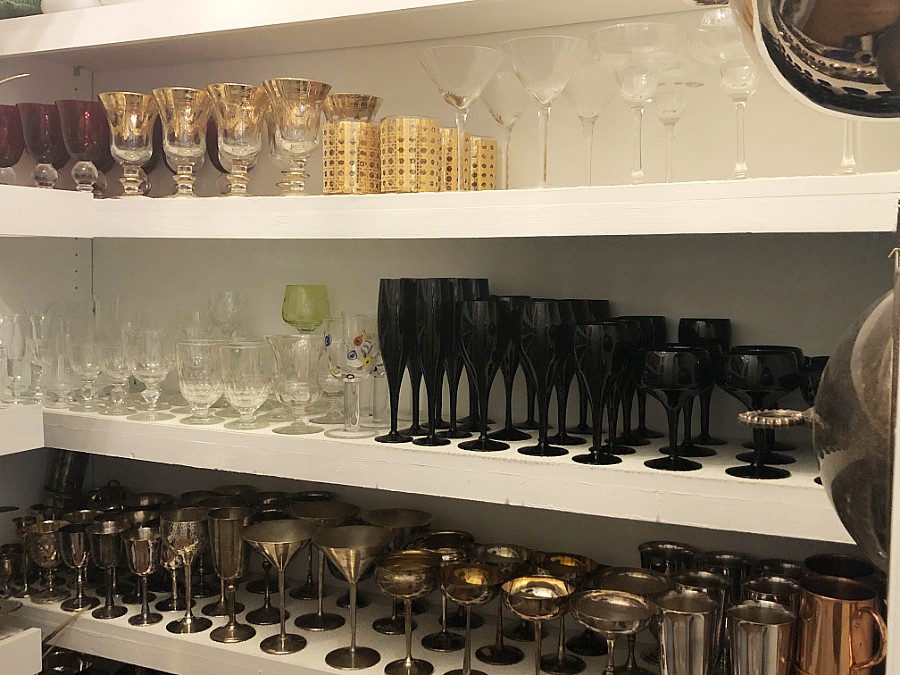
I then labeled the next three shelves for Glassware. I wanted to do colored glassware and have it flow into clear glasses. I also wanted the glassware arranged with the heights and logical placement in mind.
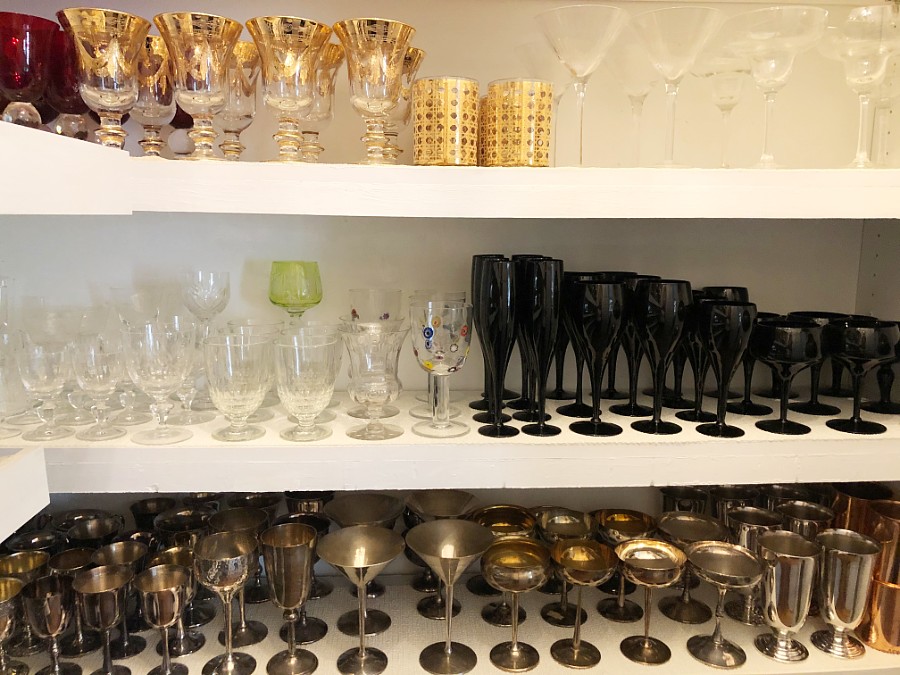
I wanted to have all of my silver glassware on one shelf instead of intermingled with other glasses.
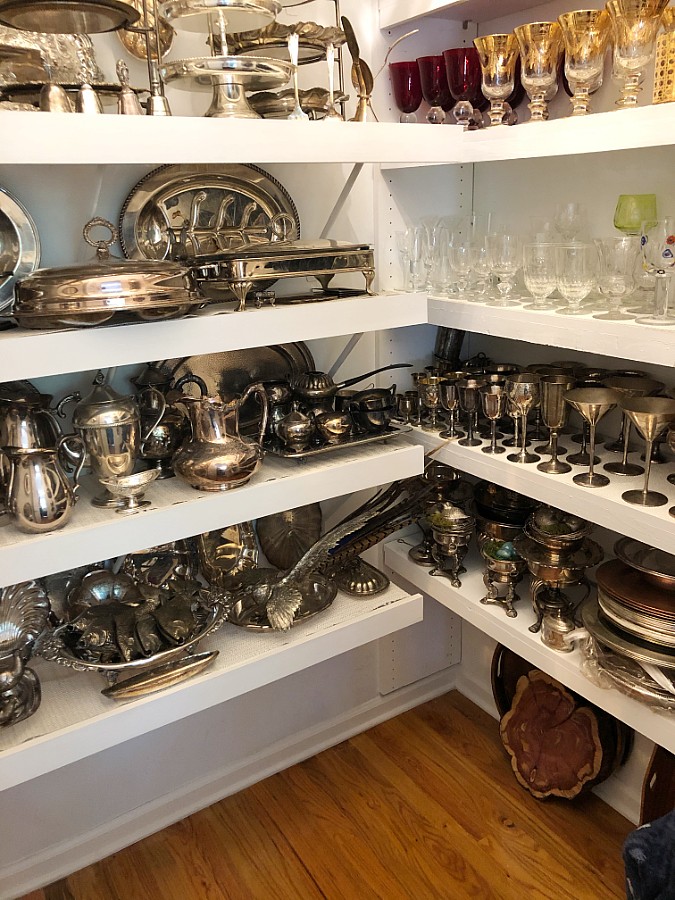
On the bottom wooden shelf I wanted all of my silver chargers and my bags of silver plates and some additional silver serve ware.
On the Wired Side
On the wire shelving, I decided to remove all of my party wear, plastic cups and taper candle bins and move them into my laundry room instead. I had to find some additional boxes that were similar-sized to my laundry room to make this work.
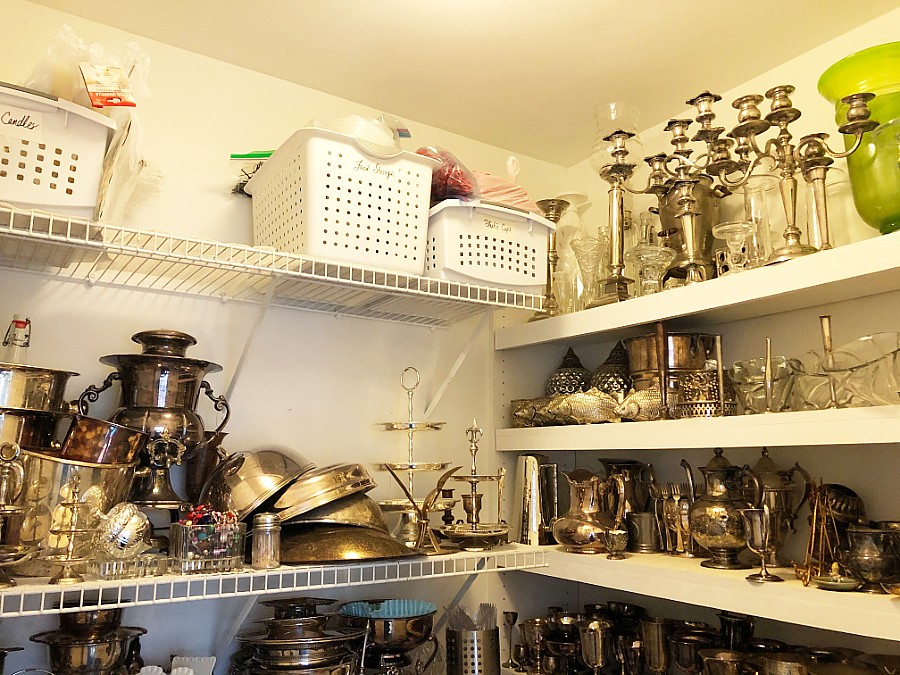
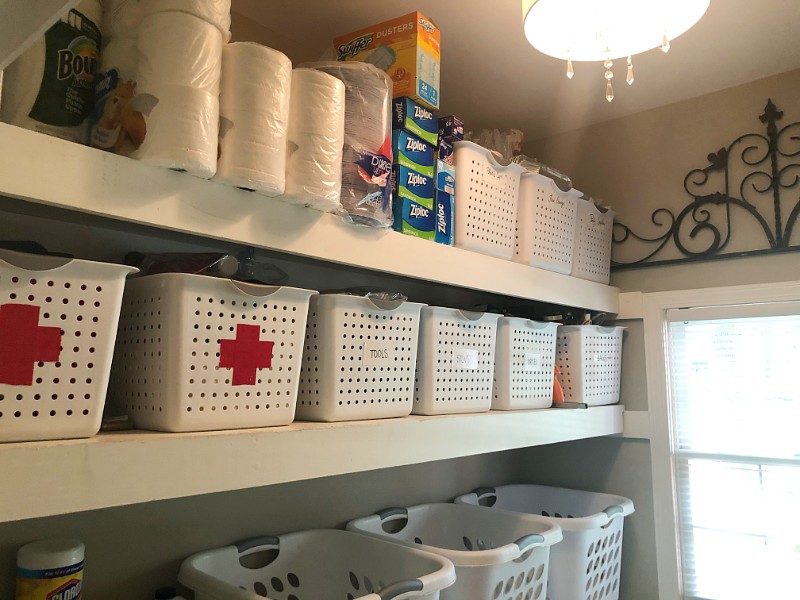
I never had liked them being in this silver closet anyway, so that was an easy fix.
In the process of moving the things out that I didn’t want in here, I decided to get rid of my crockpot, punch bowl, and beverage server and only keep one chafing dish. These items, along with my hubby’s soup were all exiting this room permanently.
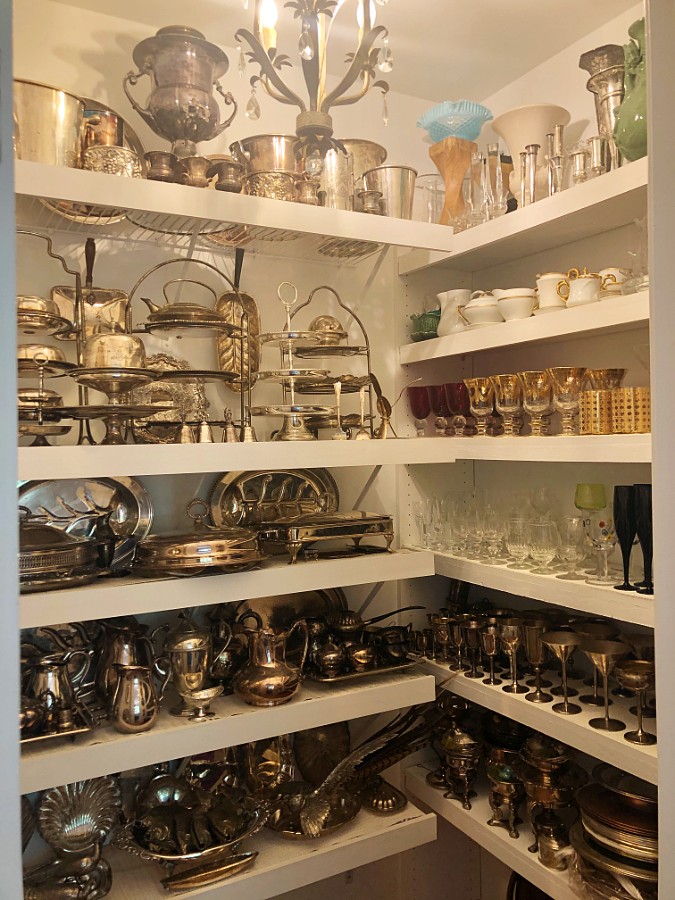
This opened up my top shelf to be able to display more things. Yay!
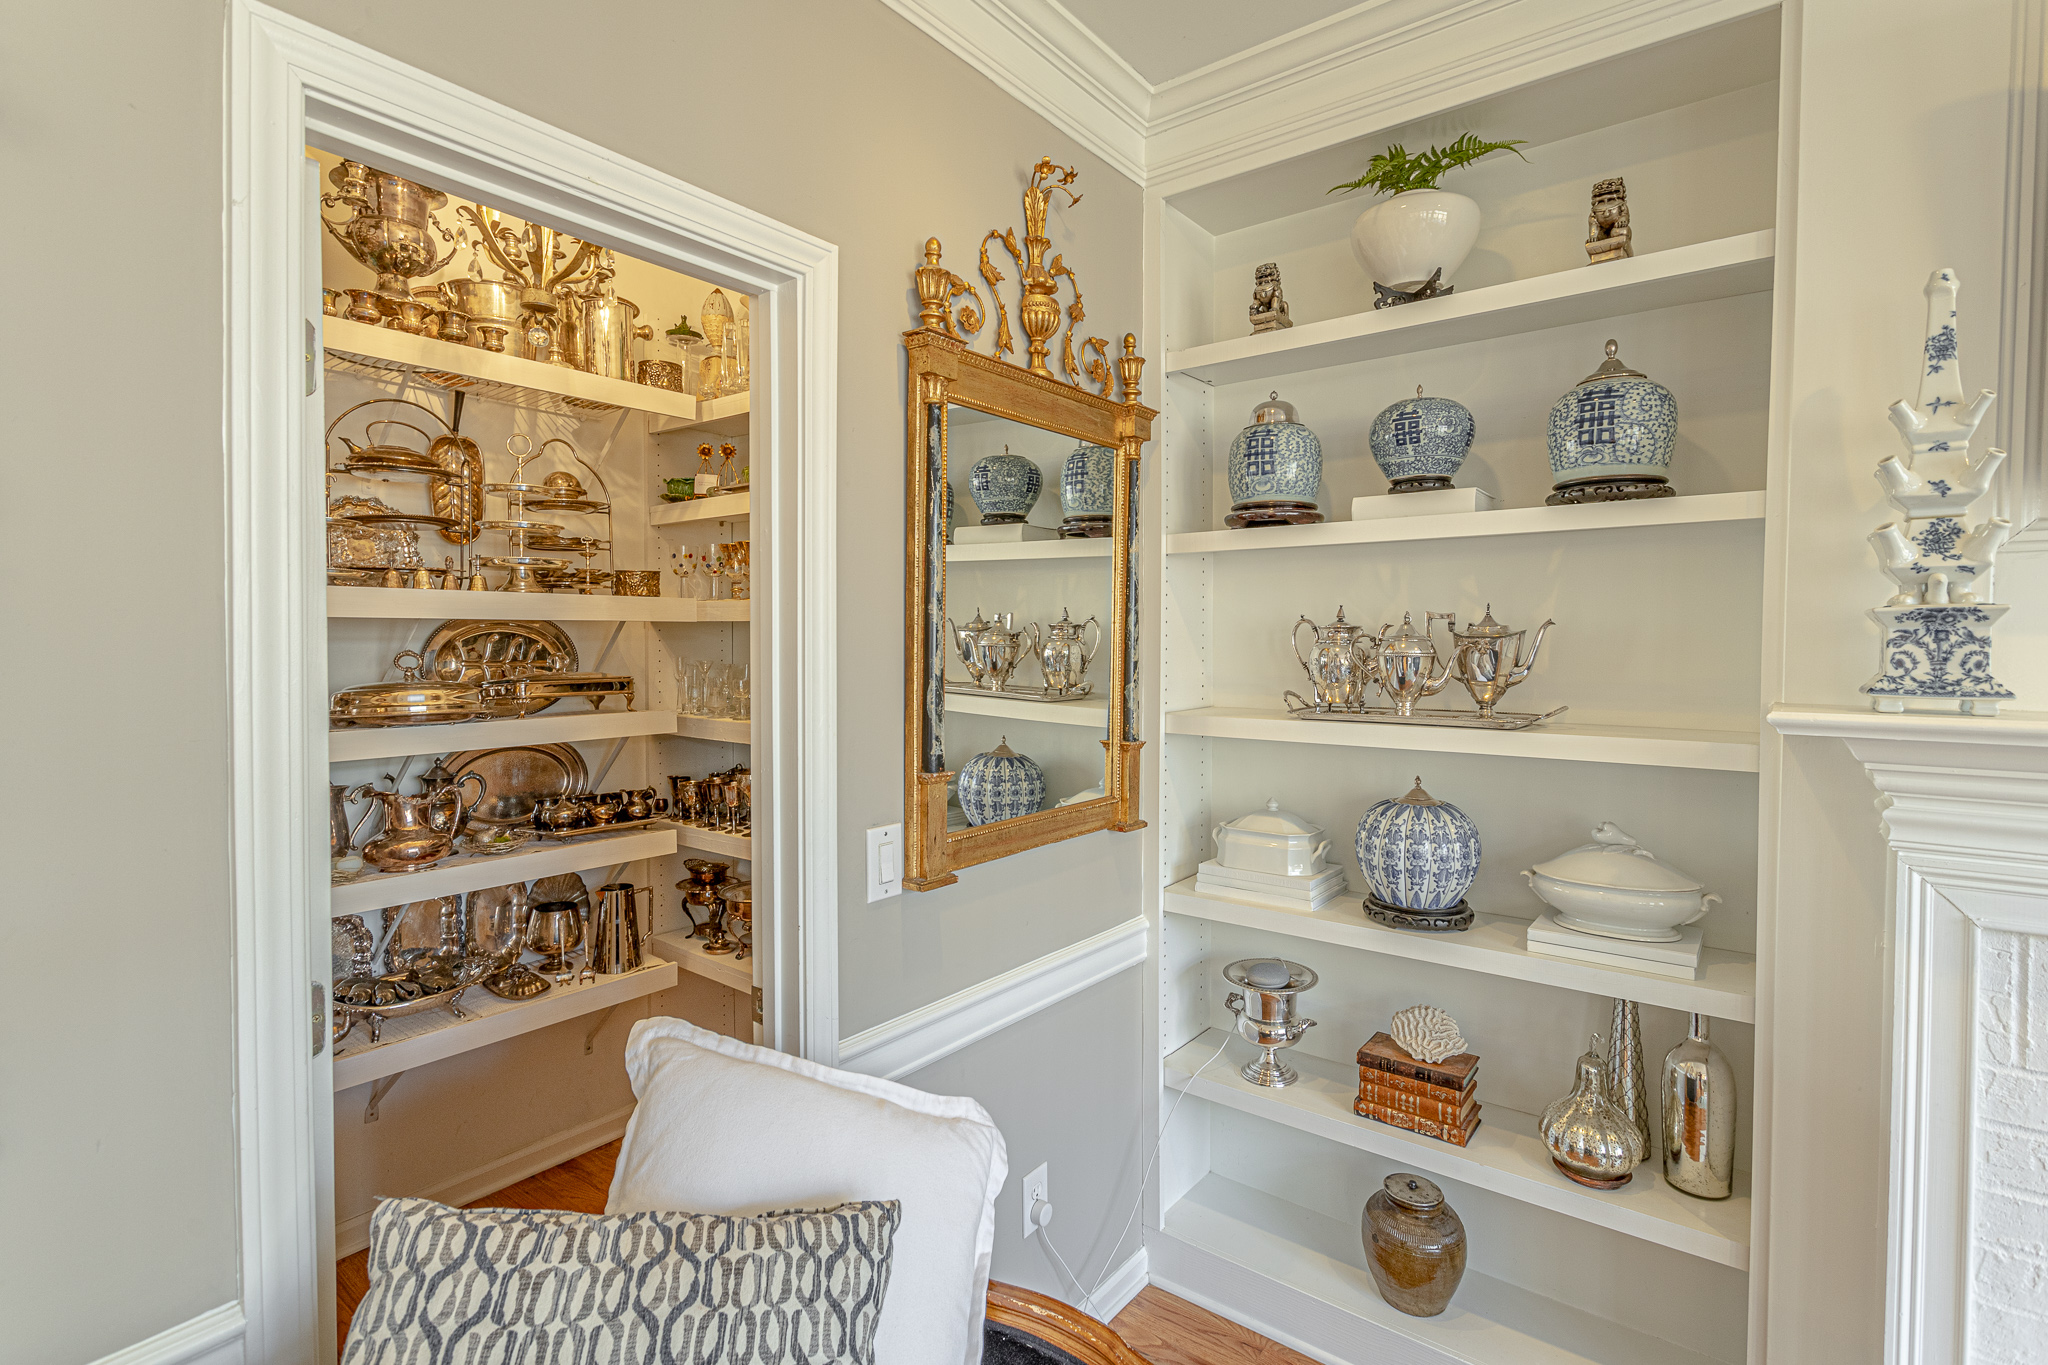
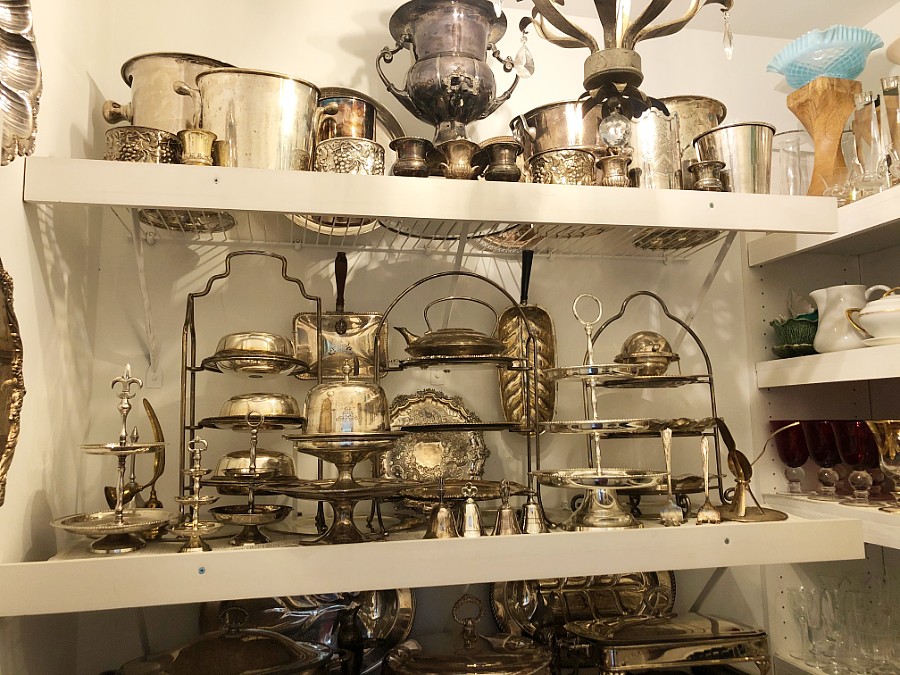
I chose to display a silver coffee server and all of my silver urns and ice buckets. In addition, I put some little silver urns and some silver wine bottle holders as I liked them grouped together.
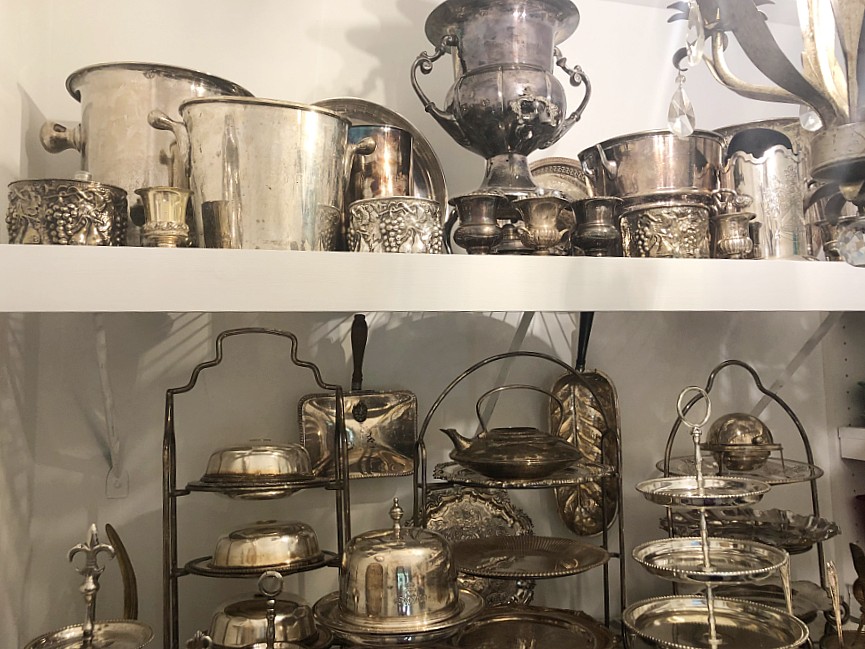
On the next shelf, I decided to put tiered trays. I also have some plate holders and some silver plates, so I went ahead and set them up to look like silver tiered trays too.
In the back I hung a couple of serve ware pieces with handles. Because I have so many little silver things, I had to stack some of the additional silver pieces on those silver plate holders. I added some plate warmer covers too, since they looked fun for me.
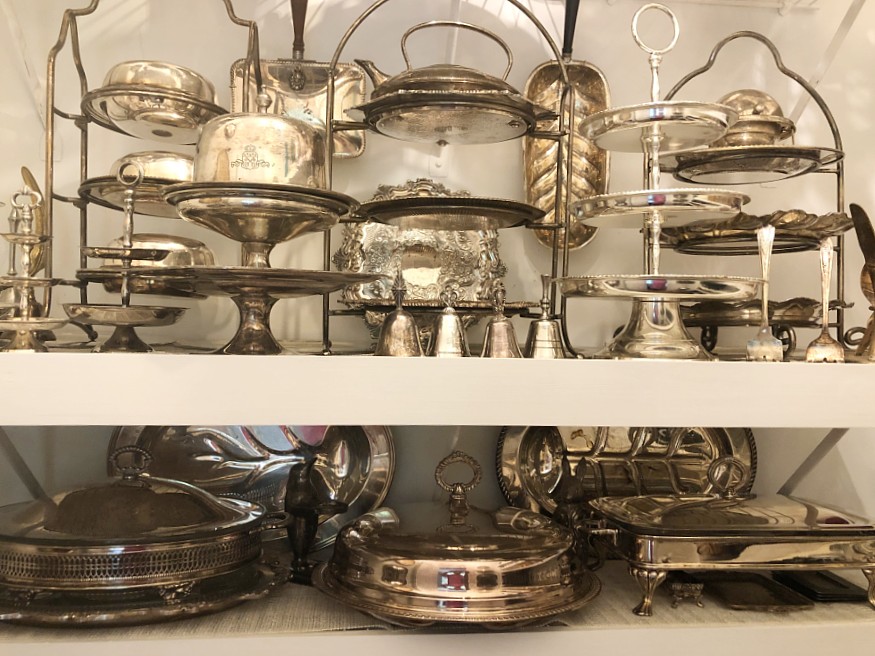
On the next shelf I placed covered silver serveware and I leaned a couple of silver meat trays in the back.
I wanted each shelf’s placement to look harmonious and symmetric to some degree.
On the following shelf I decided I would group all of my silver tea sets and silver water pitchers. I also added my cream and sugar containers too.
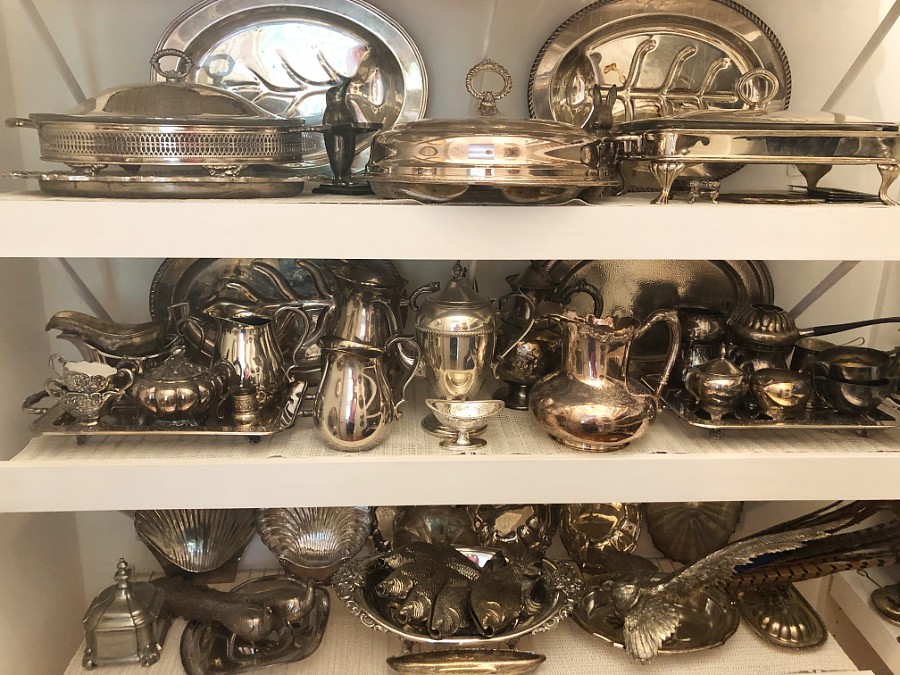
On my final shelf, I lined up all of the remaining small dishes and trays along the back side. I also wanted to make these odds and ends somewhat symmetrical.
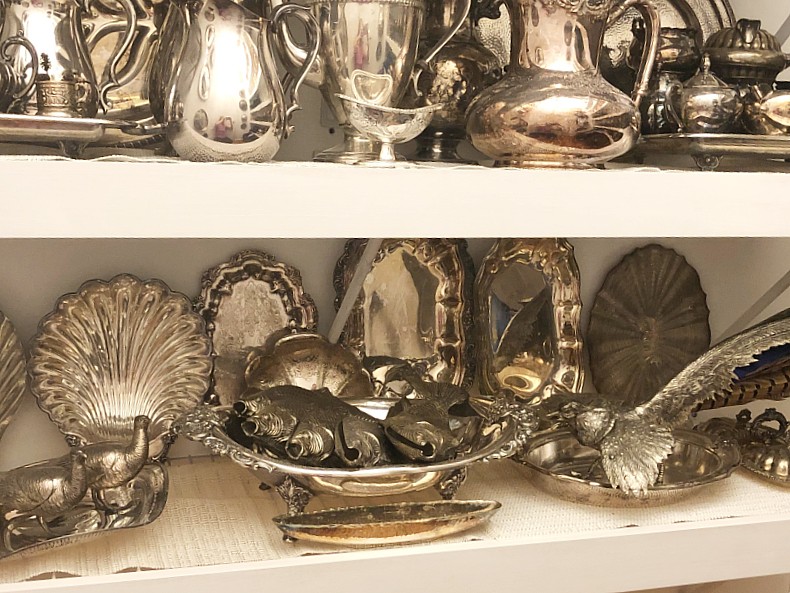
The bottom shelf turned out kind of funny. I have a silver bowl in the center with five fish napkin holders laying down inside of it. It is flanked on each side by birds. On one side I have peacocks and on the other I have a large pheasant.
Wall Space
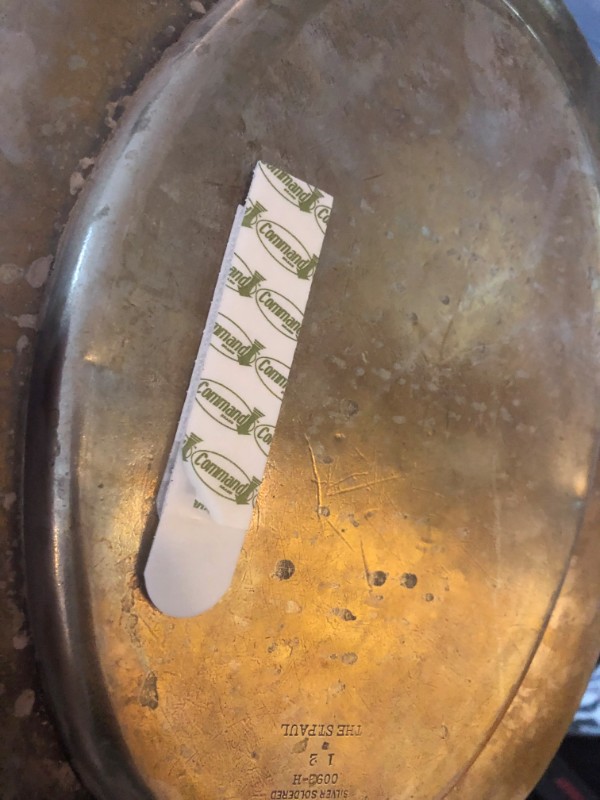
I was so excited to use my 12 inch plate hangers for hanging the lids on one side of the wall and my trays on the other. In addition to the plate hangers, I used some of the 3M Velcro Command Strips on flat pieces.

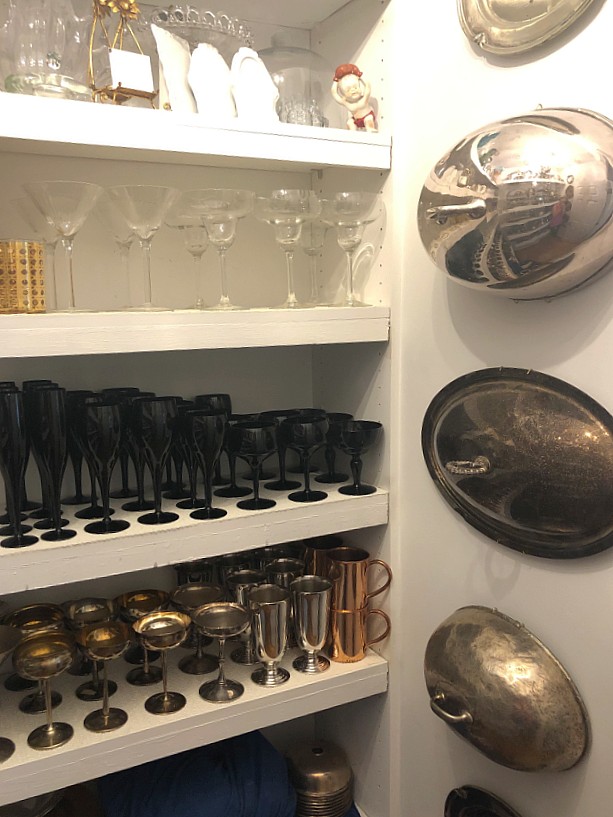
I added a heart over one of the trays and a small dustpan to the bottom.
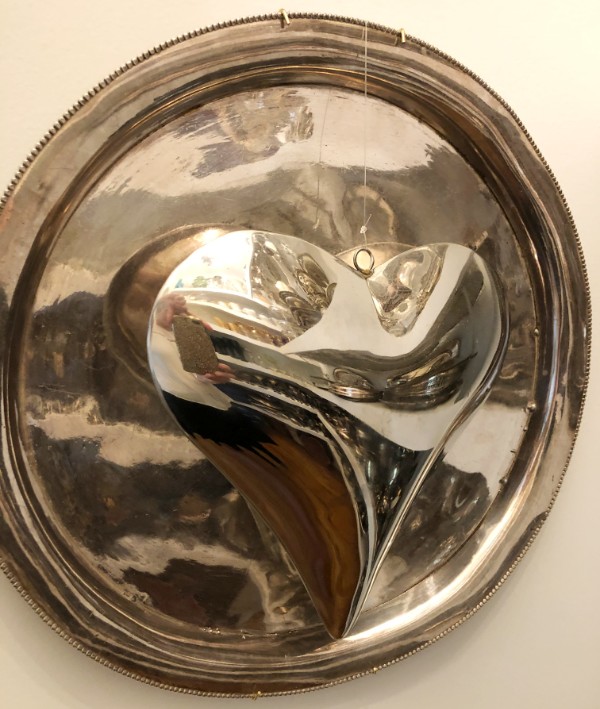
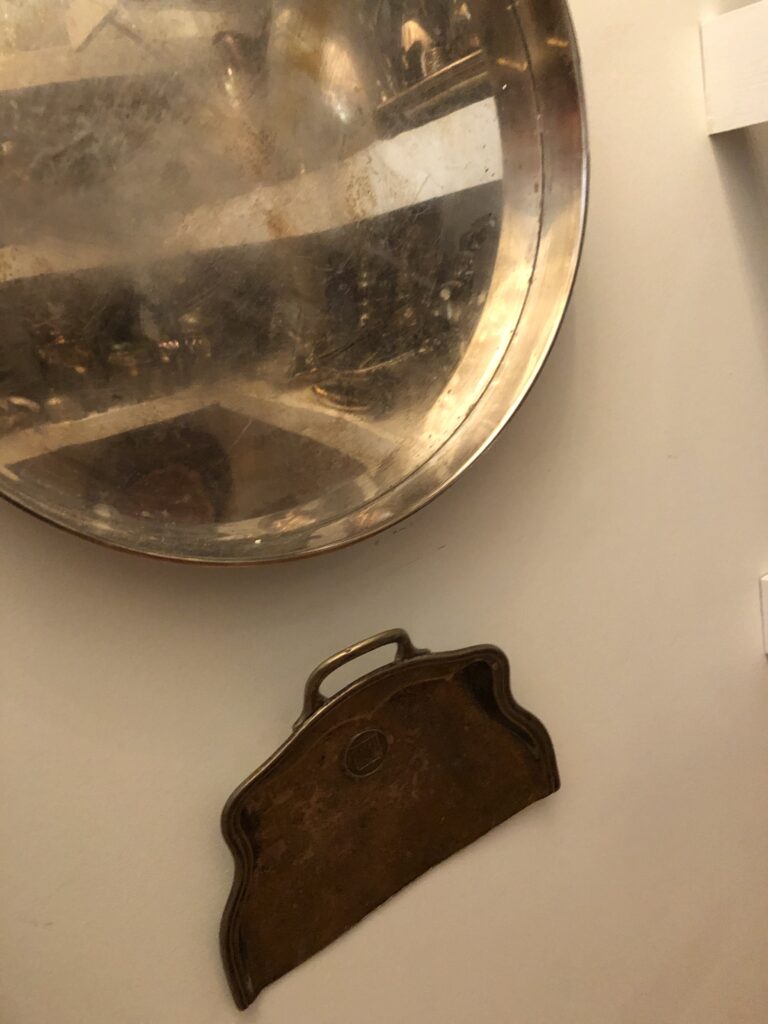
The 12 inch plate holders were completely capable of stretching around all of these large trays; some of these trays being 16 inches wide.

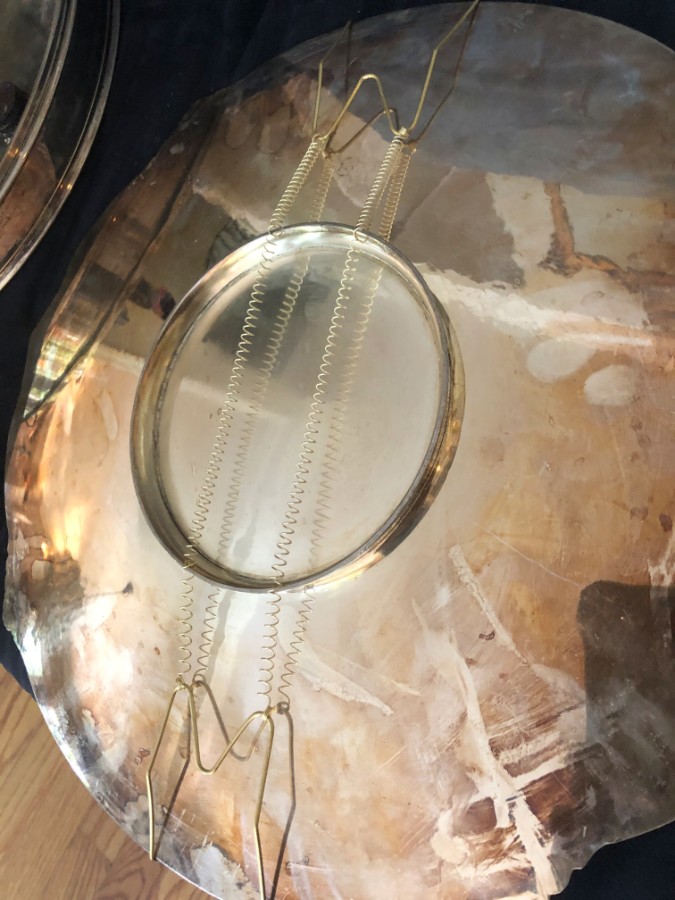
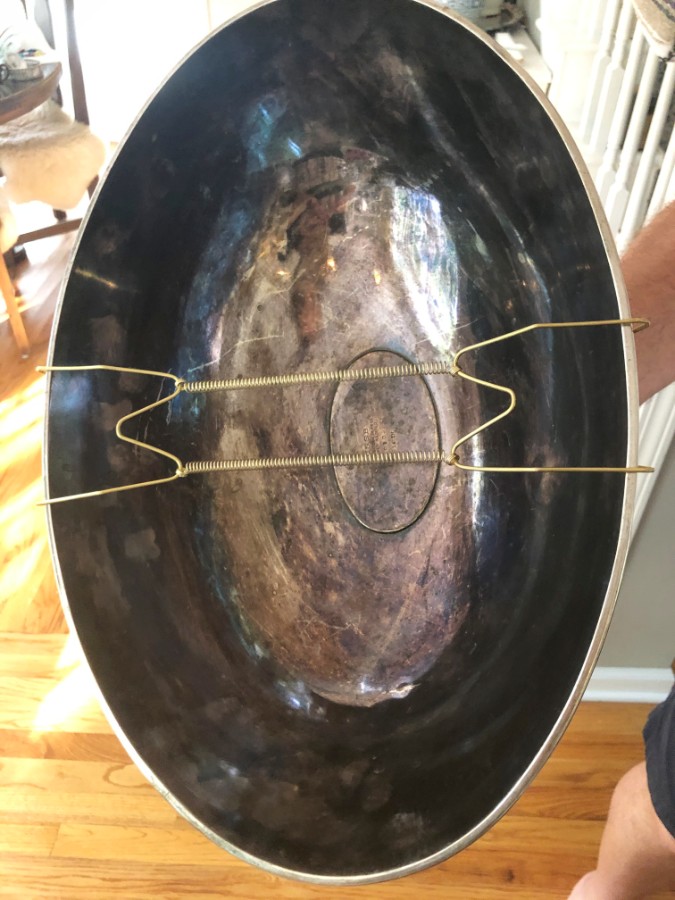
I did make sure to use nice 3 pronged hooks on some of the heavier trays.
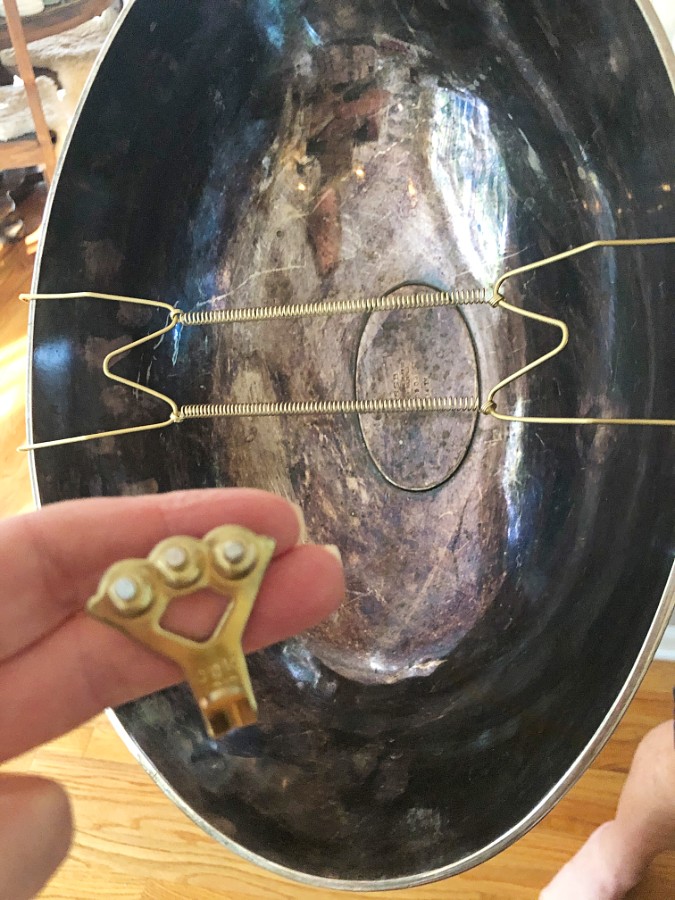
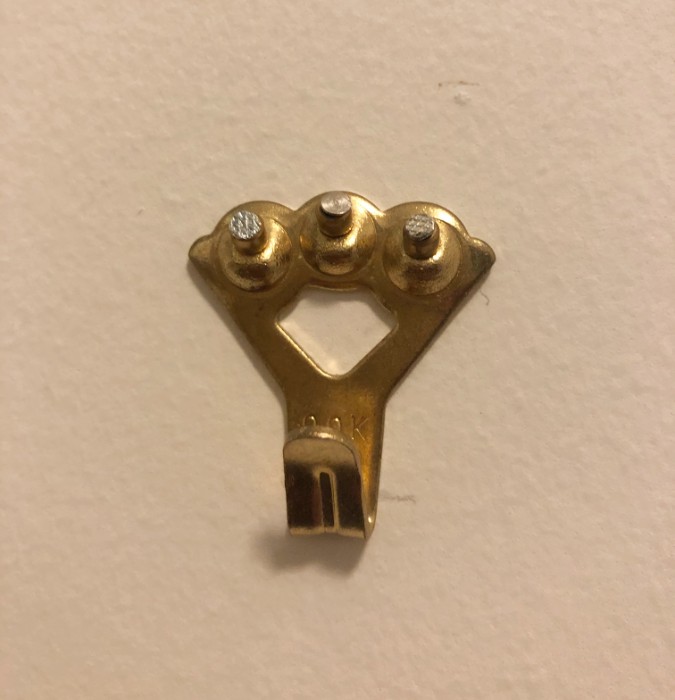
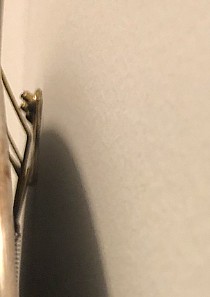
I did not polish them before I put them up, but I think they still look great, even tarnished.
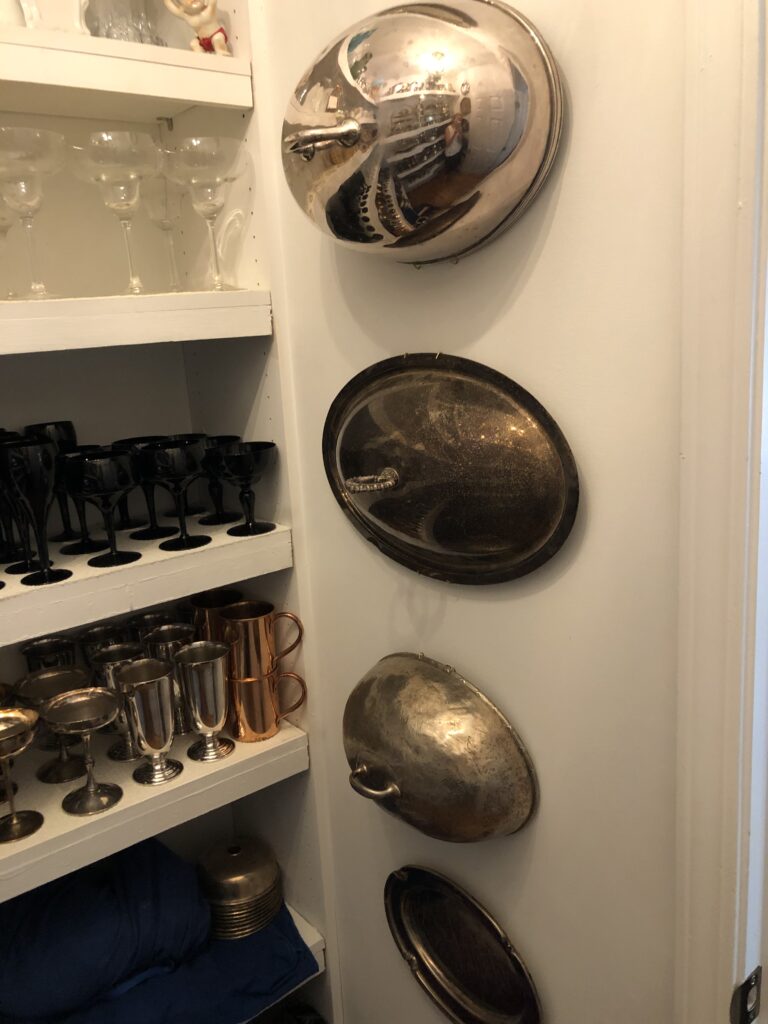

When I open the door, my floor is now clean and open. I love that I can walk into this room and grab any item that I want to use.
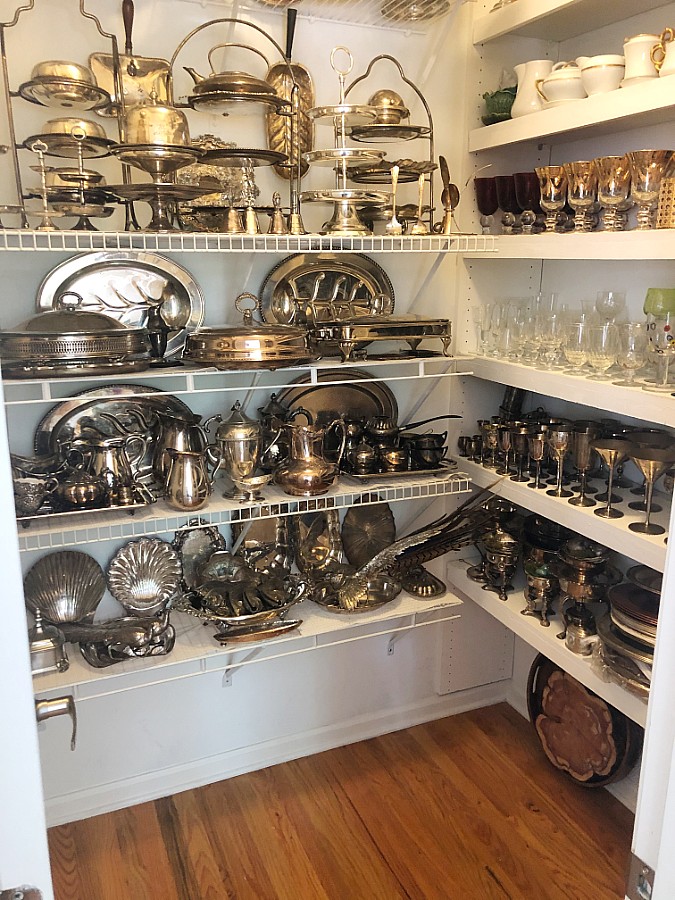
I think that because things are so organized and accessible, I will be much more inclined to use them.
I host many small events in my home and I think it’s extra special when I can serve my guests on beautiful pieces.
Lighting
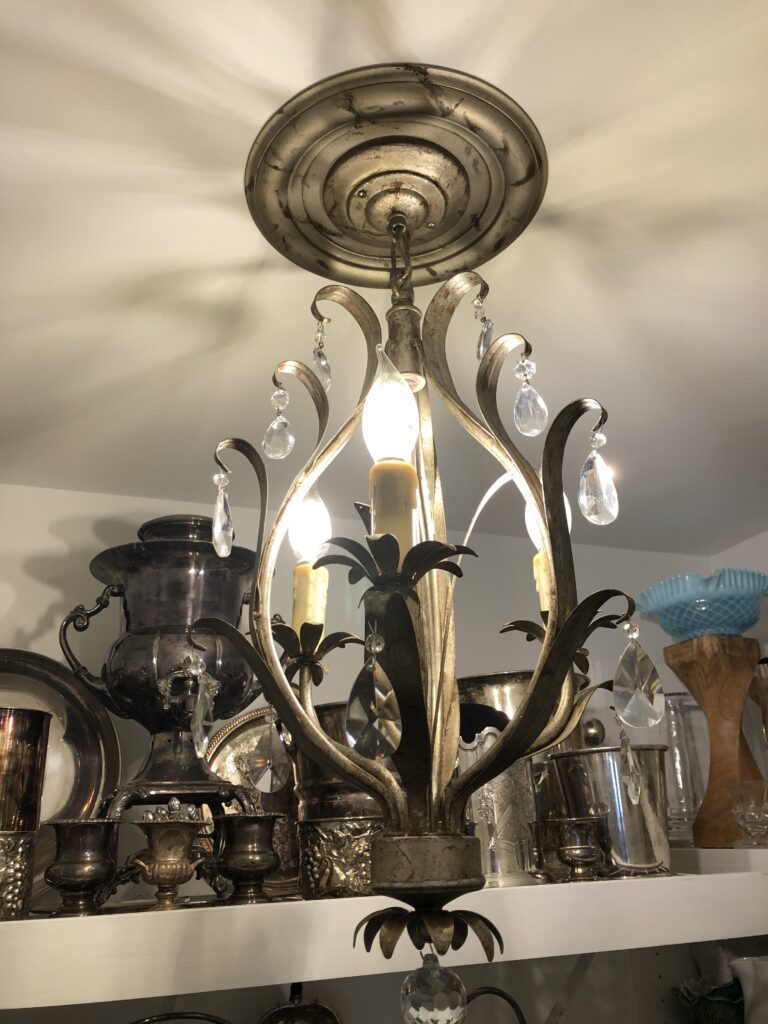
I happen to have come across a chandelier that was for sale on the local virtual garage sale site. It was a leaf style that almost had a tarnished silver look. Great! It matches my tarnished silver!
When we took the ugly light out that was previously there, we discovered a square hole that was cut into the ceiling. The top of this light fixture would not cover that portion.
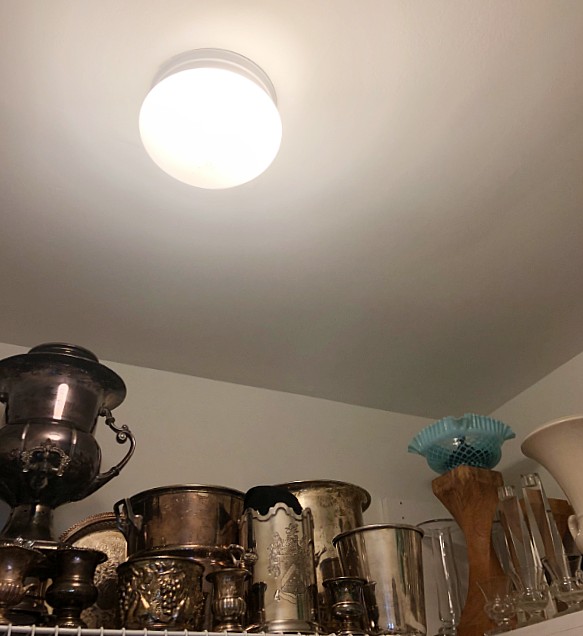
This created a little dilemma of whether to fix the sheetrock or to buy a light cover to go around that area. We chose to buy a cover at the local Lowes.
The cover was white and my hubby decided to paint it to as close of a match as the actual chandelier as he could.
He used several colors of spray paint to match the base color. He then sprayed some on a paper plate and hand-painted some streaks on to match. I think it looks perfect!
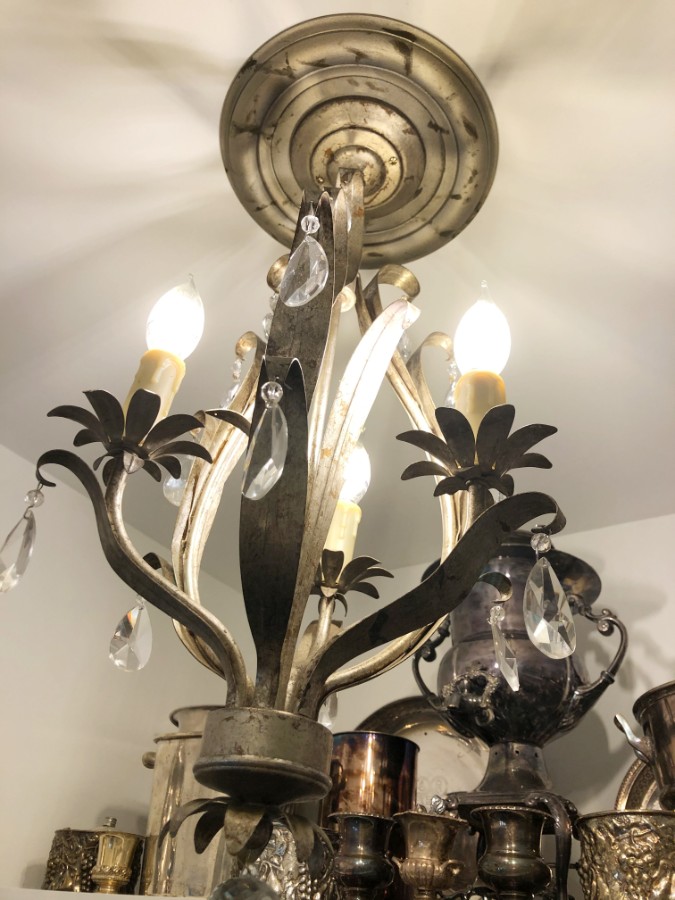
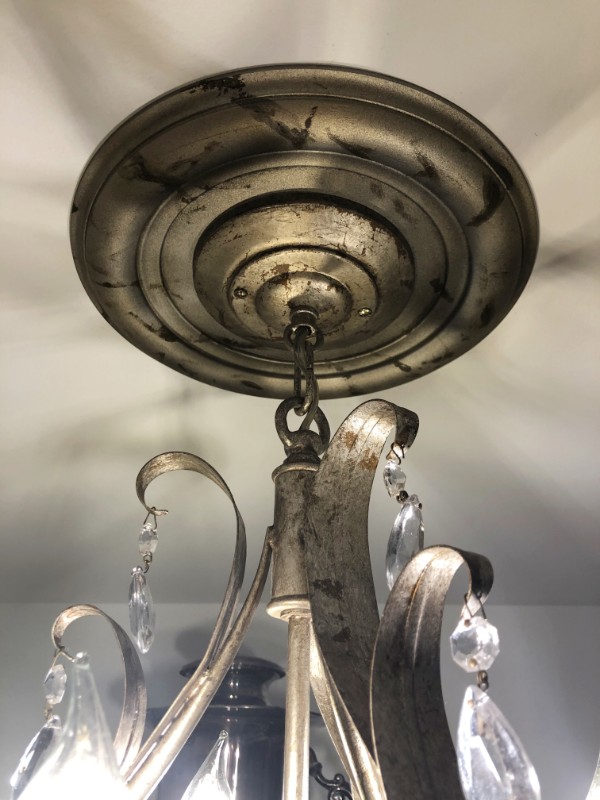
I wanted to use some light bulbs that look like little flames that are made out of silicon, but when I put them up, the room was way too dark.
This made it quite impractical if you’re looking for a specific piece. So we changed the light bulbs to a much more appropriate style.
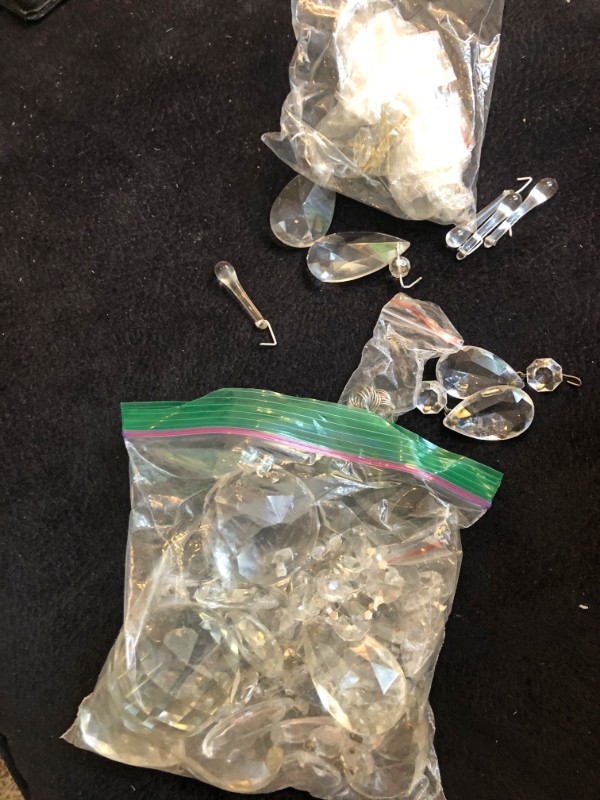
For extra beautification, I added some additional crystal chandelier pieces, as many were missing when we picked it up.

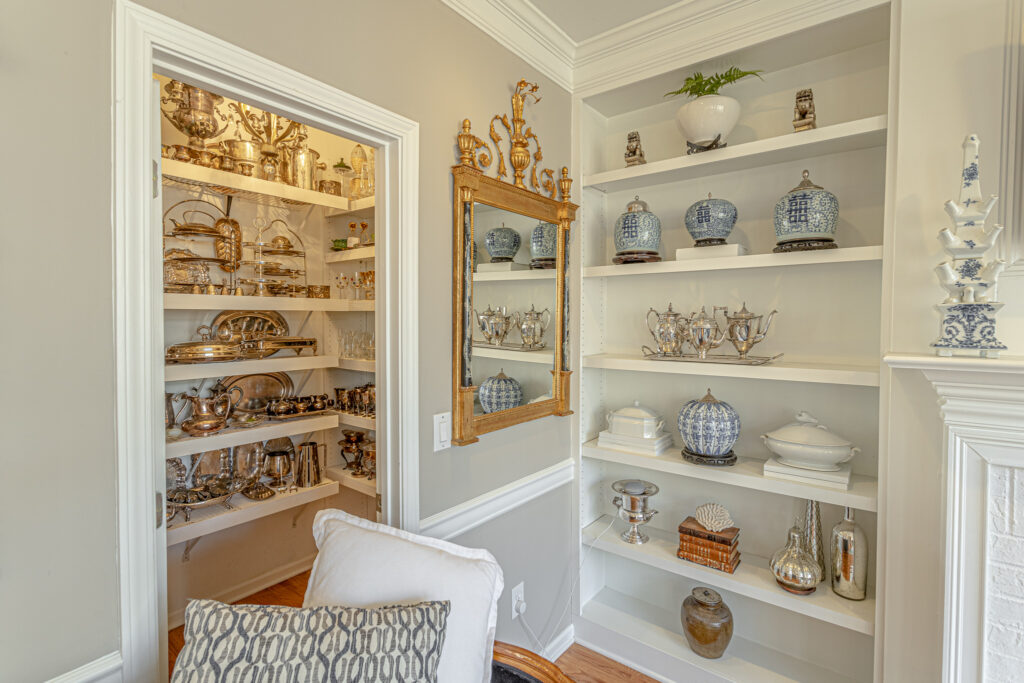
This room is one of my favorite rooms right now! I love that I can just walk in and enjoy having all of these beautiful things displayed and accessible. I love that I am able to serve my guests using beautiful pieces.
The organization of this room makes it possible.


I hope that you will be inspired by seeing how easy this was to do, and are ready to tackle a project like this for yourself.
I’m sure you have beautiful things that you are ready to display and enjoy. Organizing them in a way that makes them usable and easier for entertaining can bring great pleasure and satisfaction. You can see how lovely the finished product looks!
Happy hosting is in your future!
bello dopo tanto vedo cose belle.
Grazie
As I was researching how to organize my hall closet with both coats and housewares, I came across your blog on Pinterest. I was drawn in by your blue & white china, beautiful mirror and array of silver, which few people bother with these days! The tableau invited me in as a kindred soul. I had quite a large silver collection myself, but let a good bit of it go when I moved two years ago (still have some excellent pieces). My blue and white china and similar mirror remain. Love your two minute rule–works like a charm! Thanks for inspiring me with your step by step post! Vivian
Thank you very much!