Have you ever wondered how to lay pine straw like a pro?
Well when we moved to the south, we noticed a lot of homes and businesses here used pine straw for landscape mulch.
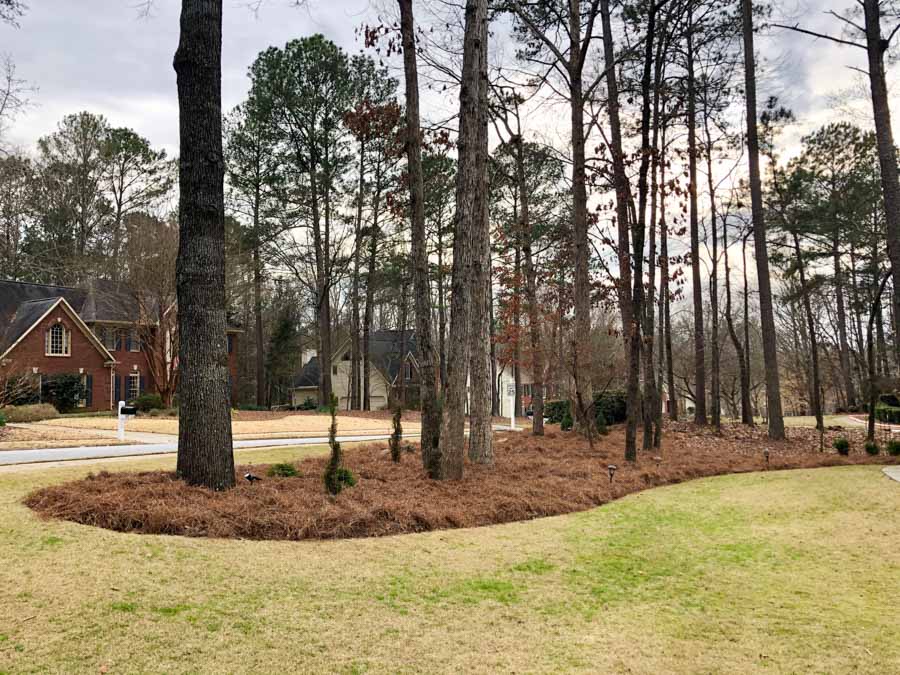
Why Choose Pine Straw?
I’ve read a few things about landscape materials in the south, and one of the reasons pine straw is recommended is that there are termites. It’s not a matter of if you’ll get termites, but when. Pine straw is more termite resistant than chipped bark or wood mulch.
There’s also some information out there on the thickness of laying mulch. If it is greater than a 4-6” depth, termites can just walk over to a house foundation avoiding a termiticide.
The thickness also keeps a degree of moisture in the soil which makes a nice living environment for termites. The termites don’t prefer pine straw as it has a low cellulose level, thus making it a good choice in southern landscapes.
In addition to it being termite resistant, it’s relatively inexpensive and easy to install.
Different Techniques
In my observation of the landscapes within my area, some the pine straw was laid sloppy and had it going every which way and on top of bushes and plantings. While other areas looked neat and orderly and had a curved edge.
I wanted to learn how to do the pine straw like a pro. Many people hire this job to be done professionally. I am not at a point in my life of affording to pay a professional, so I needed to learn how to do it myself.
Why Do People Hire This Done?
I think one of the main reasons people hire someone else to do this job is because they are afraid of snakes.
I am too.
Well I have done this 3 times now, and have yet to see a snake in my pine straw. I see geckos or blue tailed skinks.
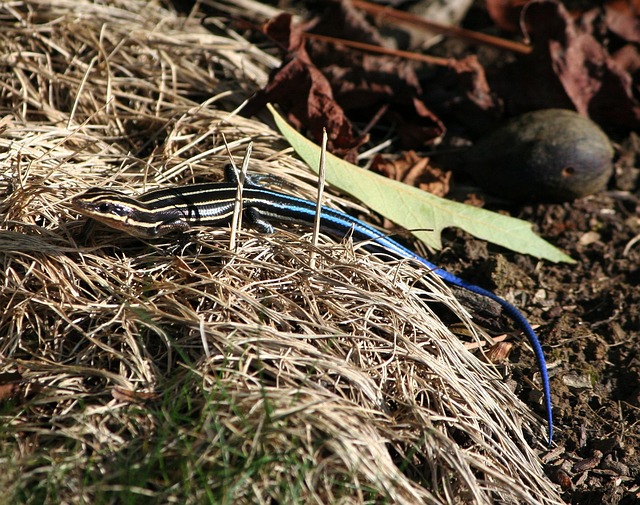
Besides that, there really is only one snake we need to be aware and concerned about here, and that is the copperhead. I still think they’re more afraid of us than we are of them. They’re easy to spot as they have distinct markings that looks like an upside down Hershey’s kiss.
It is also a dusty, dirty job. I just know I’ll take a shower when I’m done.
To me it is a rewarding job. Almost therapeutic, and I love to see the before and after transformation.
Choosing A Shape
Upon moving here, one of the first things I did in my yard was to change the shape of my landscape. The previous owners had an almost a straight line parallel to the sidewalk and I wanted to add some curve there.
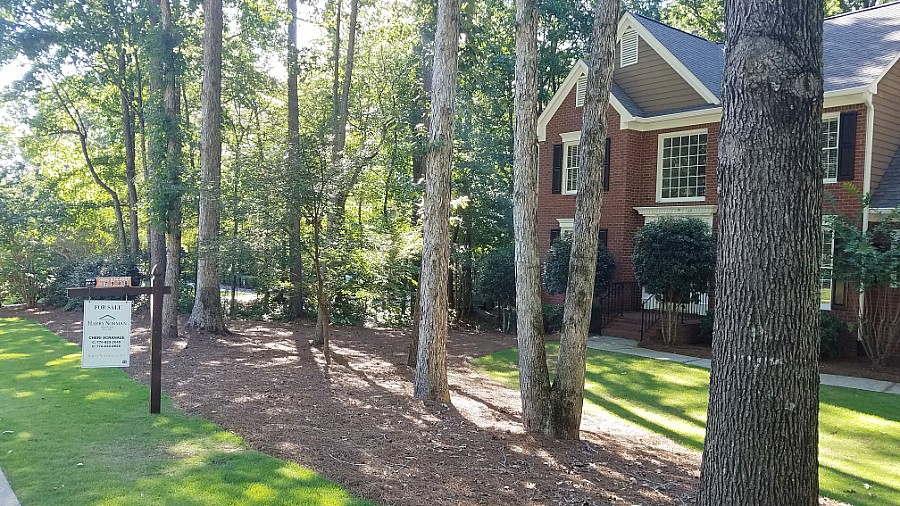
In order to do this in a logical way, that a lawn mower could follow the track line of, I used my Worx edger. This is one of my favorite tools. Like, I totally love this thing!
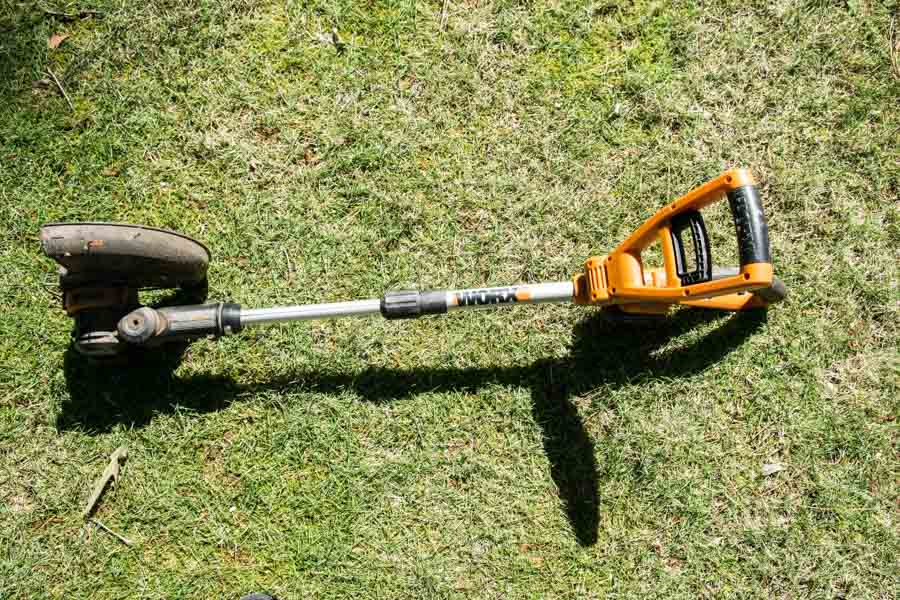
So I took the tool and basically walked the shape and edged it in. I went over the area a few times to make minor adjustments. Once I was satisfied with the shape, I began to remove the Zoysia sod on the interior side and move it to the exterior side to create my new shape.
I basically cut about the same amount on each side for an easy transition because I was doing this during a season that Zoysia was not readily available for me to install and I wanted to complete the look without waiting.
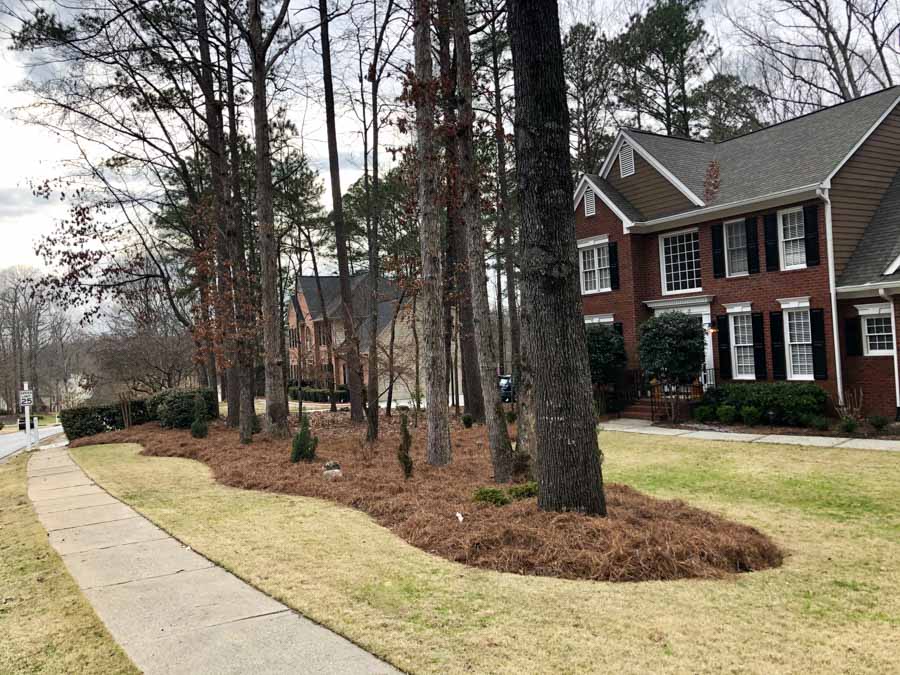
It still hasn’t completely settled in perfectly, but it’s coming along. I continue to edge the shape in since I like to have a nice tight line on my grass.
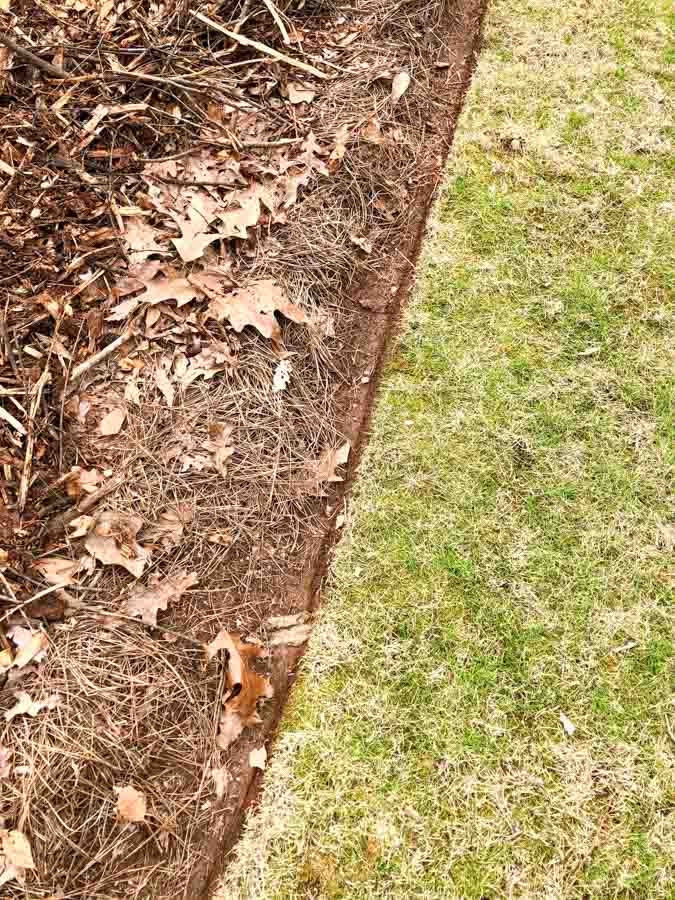
When we lived in the Chicago area, we had professional landscapers who cut a deep groove between the grass and the berm or the landscaping area. I wanted to duplicate this going forward anywhere I lived because I loved the look of it so much.
Changing the Shape
After I used my Worx edging tool to cut the grass at a nice tight angle, I then used a flat edged shovel to dig straight down to create that look. Lifting the dirt up onto the side of the berm to kind of create a bit of a hill.
Adding Mulch
This year in working with my landscape area I had a tree trimming company offer to deliver a free truck load of chipped bark to an area convenient to their work site. I gave them my address and my phone number so they could text me, and they did.
Anyway they ended up dropping off a truck load of this chipped wood.
I wanted to use it to create a little more of a hillside on my landscape before I put down any pine straw this year. In order to keep it fresh looking, a new application is unfortunately an annual thing.
I was not concerned with using the chipped wood on the hill, even after reading about the termites as it was away from the house. Although it isn’t the ideal material to create a berm, it was free and will work in this situation.
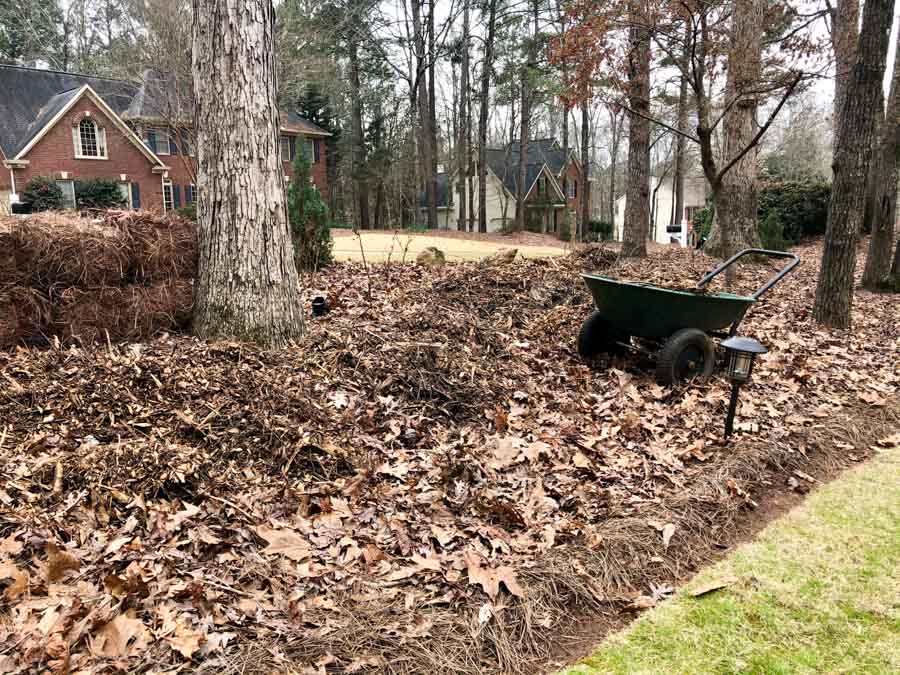
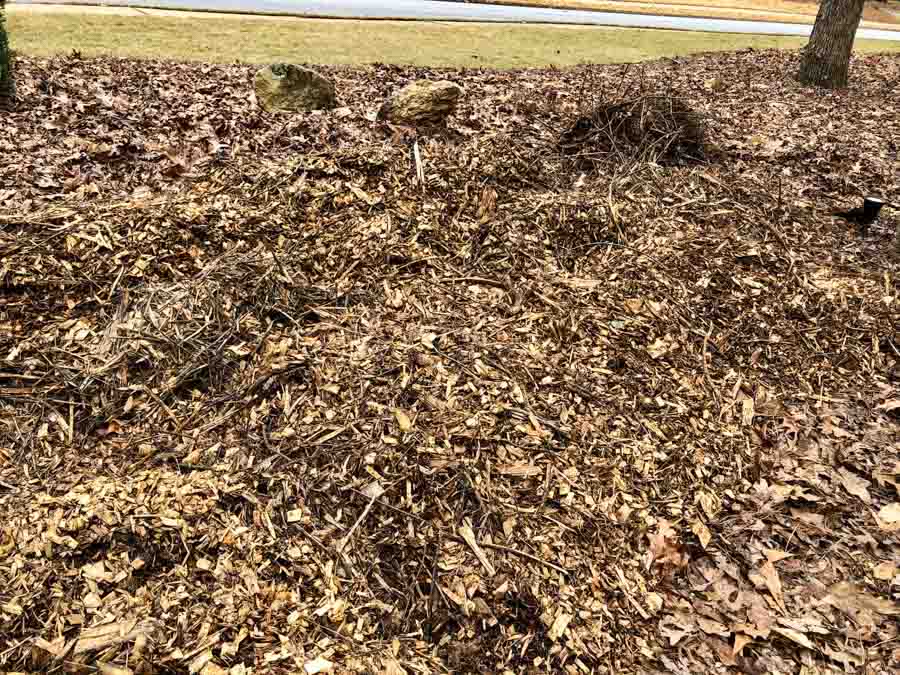
Given this was free chipped bark, it wasn’t all uniform and finely chopped. There were many sticks mixed in which made it difficult to load into a wheelbarrow.
I ended up moving about 30 wheelbarrows over to the area and then leveling it.
Creating A Berm
As far as moving the bark, I did it a couple of different ways. Part of it I’d lean the wheelbarrel up against the bark pile and use my hands to shovel it in. When the pile of it was not so tall, I used a shovel with a flat edge to scoop from the bottom of the pile.
Once I moved the bark over to the area where I wanted it, I evened it out. I tried both a rake and with my hands. I found that doing it with my hands worked better.
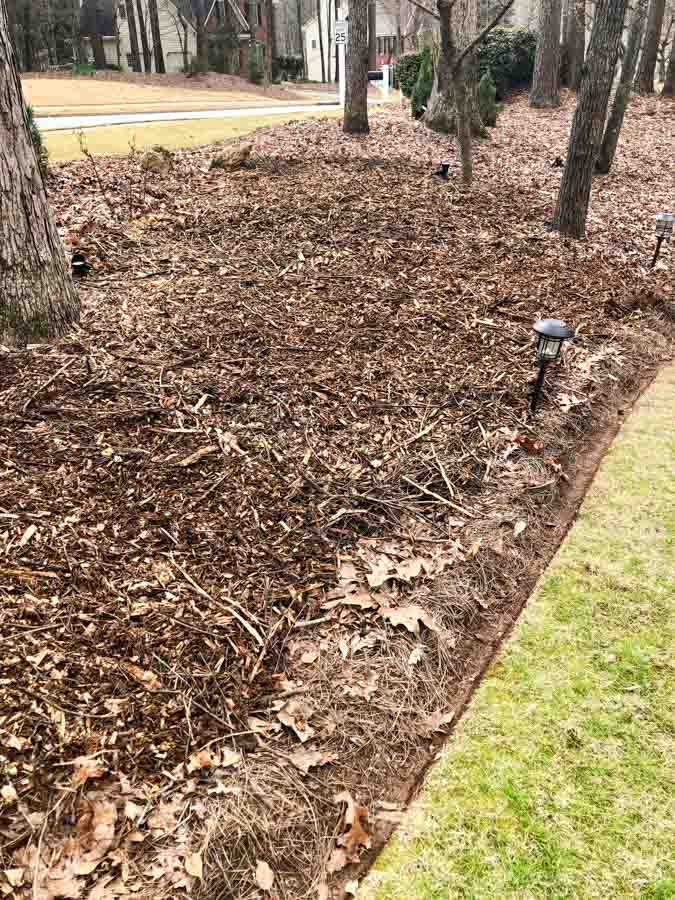
For those of you that don’t like to be bent over, a rake will work just fine too.
I re-evaluated the area several times as I really wanted it to be higher. Since I was doing this job by myself and I was pretty exhausted, I chose to be done even though I would have liked a bigger contrast. In the end, it was good enough for me.
Pine Straw
Determining the amount of pine straw you need is important. If you take a calculation of length times width, this is the recommended calculation online: One bale will cover an area approximately 45-50 square feet to a recommended depth of 3 inches.
I had 30 bales of pine straw delivered in the morning.
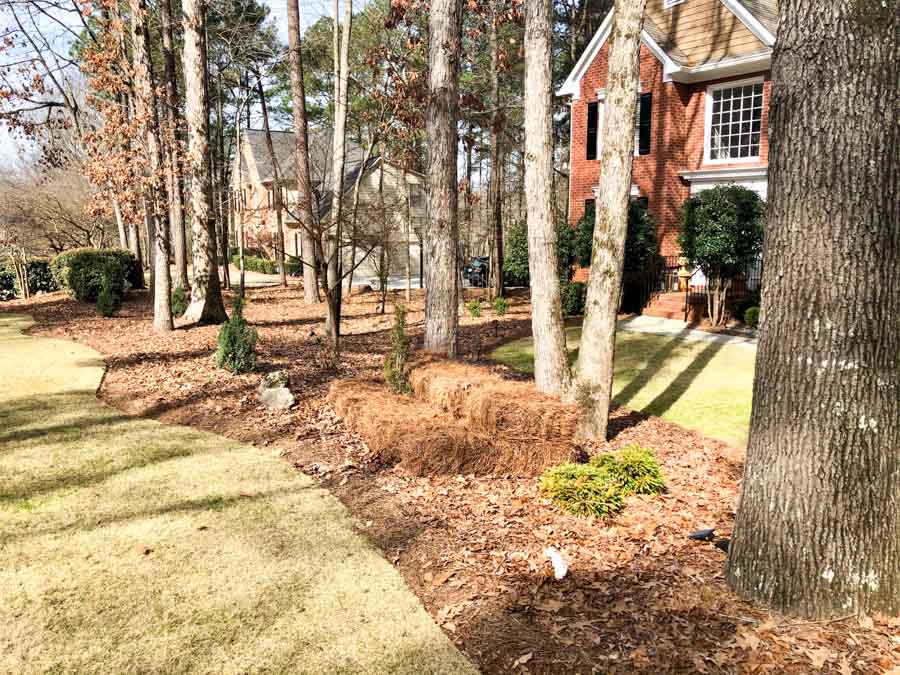
If you are in the area south of Atlanta, I’d recommend a guy named Angelo Walker. I found his name by using the search bar within my local group on Facebook. Angelo at the time quoted me $3.75 per bale.
I had previously stopped at a house within the neighborhood that was having pine straw delivered and asked if they had any extra in their truck. They said no they only have an amount for a specific job. I asked how much they charge per bale and was quoted $6 per bale.
That is a lot of money to me. I have been quoted $4 – $4.75 within the last couple of months. So as you can see this price can vary quite a bit. I do believe that price included spreading it though, and they did a nice job.
Pine Straw Varieties
There are both long and short needle pine straw. Sometimes the quality also varies and one can be more faded than another or fade quicker than another.
I was very happy to hear Angelo had long needle pine straw. The long needles actually spread nicer and have better coverage in my opinion.
There is also a service out there that will “paint” your existing pine straw to freshen the color if your pine straw is in good enough condition and just needs a color refresher.
Perspective On Coverage
Here is a picture of only three bales laid out thus far. You can see it goes pretty far by comparison. I paid a total of $120 for thirty bales.
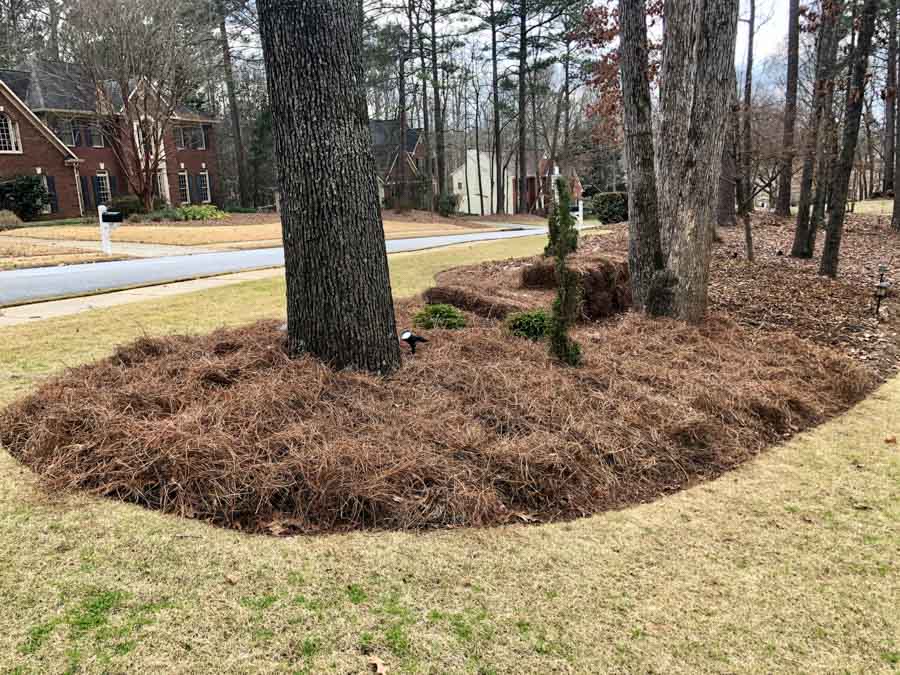
You can see how far this all went. I think it would have been better to have ordered an additional five bales to go around the edges better and to fill in a little bit of that section in the back.

Drive By Deals
I also found after adding another 10 bales later in the summer from a truck driving by in my neighborhood, that some bales are loosely packed so you don’t get as much. I’ve also read about people being scammed numerous times by drive by pine straw guys.
My best recommendation: Get a quote of a price per bale. Physically count the bales. Many people have received less than they have paid for.
Also, a lot of these folks like to spread for you and charge hundreds of dollars saying they used 80 bales which you can no longer count them as they are already spread. Definitely an area where you need to be a smart consumer as these drive by deals are usually not good deals.
Spreading the Pine Straw
To spread the pine straw I clipped the strings that are going around the bales. Basically it will fall apart in little sections that are about 5 inches apart.
I tend to grab one or two of those sections at a time and kind of rub them together with each other shaking my hands side to side at the same time. I find this to be a very effective method.
If I end up dropping a chunk I just pick it up and finish the process. I do this until the entire area is complete and I’ve used all of my supplies.
While going around my bushes and shrubs with the pine straw, I like to make sure they are well covered at the base. I have found that in the south, shrubs and bushes have a much better growing time if they have their base protected by a layer of mulch, or in this case, pine straw.
The temperatures here are a little crazy. We can have a ton of rain in a short time or we can have a very dry hot heat. I feel adding the extra mulch protects their root system and basically keeps the plants happier. It also keeps things looking tidy.
Once I have finished laying all of the pine straw out, I go over the outer edge about an extra 6 inches. I do this to create a little curved edge. This can be obtained by using another one of my favorite tools which happens to be a gas leaf blower.
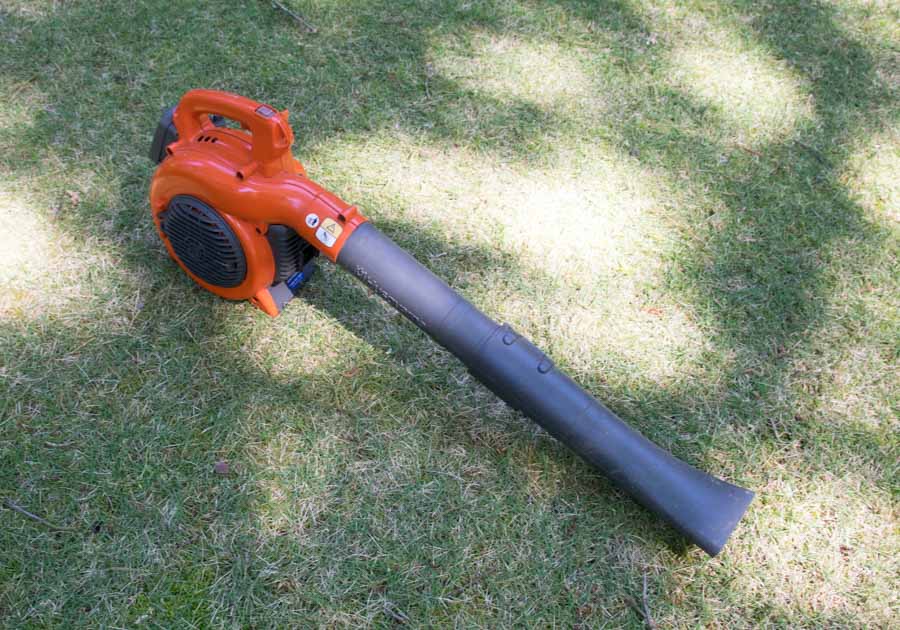
If you hold the gas leaf blower at an angle almost touching the ground it will curl the edge of the pine straw underneath.
I do this kind of slow and at an angle so that I am in control of what I am doing. I also do little bursts of air to not flip the pine straw but to have it curl underneath. If there are any stray leaves they will also blow underneath.
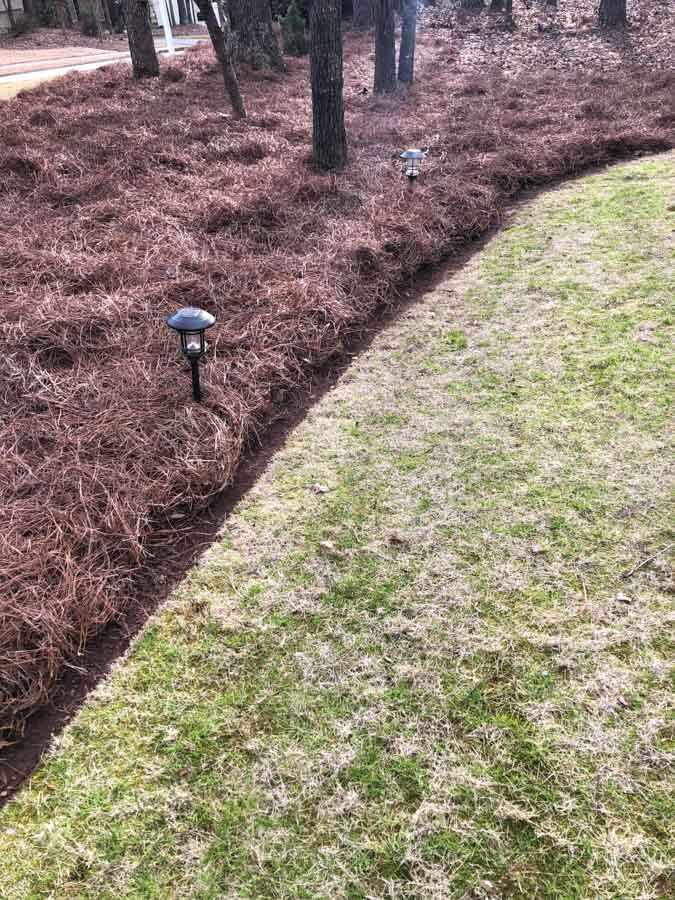
I love the look of the curved edge. It looks and feels like I have a professionally landscaped yard. I enjoy seeing the before and after and knowing I played a big part in the outcome.
Benefits
Another fringe benefit of having my yard look professionally landscaped, is that my neighbors, many of them who have their yards professionally landscaped and maintained, see that I’m doing the work myself and tend to step up to the plate and improve their yards even more.
You may think this is funny, but I feel like my neighbors are motivated to do a better job with their yards or improve areas they previously were just having maintained.
This is a win-win for me as it increases the property value of the neighborhood when everyone’s yards look maintained.
I enjoy seeing what everyone does in their yards too. Any effort is a good effort in my book. It also inspires me and makes me want to do more as I see neat plantings and specimen trees and such around the neighborhood.
Taking it a Step Further
I decided to do the little front area next to the house at the same time to complete the look. Previously, I had the area landscaped with pine bark. After a neighbor told me it’s probably not a good idea to have something termites could eat, I decided to change it to rock.
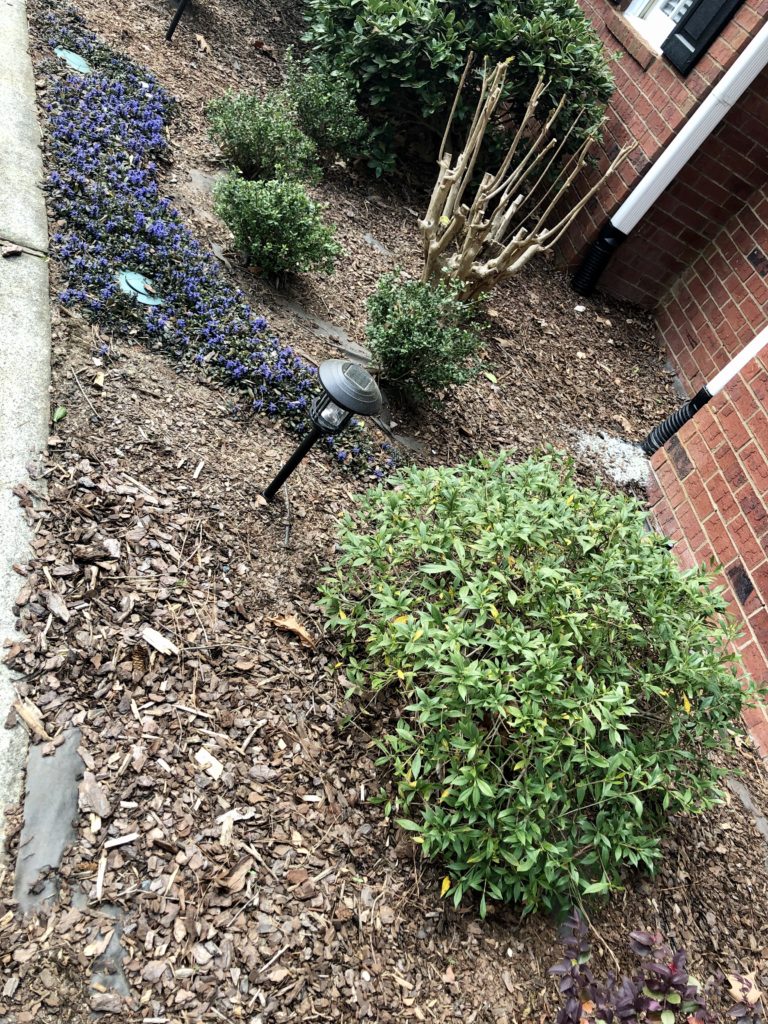
I went to the local landscape yard to view my options. I was originally planning on putting slate chips in that space. When I got there and looked at the options, I decided that the red colored rock would blend nicer with the pine straw that I had already chosen for the larger part of my yard.
An added bonus, it was also less expensive than the slate chips.
I decided to place a complete order at one time so that I would only have one delivery fee. I decided to order dirt for planting, slate chips, red rocks, and pine bark. I had them delivered to place in different areas of my yard.
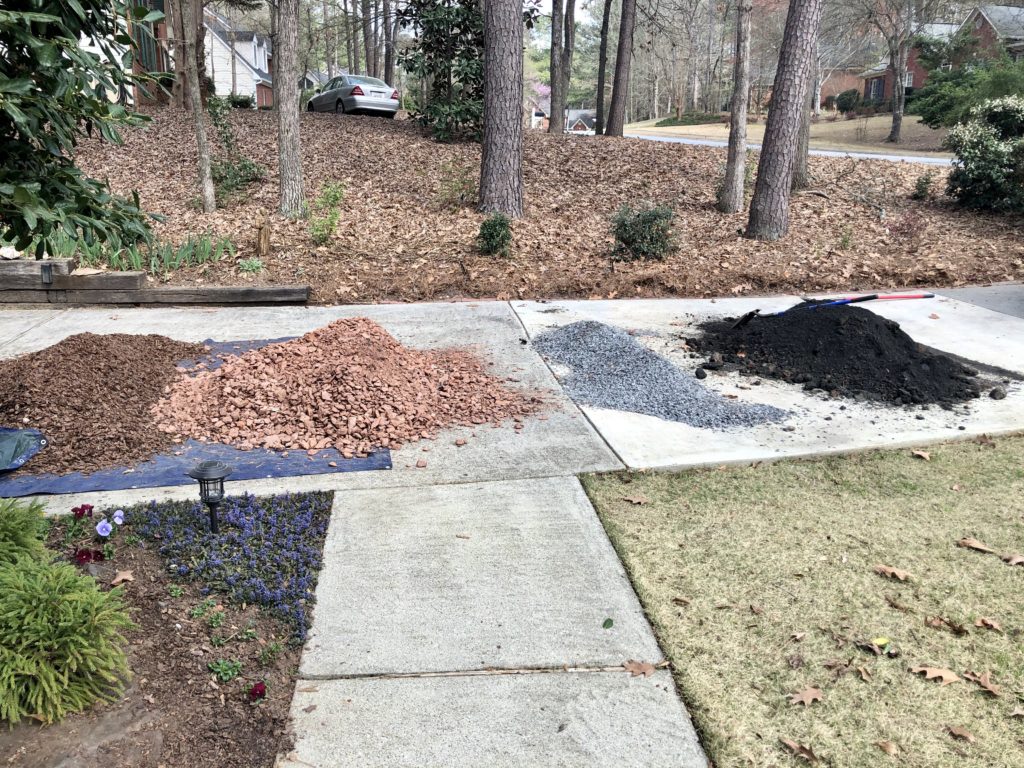
I ended up removing the bark in the front area and bringing it to the back. I already had put down a weed preventing cloth which made it much easier to replace the bark with the red rock.
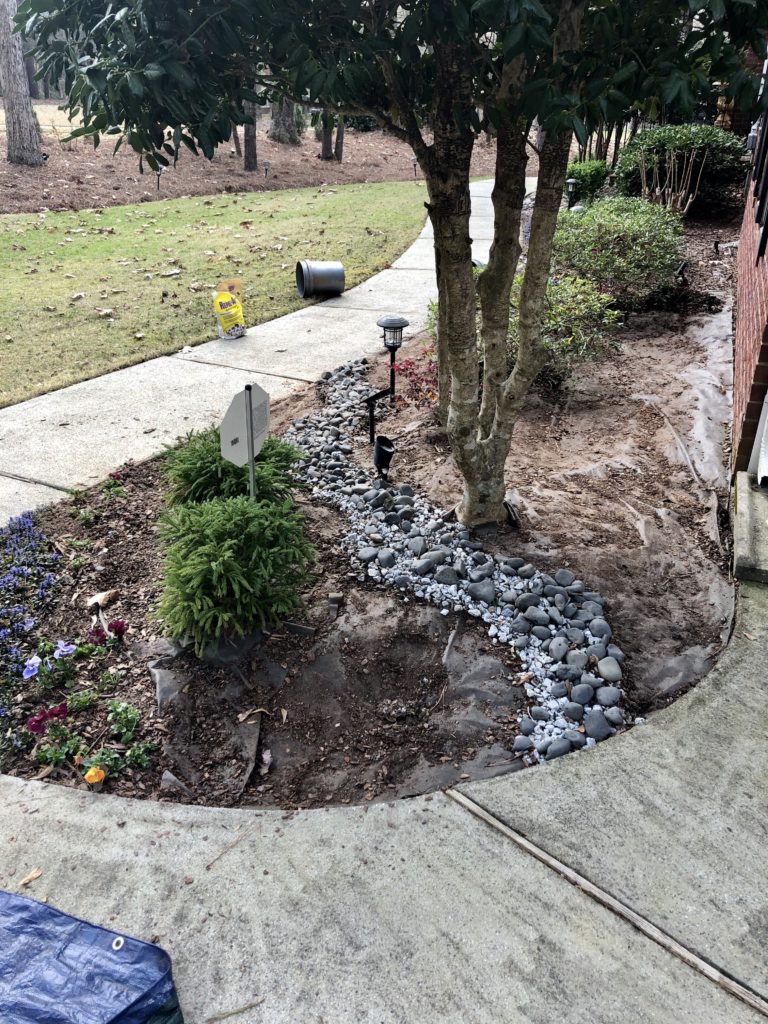
Here’s the after. I think color wise, it blends well with the pine straw and gives a more finished look to the front yard.
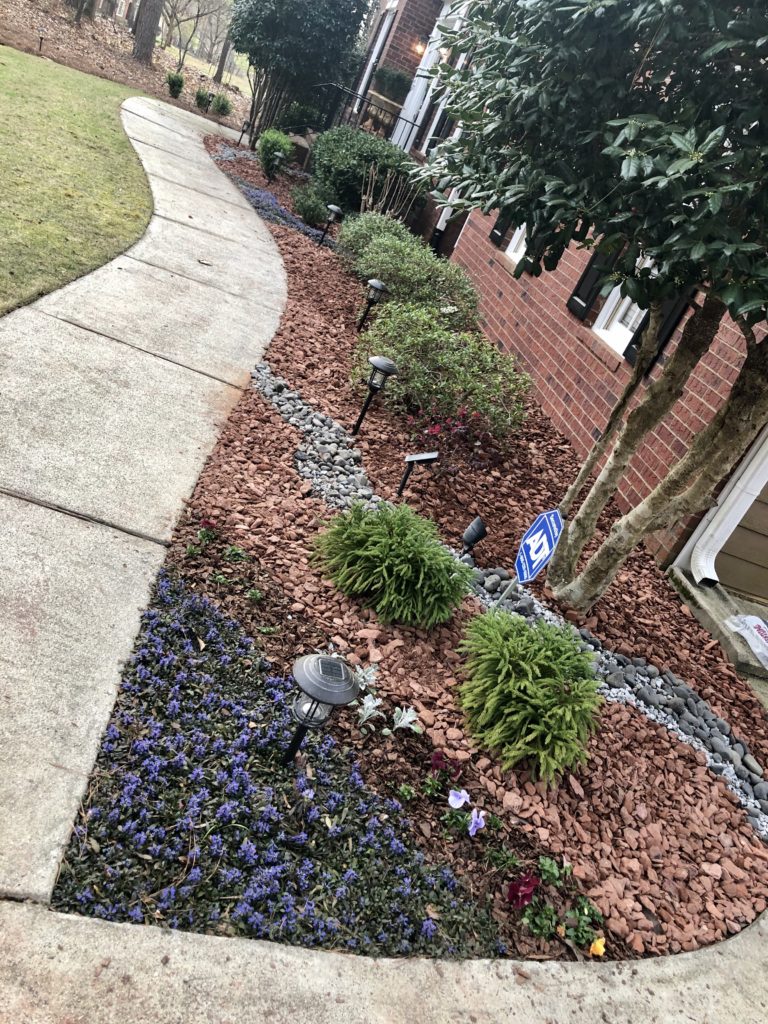
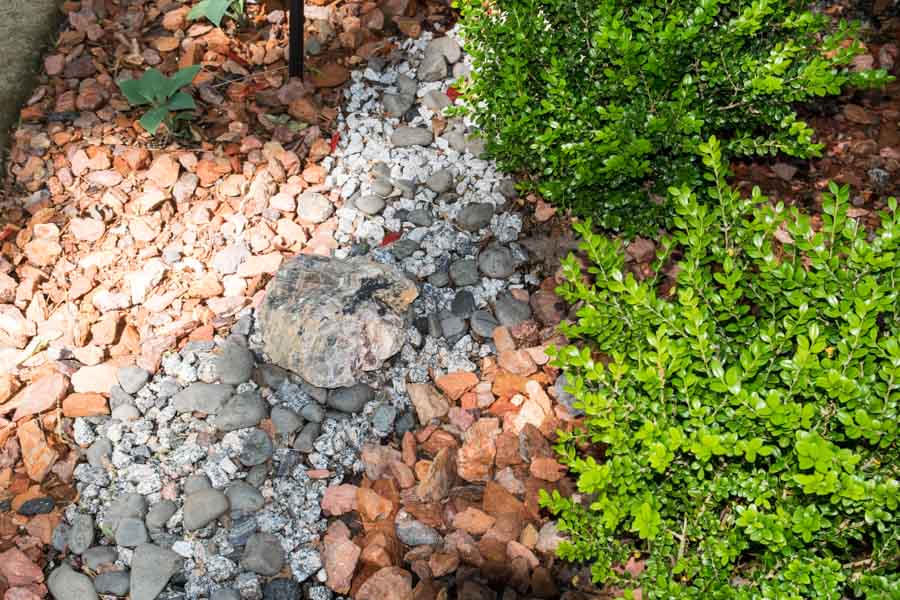
An additional benefit is that I have no termite draw next to my house. It also enables me to blow the leaves off of this area without having the small slate chips or bark blow into the grass. I’m hoping that I will have less loss of product and it will last me a longer time.
This area may have too many different kinds of landscape materials in a small space, but it works for me. I like using the supplies I already own and I like the look of the dry creek contrast. I also placed a special rock my husband found for me in the area too.
Final Considerations
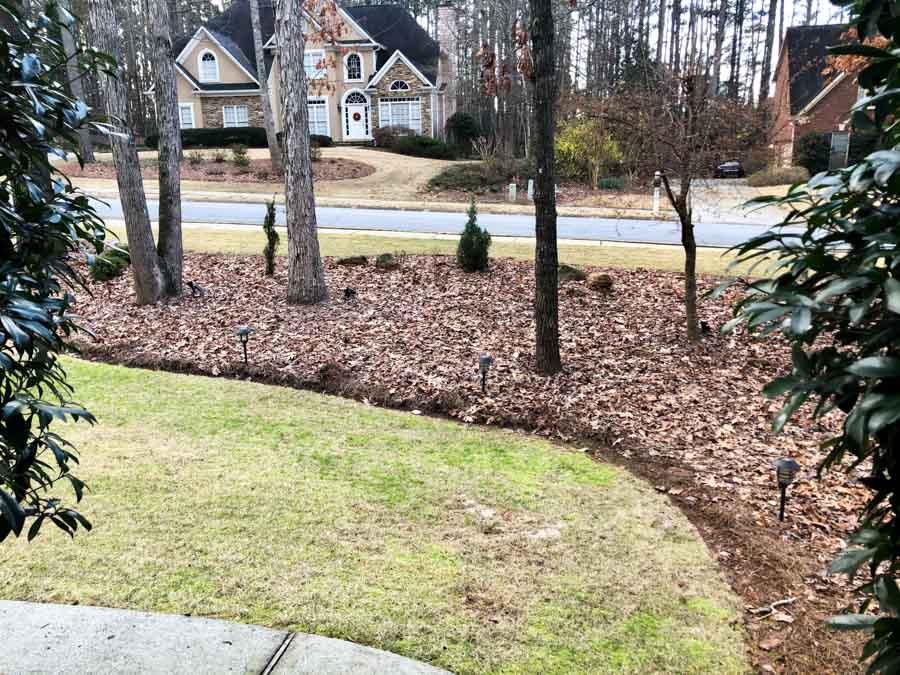
One additional thing I learned, after the fact, is that it may have been smarter to have waited a little later in the spring to put down the pine straw.
I have red oak trees that lose their leaves in the spring and I would rather not have had these drop their leaves on my freshly laid pine straw. I did my best to blow them off, but it’s still not perfect.
I’m thankful for having a more maintenance free yard though. Hoping you get some ideas and implement some upgrades to your space too!
I like your publication. It was very helpful. Can you email Angelo Walker’s telephone for my final touches? Thanks in advance, and best to you and your family. Your designs and landscape are georgeous.
This is a fantastic post. It answered most of my questions and is exactly what I am going through on my pine islands. This was the most detailed and best of all the ones I read.