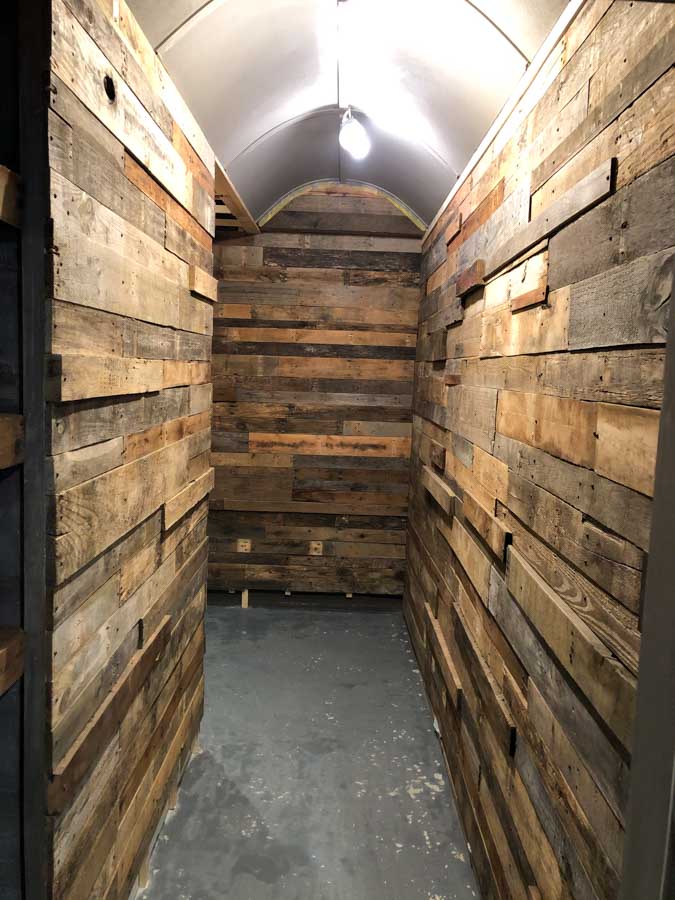
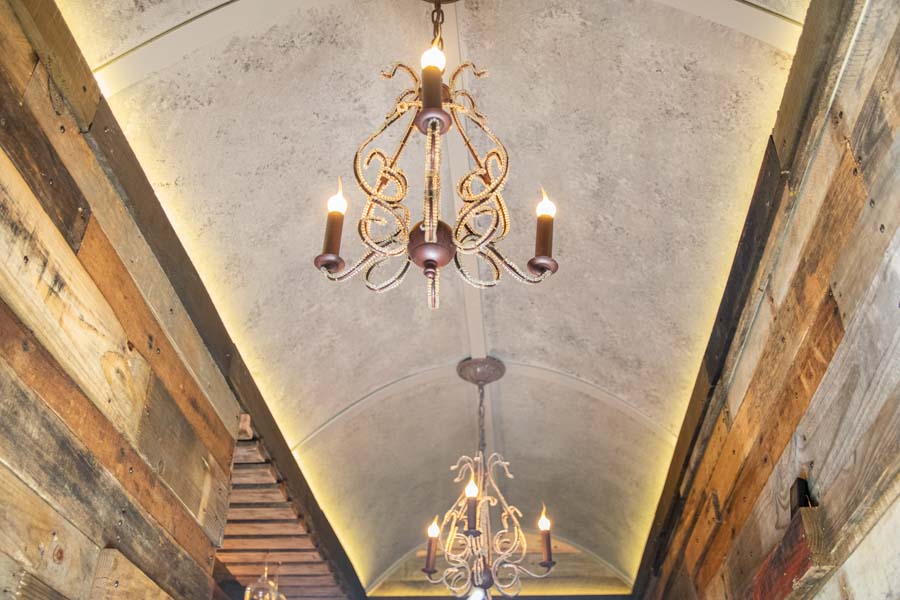
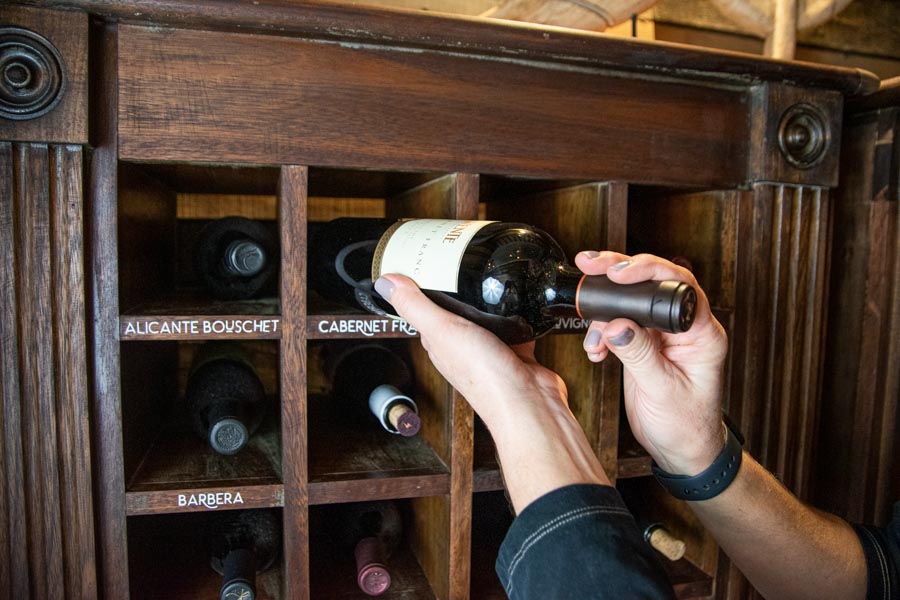
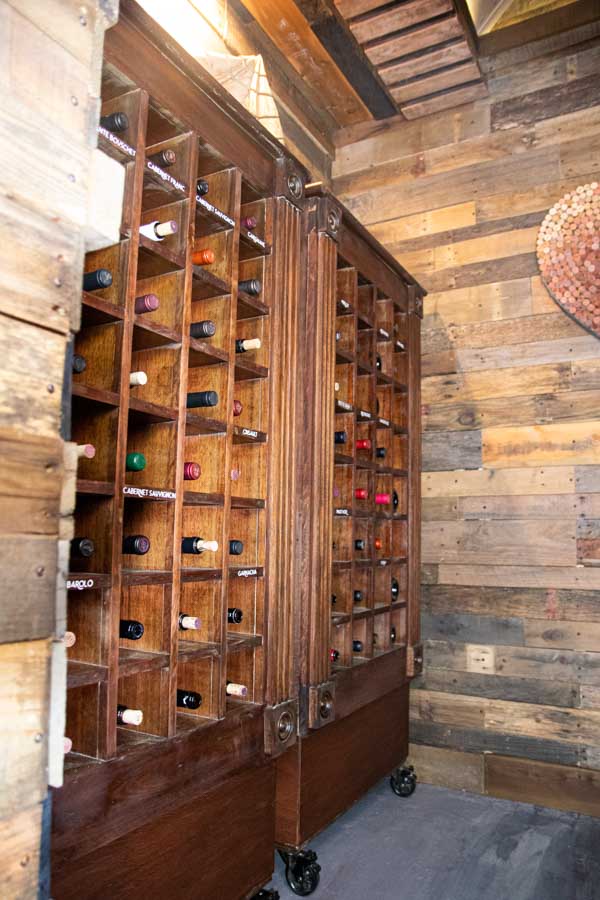
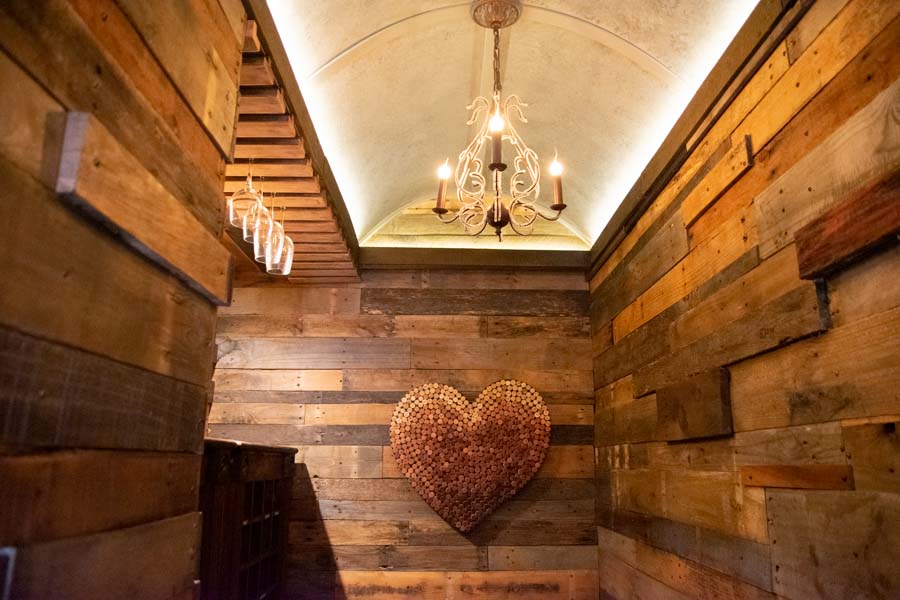
I have a little storage area in my basement that I wanted to convert to a wine room. I first studied the space to determine how I wanted to have it laid out.
These are the steps I took:
Step 1: Take Measurements
I first needed to measure the room so I had an idea of what amount of square feet of supplies I needed.
Step 2: Determine Electrical
I needed to decide on how many electrical outlets I needed and what type of lighting I wanted. I needed to make sure to figure out what supplies I needed and what the regulations are.
Shopping List:
I purchased some thin boxes for the chandeliers so they would be more flush with the ceiling as well as a recessed light and additional boxes for the light switches, outlets, and romex wire.
This would be a good time to determine if you want to install a wine cellar cooling unit or air conditioner as you would need the appropriate materials and location determined for it.
Some wine connoisseurs are very finicky about maintaining an exact temperature in their wine room.
My wine room is more for fun and I don’t plan to keep and age bottles of expensive and rare wines.
That being said, I ordered a little hygrometer off of Amazon that measures the temperature as well as the humidity in the room to determine if I was in the proper range first. It’s actually quite small, like 2 inches by 3 inches.

We chose not to add the cooling unit as the room is in the basement and consistently maintains a temperature within the proper zone.
Ideally between 55°- 65° for red wine. Ours sits at 65°. The humidity range goal is 50-70% with 60% being ideal. Ours sits closer to 21% but this is more of a need if you’re concerned with corks drying out. Again, I’m not planning to have bottles sitting there long enough.
Besides that, these wine cooling units can run around $1200! Yikes!
Step 3: Install Electrical
There are regulatory standards for this, so please check specifics with your county.
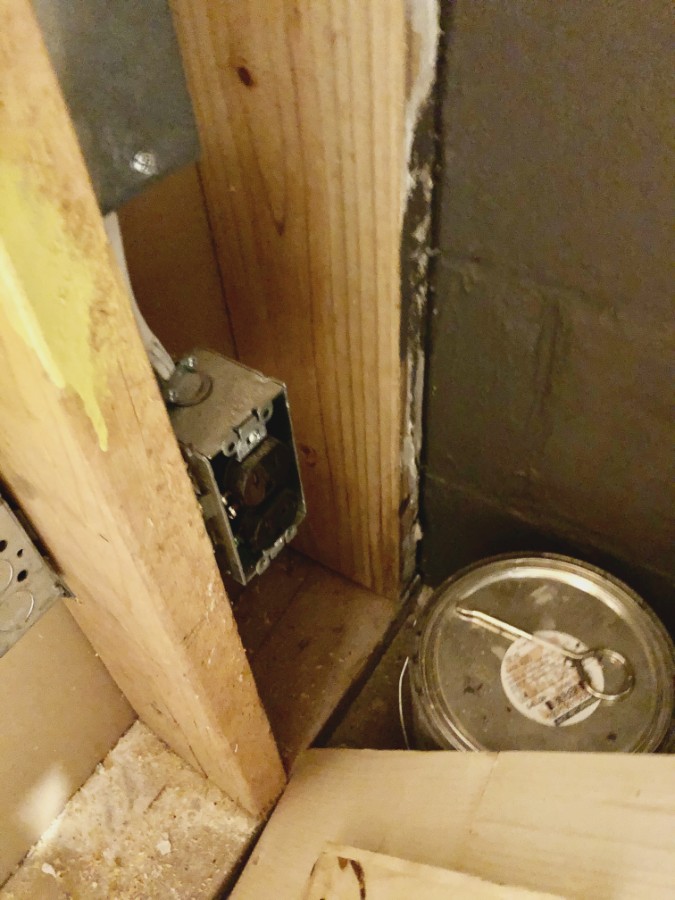
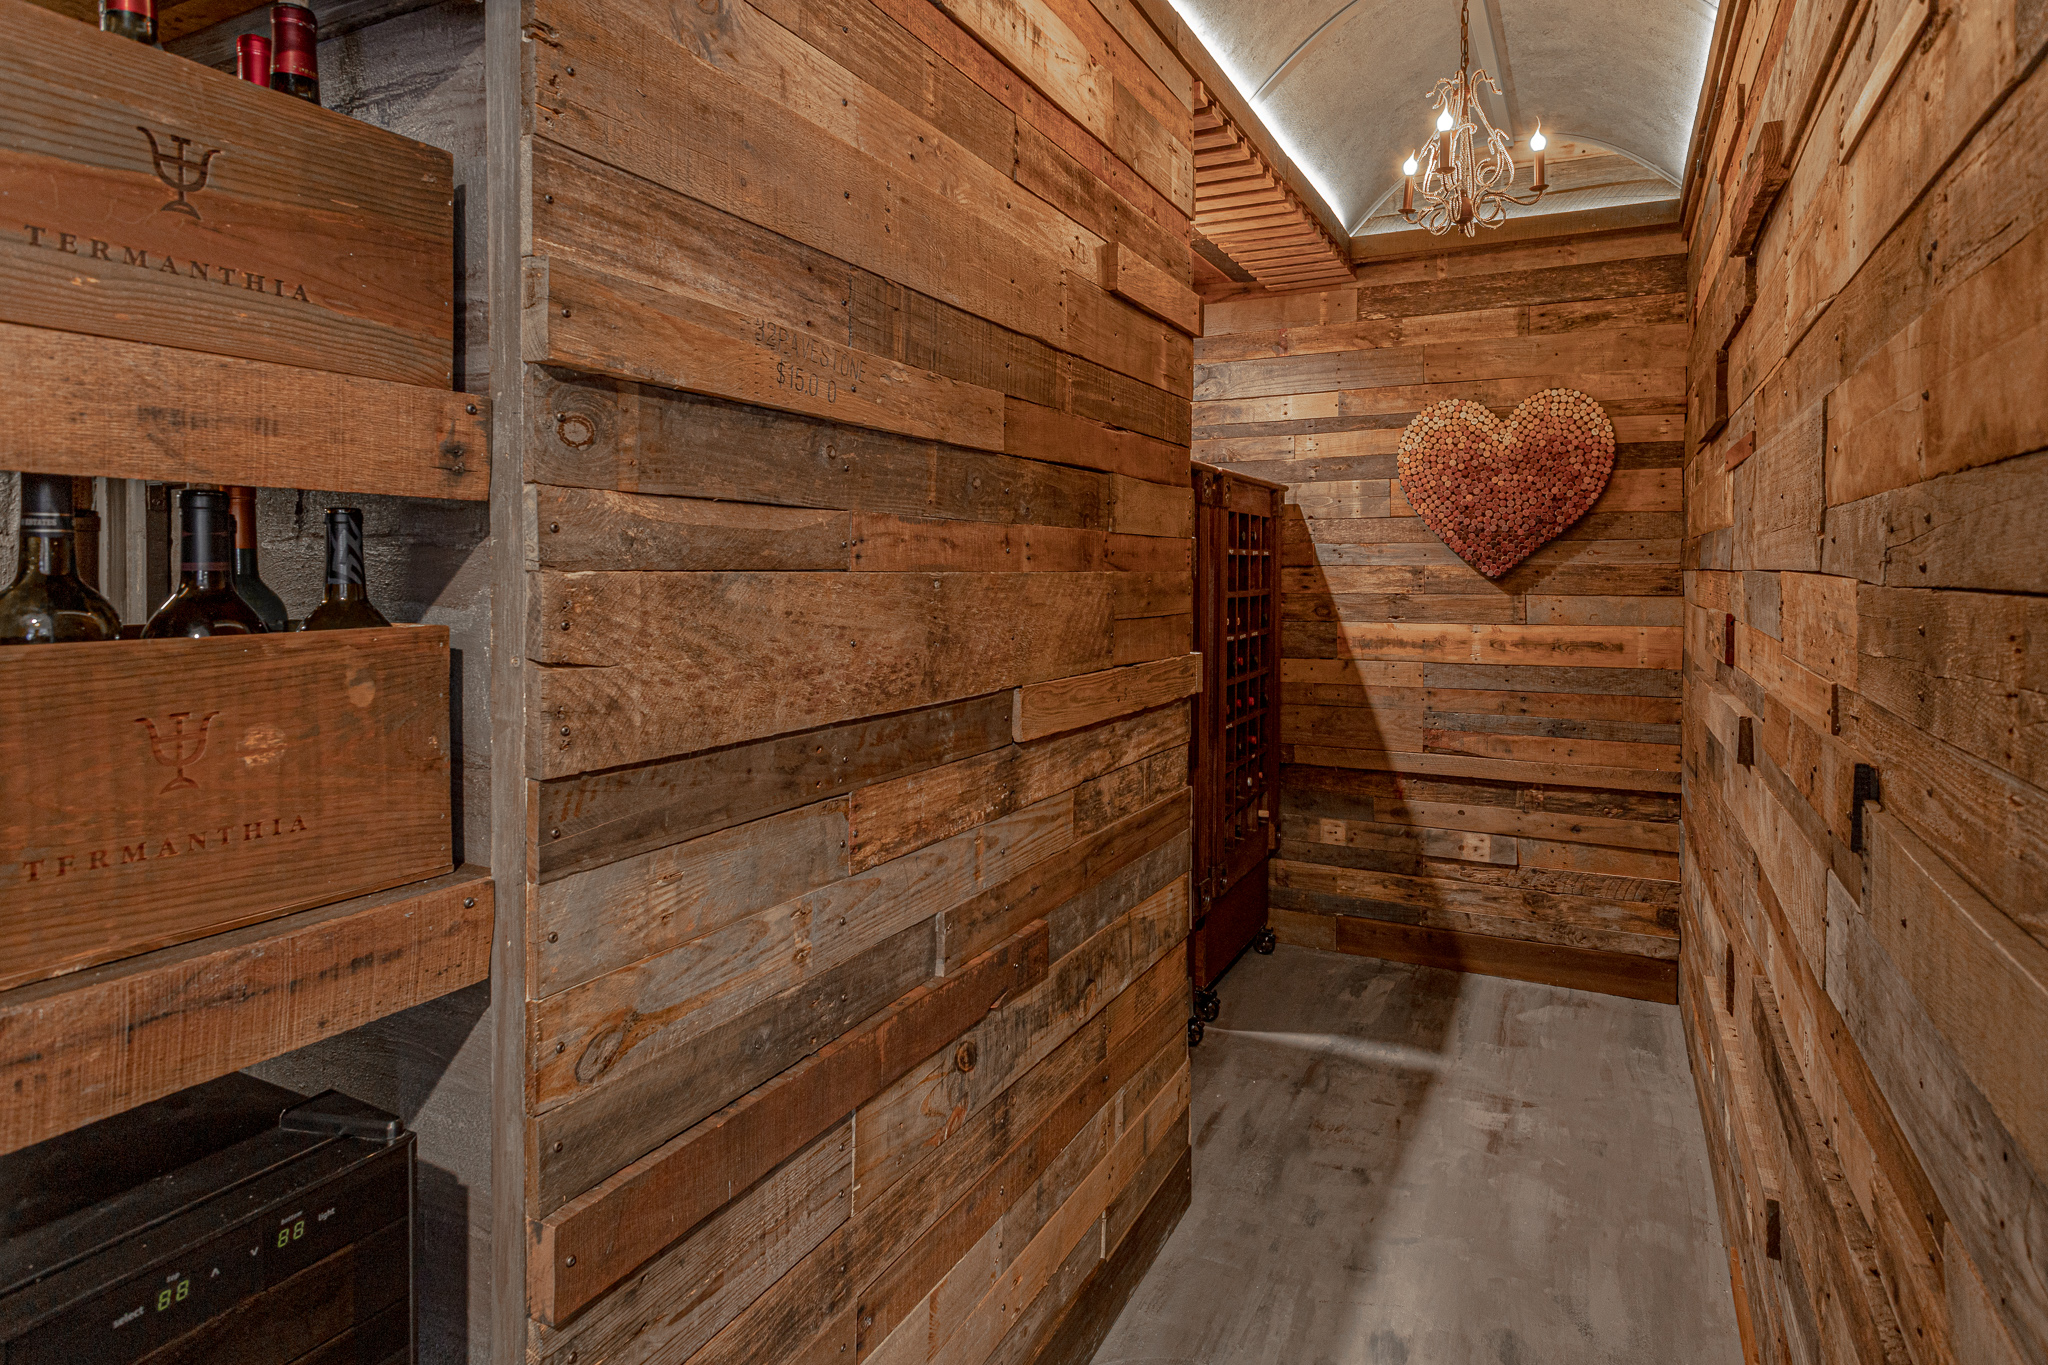
We wanted to add two electrical outlets, one for rope lighting around the ceiling, and one for the wine fridge.
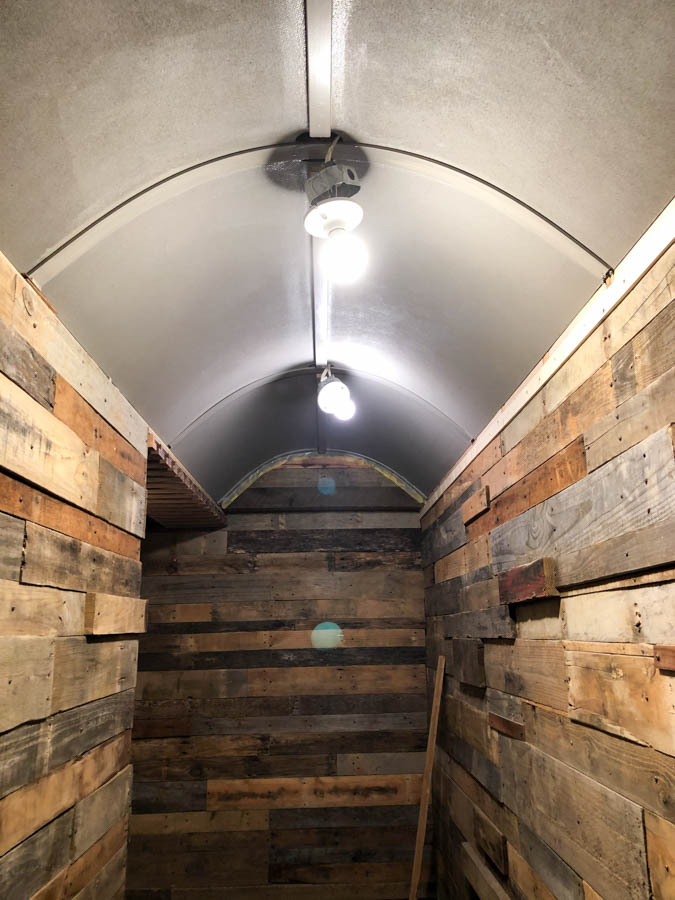
Additionally, we needed to add a box to the ceiling and move the other one in order to have two chandeliers in centered locations.
We needed to figure out the placement of the electrical outlets and the boxes for the chandeliers before we could do the next step.

I didn’t originally know that my hubby wanted to have rope lighting around the ceiling or little spotlights behind some shelving.
I think he thought I’d like it and he wanted to surprise me.
I wanted this project to be done in the least expensive and most timely manner as possible. I simply wanted to enjoy it right away, so I was not as excited about adding the lighting. Now I have no regrets!
Step 4: Paint The Cinder Blocks
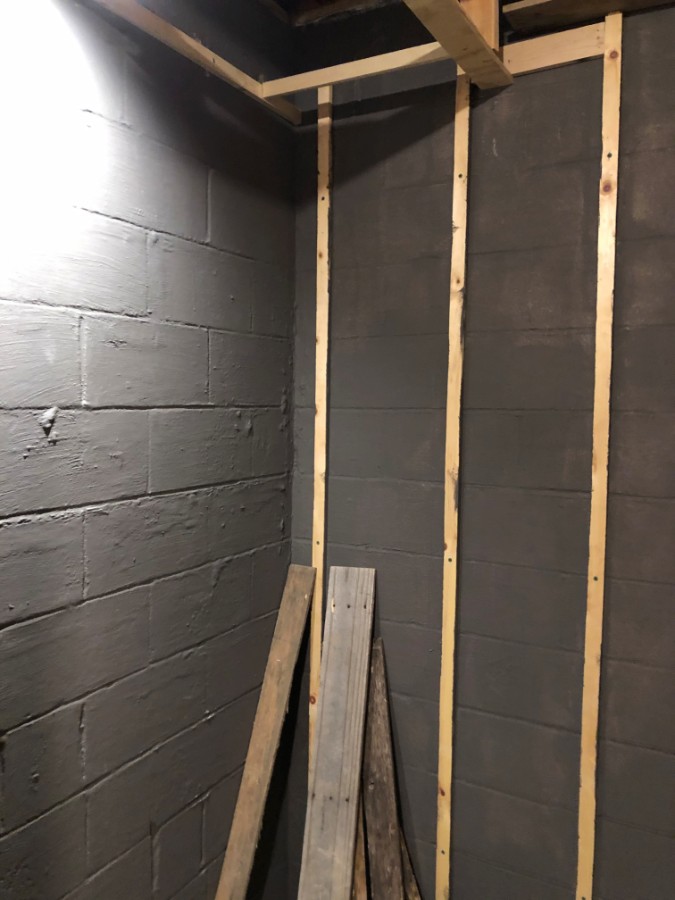
I used a paint specific for basements and masonry as a waterproofer. We did not have an issue with moisture, but more as a preventative measure.
I ended up having them tint the paint as close to a Restoration Hardware shade as I originally was going to leave two of the walls painted and not covered with the pallet wood.
This is not a normal practice for them to tint this paint, I happened to have a new and helpful worker. These cans are pretty full and don’t allow for much to be added in, in any case it’s a prettier color than what came in the can.
Step 5: Framework
My husband put in one by two’s as a framework to attach the pallet boards to. He pre-drilled the boards and let it touch the mortar to see where the hole needed to be. He then pre-drilled the holes in the mortar using a special masonry drill bit.
This was a slow and tedious task. He used some glue to hold the boards in place in an event that over time the masonry would soften and the screws could potentially become loose. Yes, he’s German. Lol!

Step 6: Create A Frame Around The Pipes
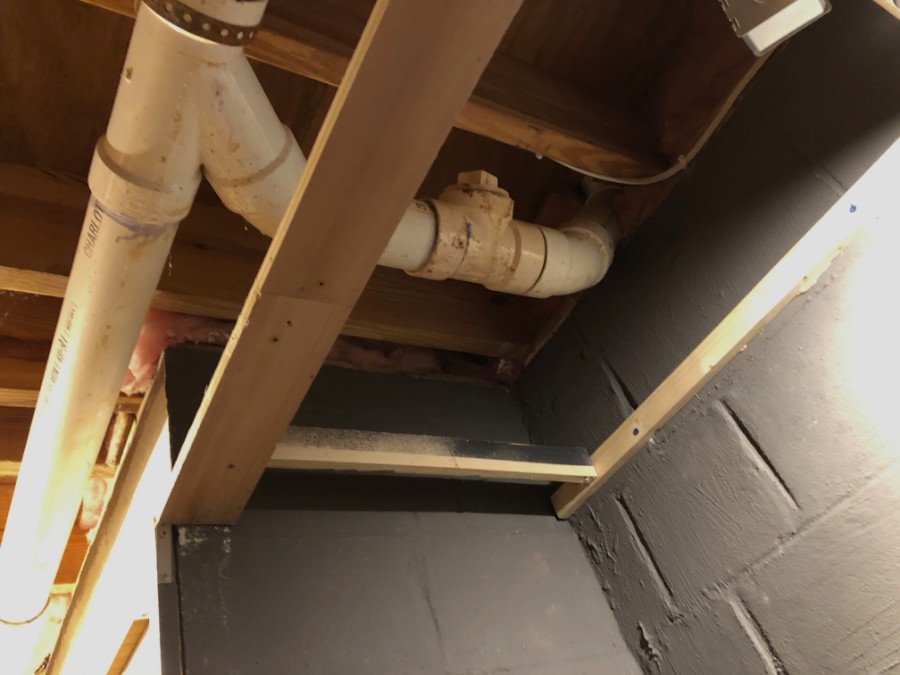
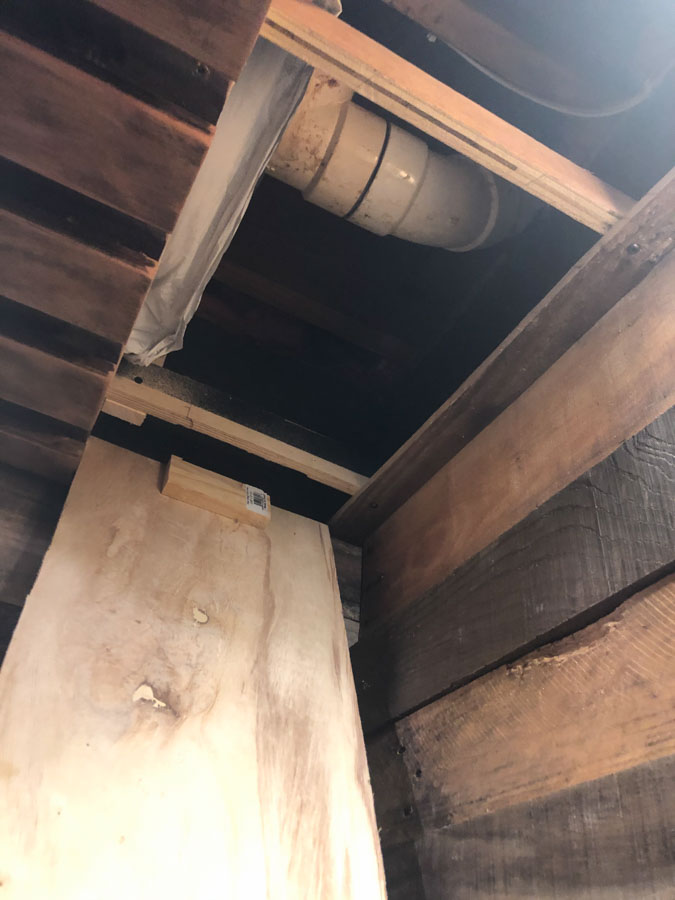
We also had a number of pipes that we had to go around and still make it look like a professional project. The goal here was to still have taller ceilings instead of them being lower below all of the pipes.
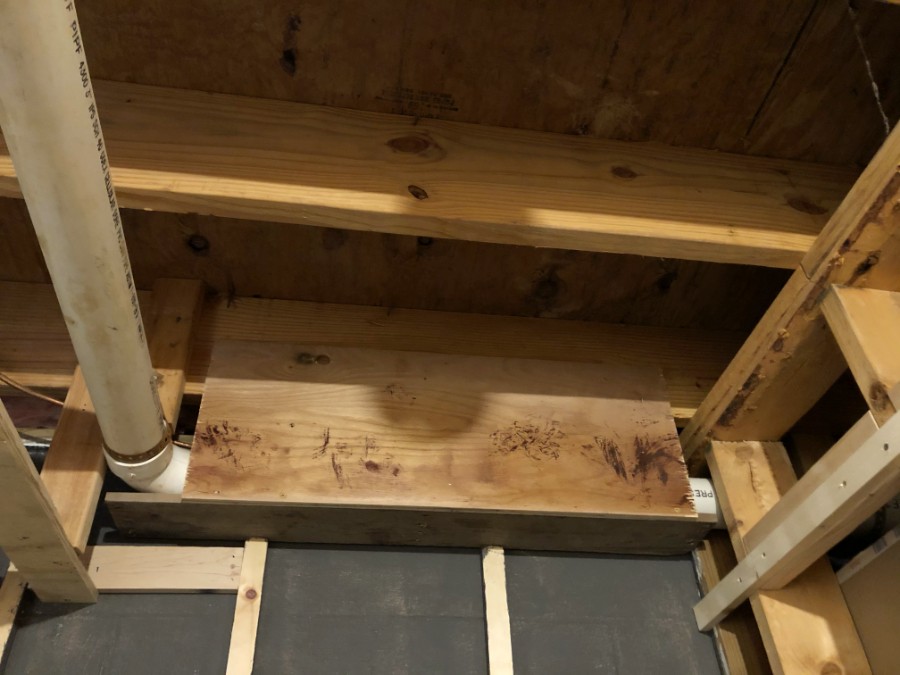
The framing around one of these pipes needed to be done in a way that enabled it to still be accessed as it is a clean out drain. Basically we needed to create a secret “trap door” for this area.
Step 7: Create Ceiling Support
My hubby and I agreed we both wanted to have the ceiling arched. At the time, I didn’t know that he also wanted to add recessed rope lighting around it.
He needed to build a framework in order to hold the arched ceiling in place. This was kind of a one shot deal and the measurements needed to be precise. Once the ceiling was bent into place, it needed to fit in there exactly so that it all lined up. This was super tricky and is definitely a measure twice scenario.
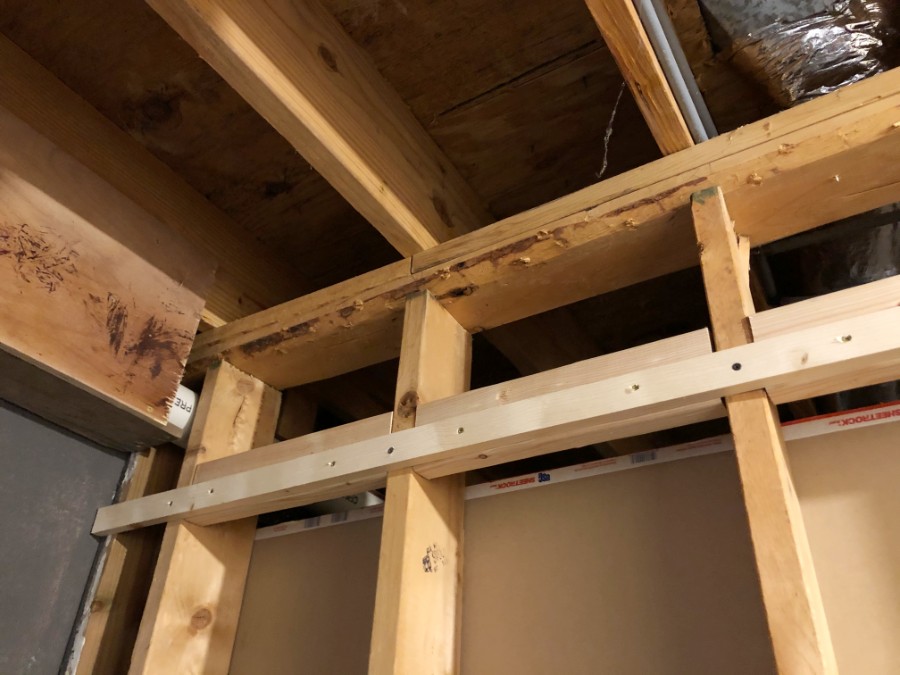
To add the area for the recessed rope lighting, he needed to create an additional space for it to sit and reflect up onto the ceiling. To me, this meant an extra step which equaled more time and money.
He measured around the entire ceiling area and put up one by twos. He left a space above it and put in additional screws for the arched ceiling to sit against for support. This created a space to install the rope lighting and cover it with additional boards.
Step 8: Find Pallets
I needed to figure out where I could get free pallet wood. I wanted to hand pick my pallets as I was hoping to have weathered boards. I wanted to do this economically and yet still have a really cool space.
I was able to find some pallets at my husband’s work, as well as a pool servicing company, and Lowe’s.
If you look around or ask online, many times people or businesses are giving them away for free.
If you want to skip this step, many home improvement stores now sell aged looking boards for projects like this.
Step 9: Prepare the Pallet Boards
Once I discovered where I could get the pallets, we handpicked the ones that were particularly aged so that they had more of a weathered gray tone.
This took several trips as we could only fit a few in the car at a time.
When we brought them home and started working with them, we discovered these are a real beast to take apart. They have tons of little staples and nails holding them together.
We can see why other people might prefer to use new boards that look weathered to make this an easier and seamless project. To me, they don’t have the same character and unevenness, so I’m happy with the route we took.
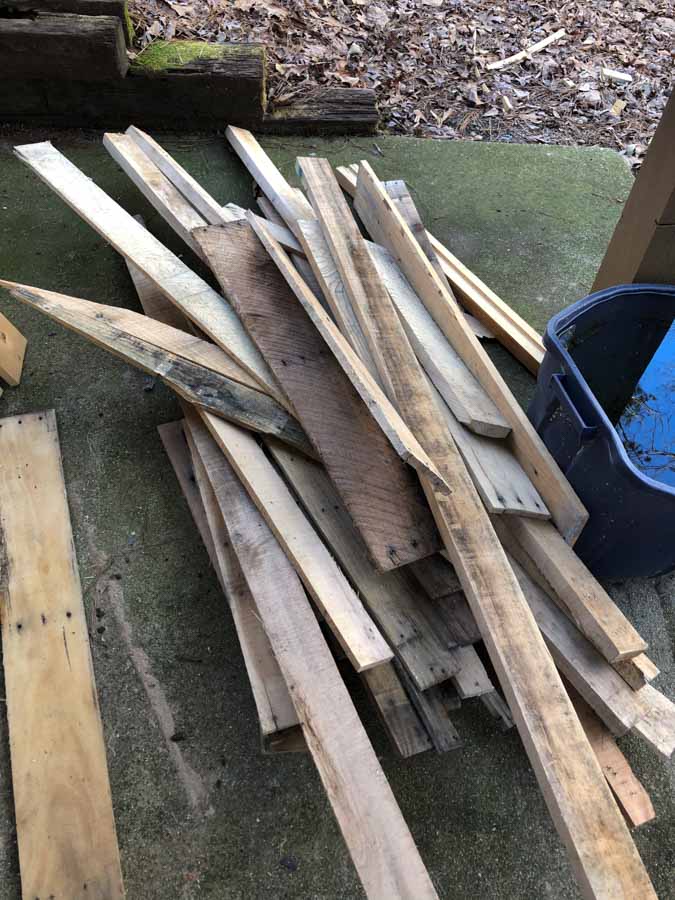
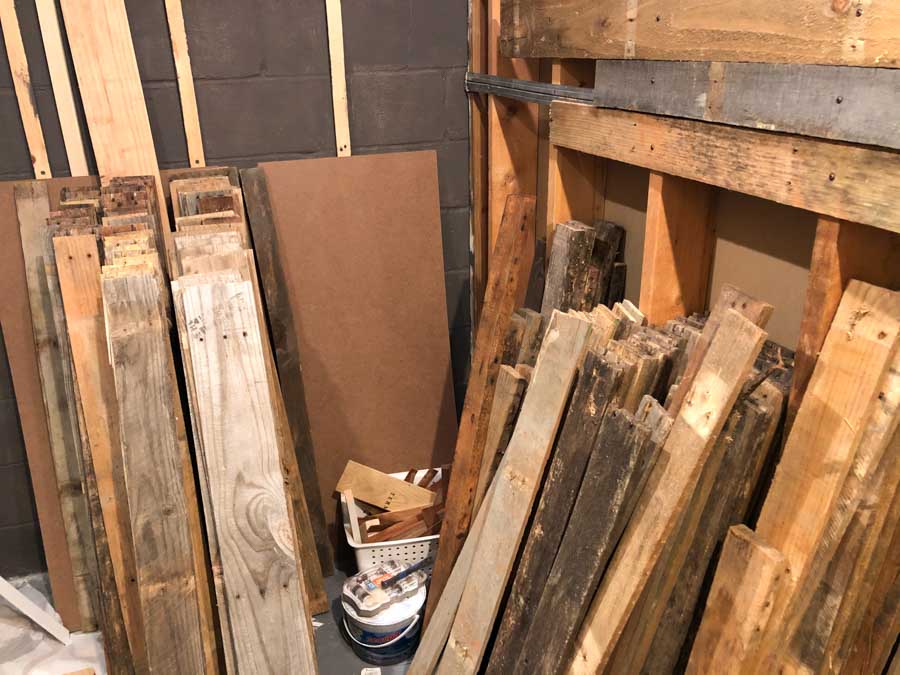
After taking the pallets apart, salvaging all the good boards, we trimmed any broken edges and stacked them up.
Many of these had to be washed off as they were coated in clay soil and/or cement dust. We sprayed them down with the hose and let them dry.
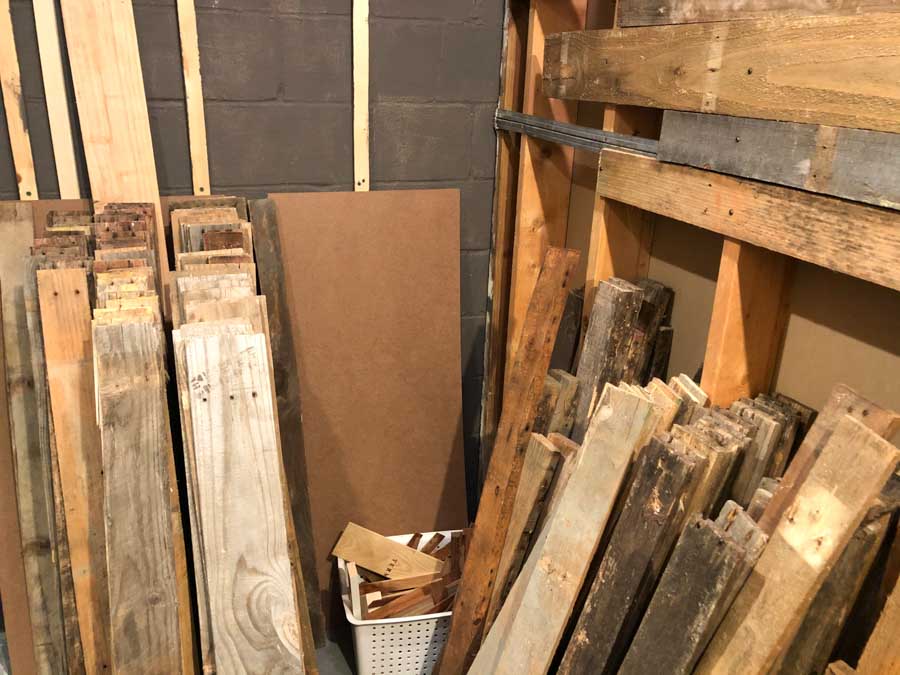
Once I had accumulated enough boards that were taken apart, trimmed and cleaned, I was ready to begin organizing them.
Step 10: Picking the Screws
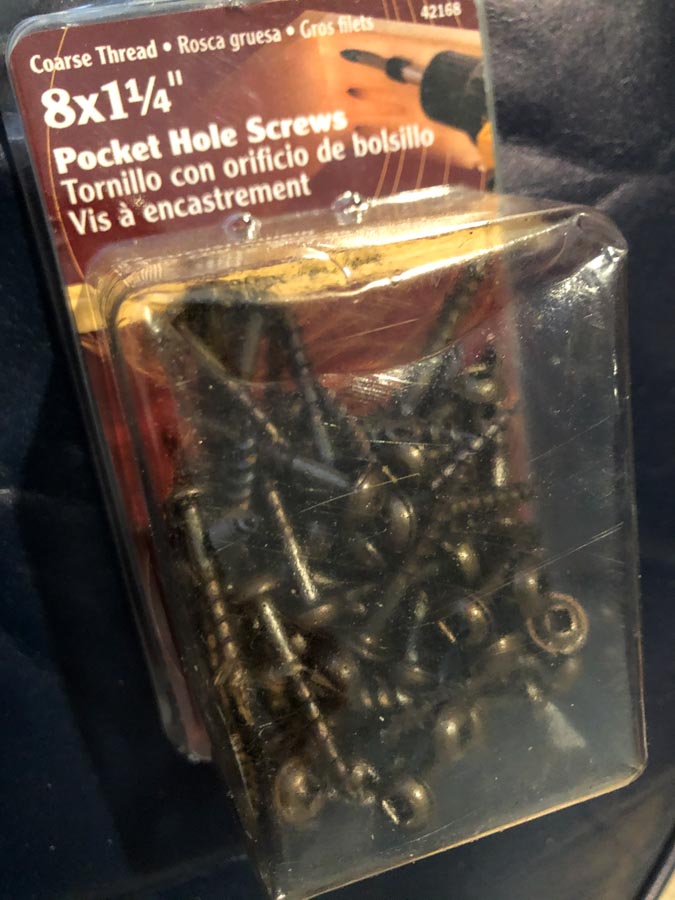
My hubby was quite particular about picking out the screws to use for this project. We tried to find something that looked old fashioned and was more of a bronze color tone.
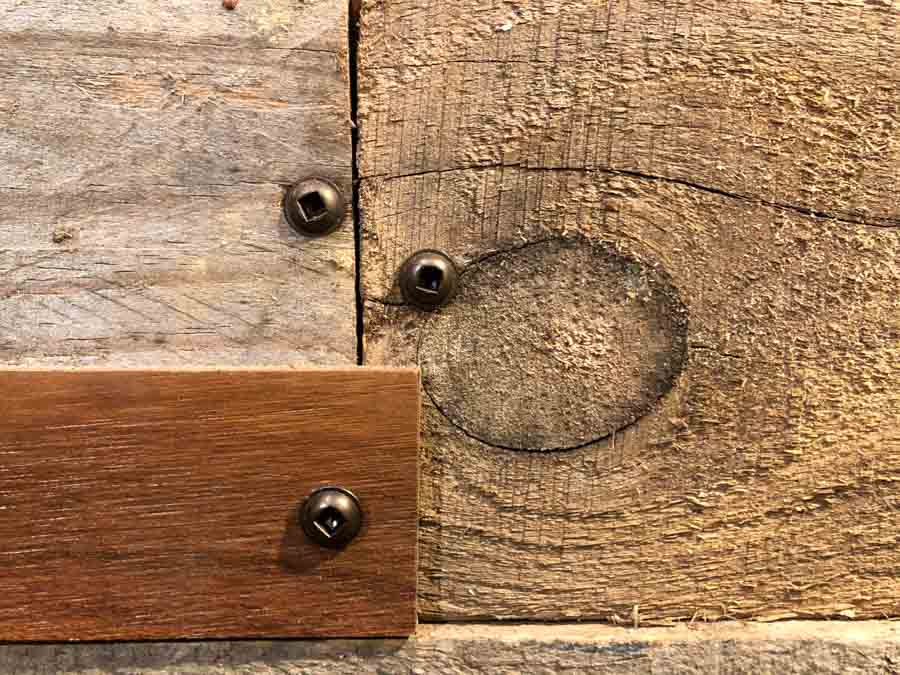
Originally I was thinking of using square shaped masonry nails. I thought that would give a cool rustic look.
We ended up finding screws with a square bit in a bronze tone at Home Depot or Lowe’s. I thought they worked quite well and they came in a variety of lengths. We went through several of these boxes and this became one of our bigger expenses.
Step 11: Insulation
After doing some additional research regarding maintaining a particular temperature range in the wine room, we decided it was a good idea to insulate this room, as it shared a wall with another room that received heat.
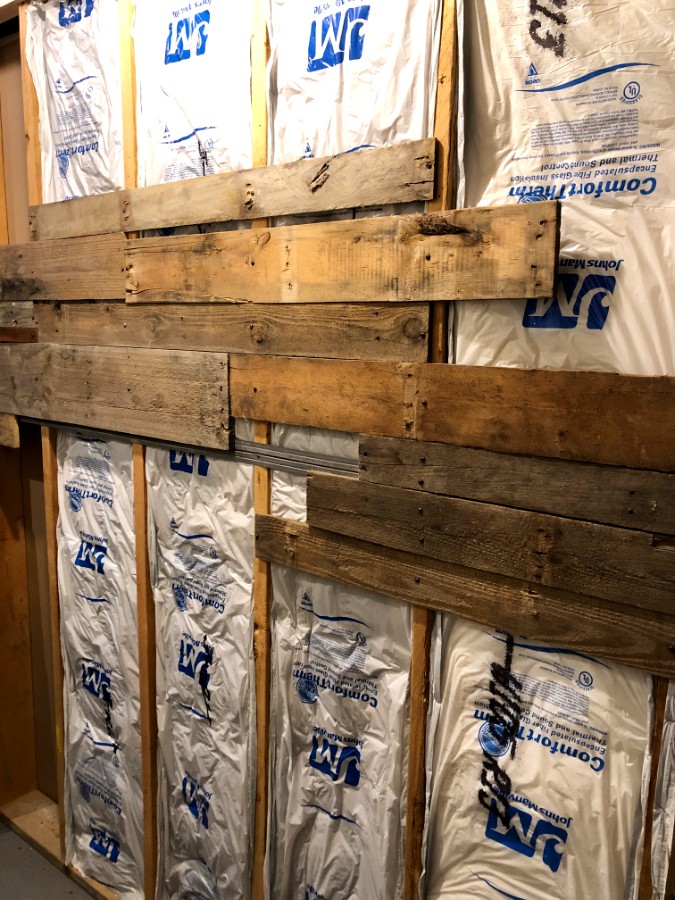
We purchased insulation to stick in between the interior walls. We did not put insulation on the walls that were below grade and shared a wall with the ground.
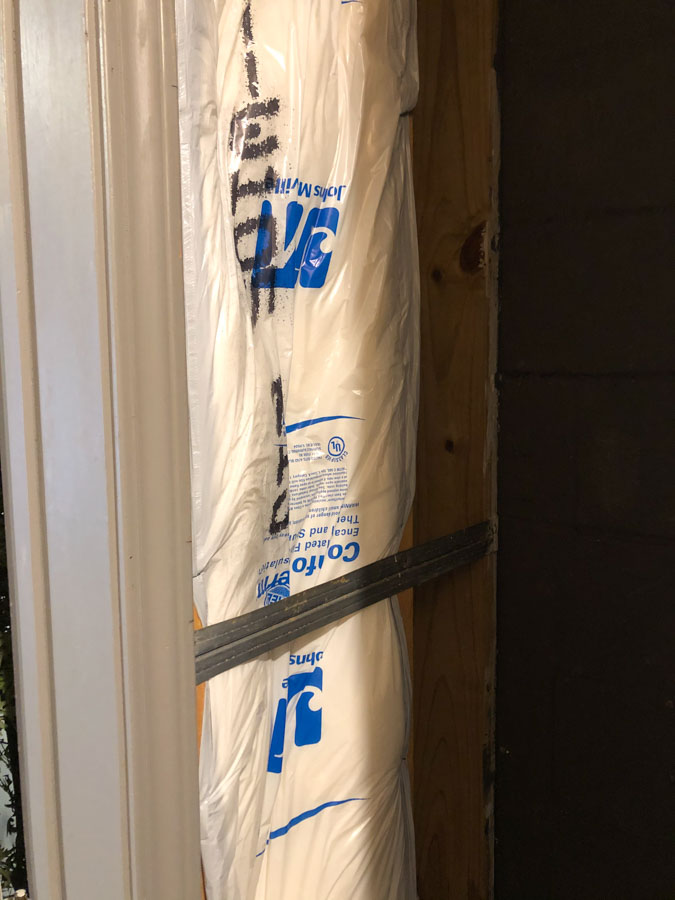
We chose to use insulation that was wrapped in plastic so that we didn’t have to touch the fiberglass when we were installing it. We also added it in the ceiling area where we could.


Step 12: Installing the Ceiling
The ceiling was going to be one of the most prominent features of this room. I like tall ceilings and really wanted to use the overhead space instead of having it be a lower ceiling like the rest of the basement level.
I thought an arched ceiling would be amazing!
We got the idea from a friend of ours who runs a drama club in California after seeing how he built a curved stage. We applied this concept for creating an arched ceiling.
Home improvement stores carry a thin plyboard that has some flexibility and come in 4×8 sheets. We measured it out in 4 sections to meet at the light fixture boxes and cut the pieces.
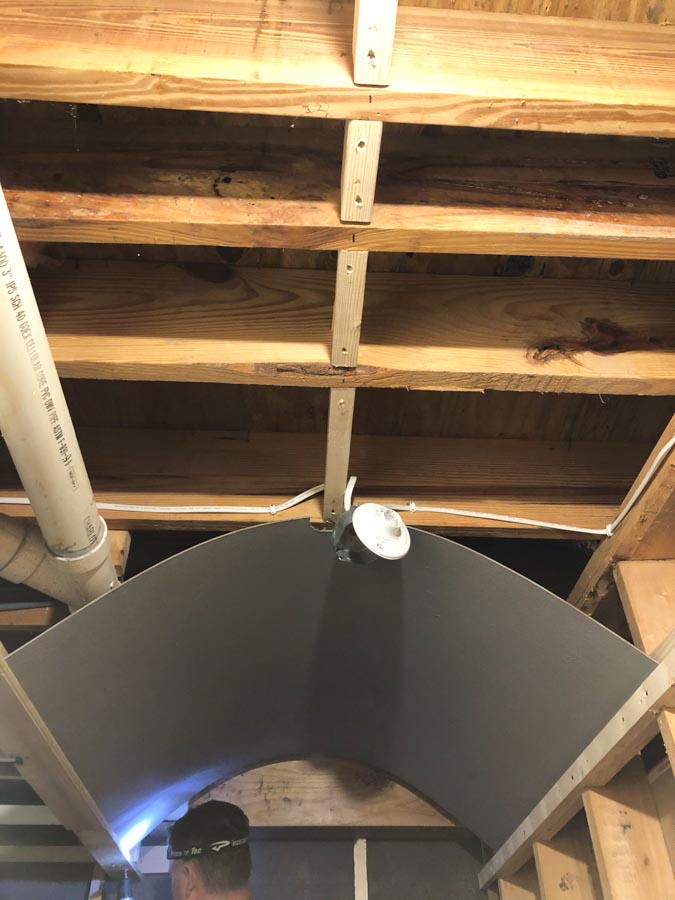
One of the sides of this board is almost like felt and one of the sides is super smooth. One concern since it was in a basement is that we didn’t want any moisture issues where the boards could potentially droop or anything like that. (We live in the south where it’s generally more humid.)
We decided to paint the non smooth side. I chose a gray tone of paint that I thought looked kind of like a Restoration Hardware gray. After painting the softer side, we put the smooth side against the ceiling where it had a better chance as a moisture barrier.
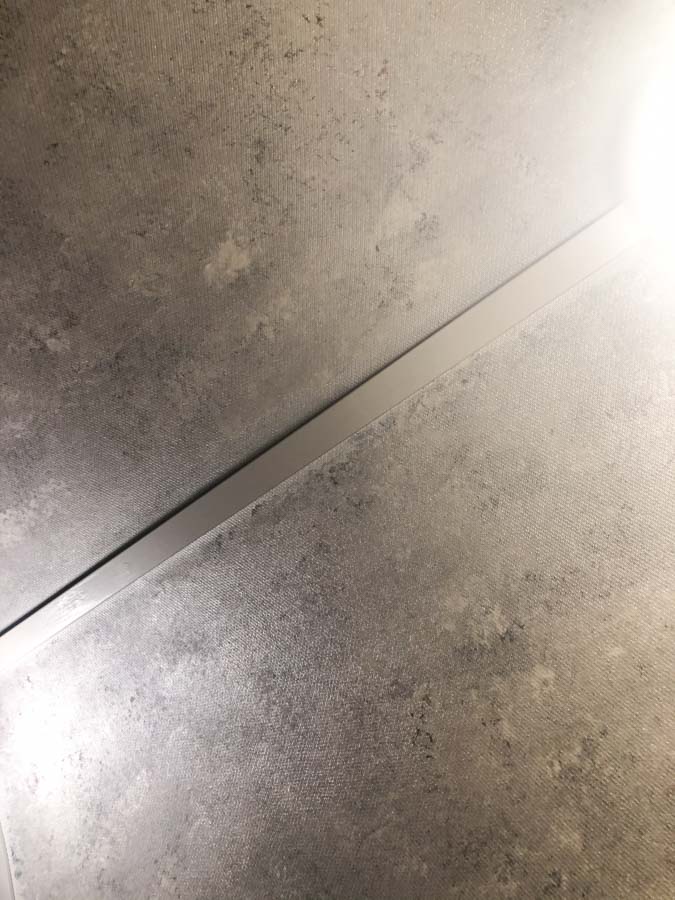
When complete, we used some little plastic style trim boards to go around the edges and seams.

Painting the Trim
Painting the trim pieces while they were right up next to the pallet boards required tape to protect the area. I needed to carefully put the tape around the arched area.
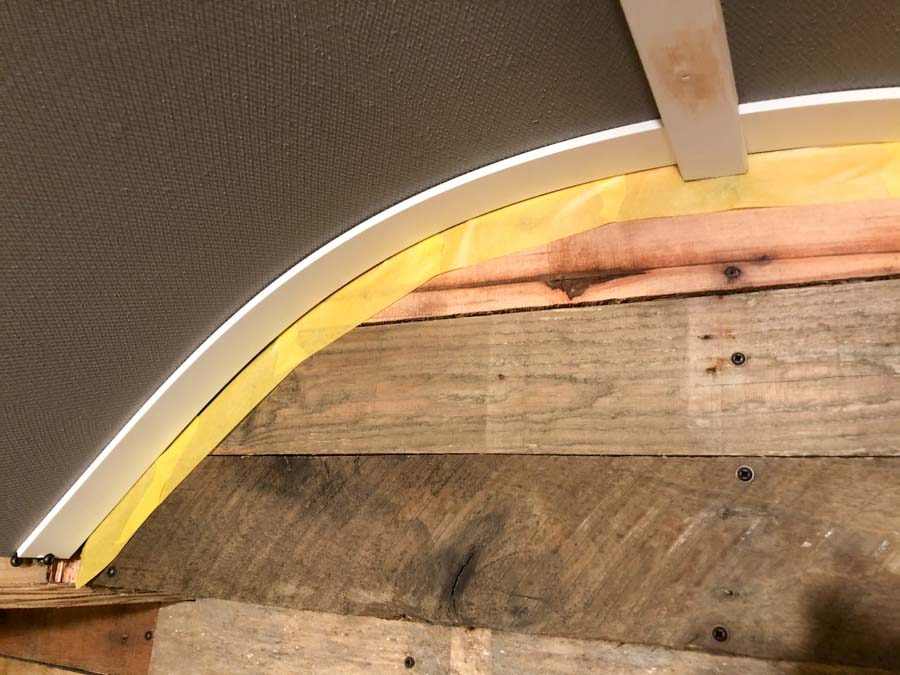
This was a little bit tricky.
I had to tuck parts of the tape up in between the boards and make sure I had a good clean line first. Once painted, and before I peeled the tape off, I first used an exacto knife and cut the tape right up at the edge. This was to ensure a perfect removal without any jigs in my line.
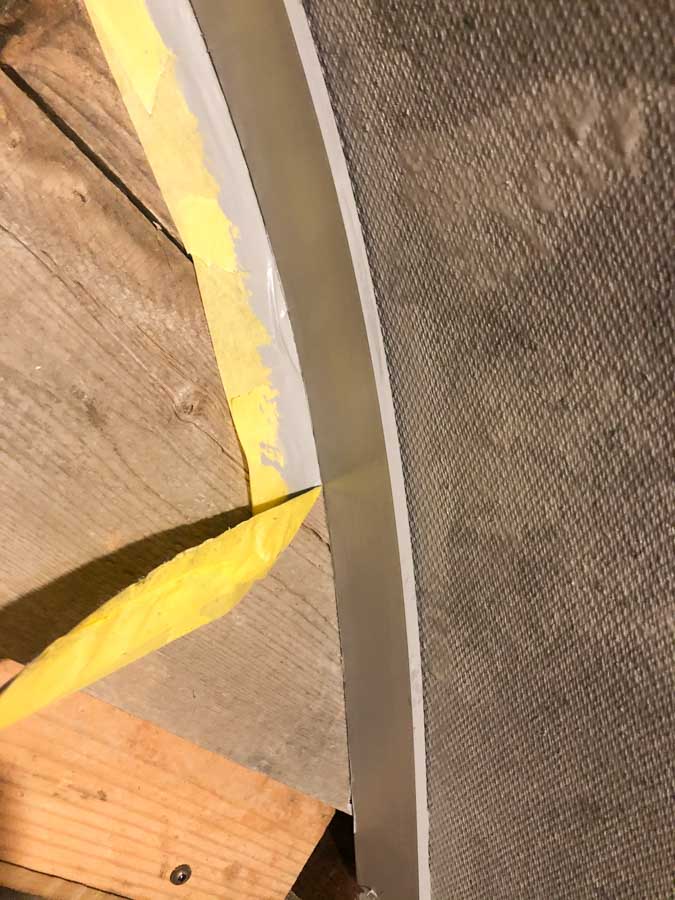
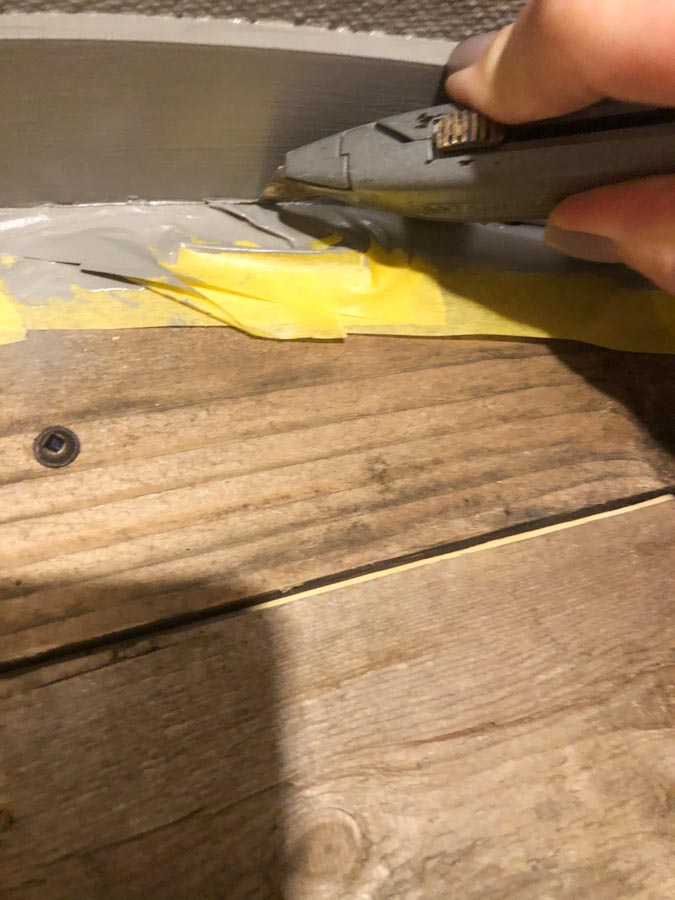
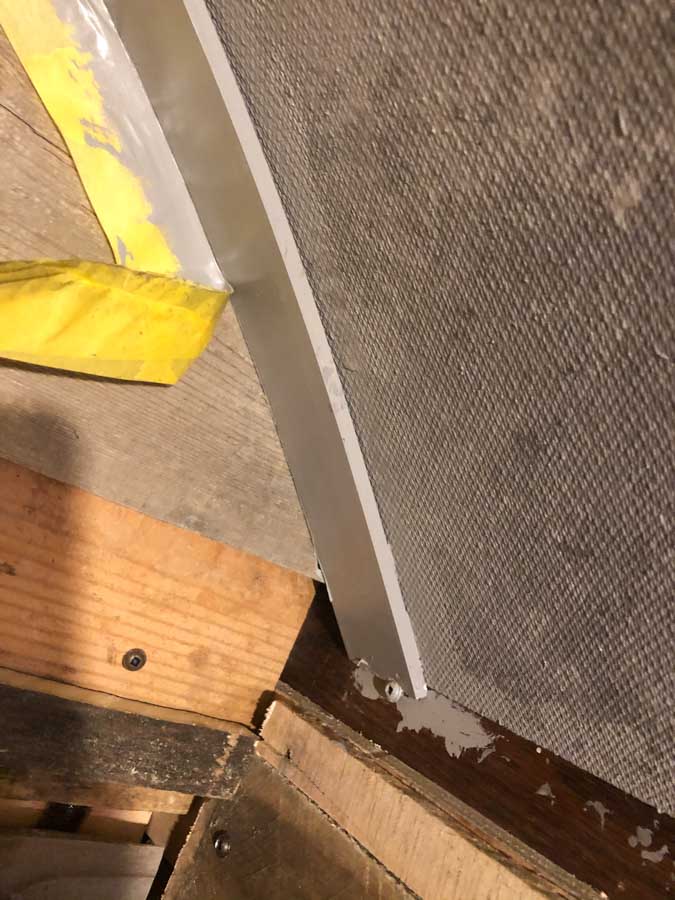
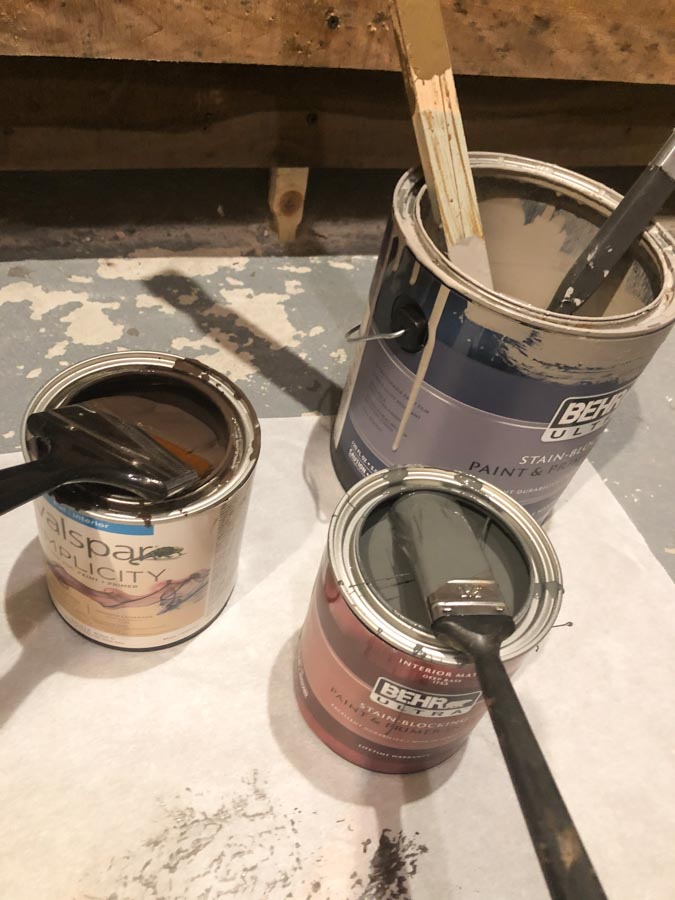
I used the same gray paint for both the arch and the trim, but in the end, my husband thought it was too plain.
So I decided to add some texture to the ceiling.
I pulled out an old fashioned painting tool called a Woolie.
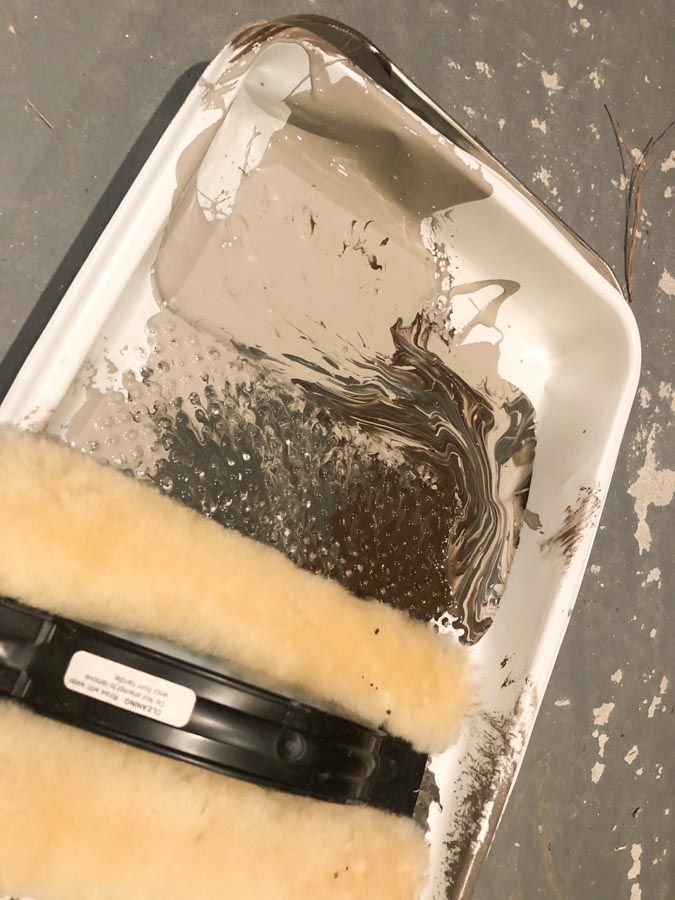
I added a dark brown and a darker gray and basically lightly textured the ceiling avoiding the little trim pieces. I did this until it was decent looking.
Step 13: Organizing the Boards
I first separated the boards by length thinking that was a good way to see what I was working with.
We did a few rows using uneven width boards which left us with some holes we needed to cover. We then needed to find specific sized boards to fit into or go on top of the gaps.
I had liked the idea of having an uneven texture with additional boards protruding from the wall. This prompted us in the first place to try this patchwork style when we first began.

We soon found it MUCH easier to use the same width of the board going the full length of the wall.
This prompted me to re-separate all the boards by the width. They now could be lined up quickly and complete a full row in a fraction of the time without having to find pieces to cover the gaps.
Step 14: Contrasting the Tones and Depths
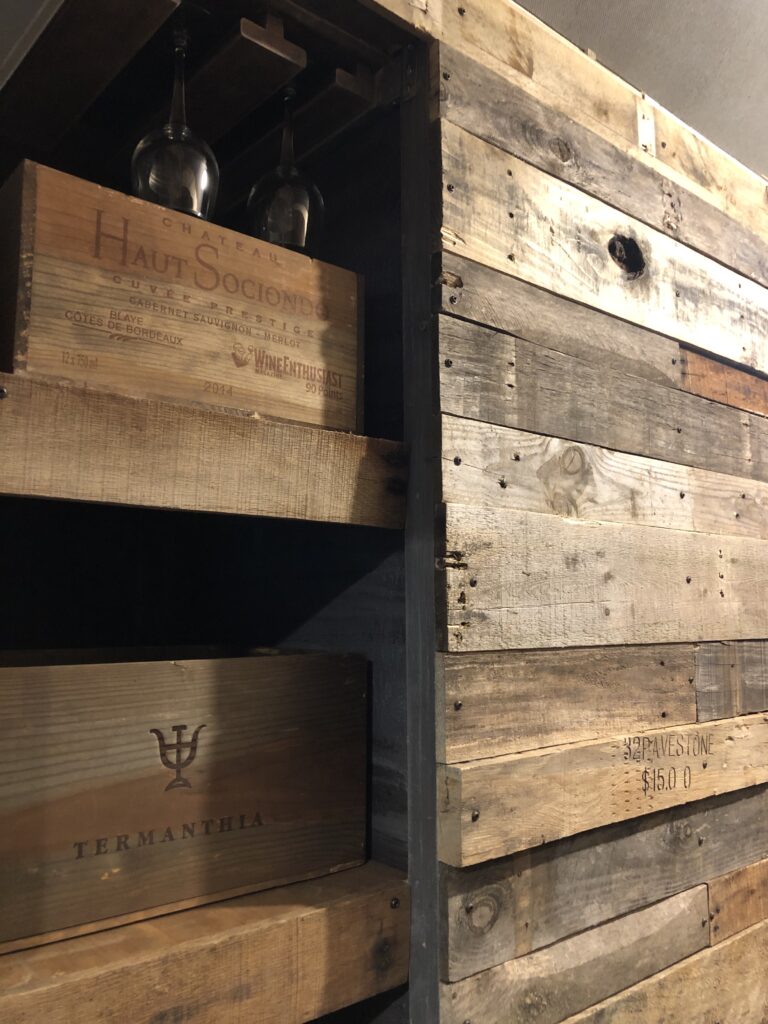
I like the contrast of different color tones of wood as well as different depths sticking out from the wall.
I had seen this done in a few places and really liked the texture of it so we wanted to copy this idea too.
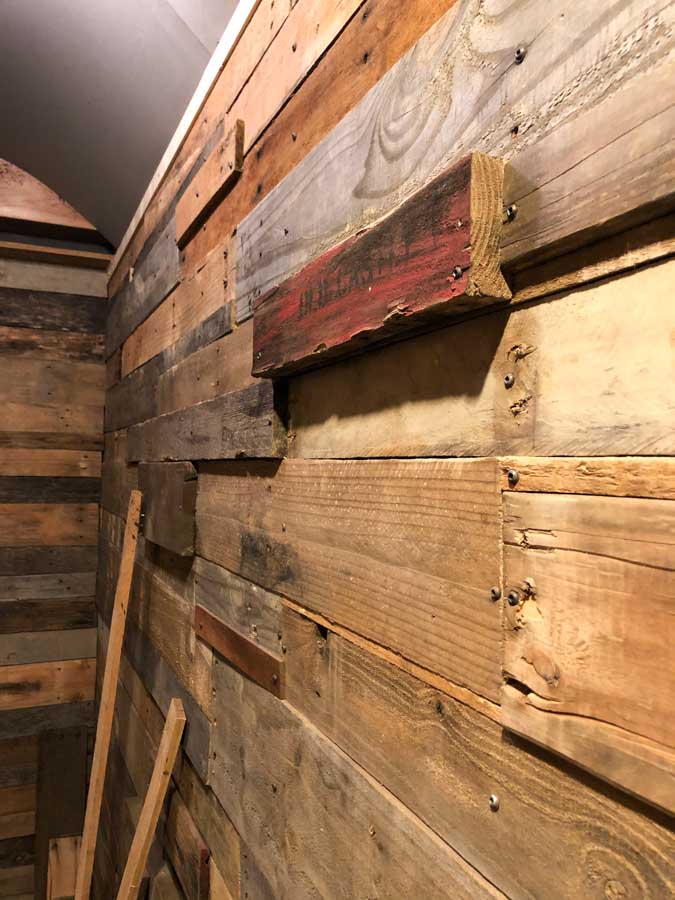
After re-sorting the boards by the width instead of the length I was able to just grab a board of the same width and keep moving along that row. Still varying the textures and depths of wood as we went along.
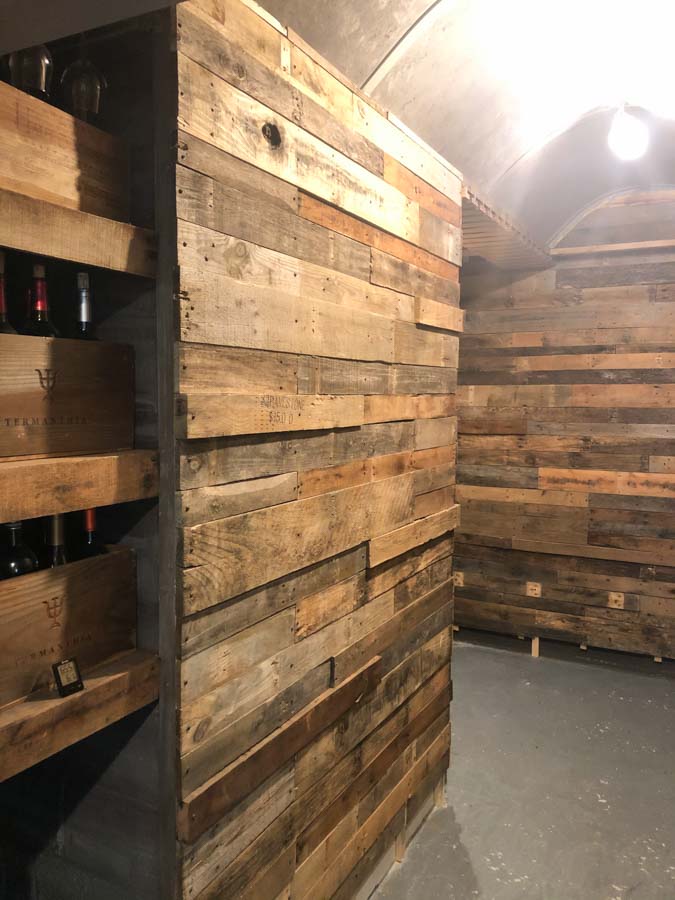
We used different length boards at different starting points so there wasn’t a line going up in any specific spot.

Some of the boards had some paint coloring attached to them, like red, for example, or with writing embossed on it. I definitely wanted that to be visible and thus carefully selected the best sides to have exposed when placing the boards.
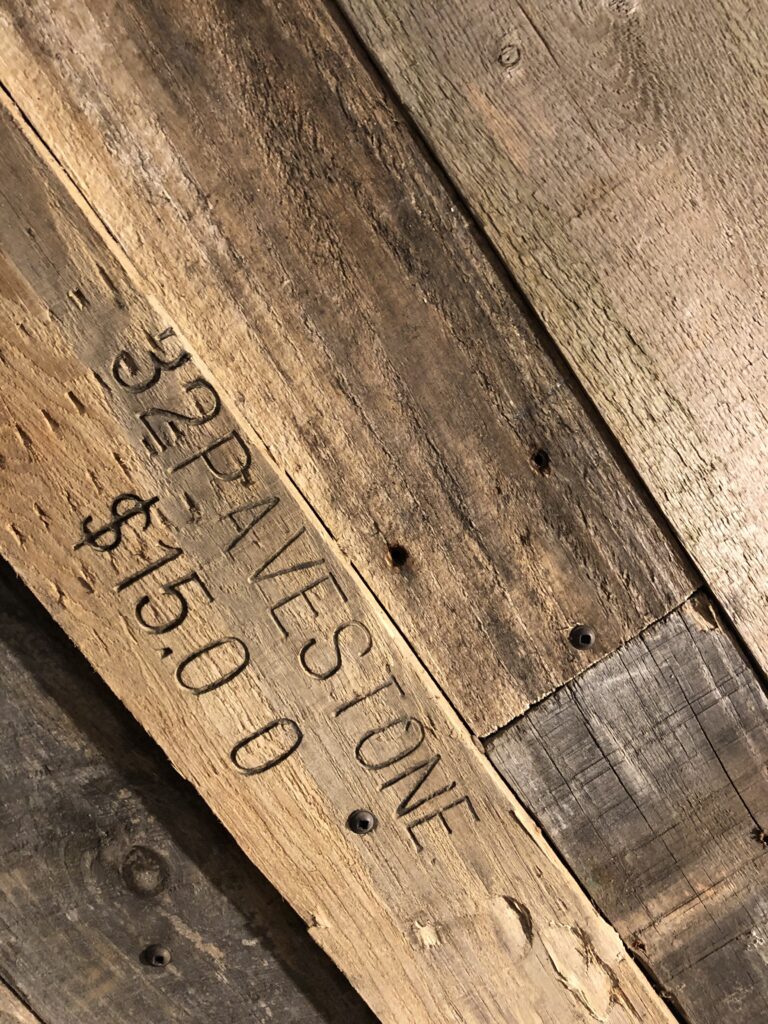
My hubby and I worked as a team with putting these boards up. I would pick a couple of boards, we would measure the needed lengths and he would cut them with his table saw and then put them up.
Step 15: Unseen Cover Ups
One of the walls was painted with a white masonry paint. I didn’t want to see the white underneath if there happened to be a slight gap in the wood pieces.
On these spots, I either did a quick swipe with the darker masonry paint or I tucked a little piece of brown paper bag behind the area. Totally worked!

Step 16: Lining up the Corners
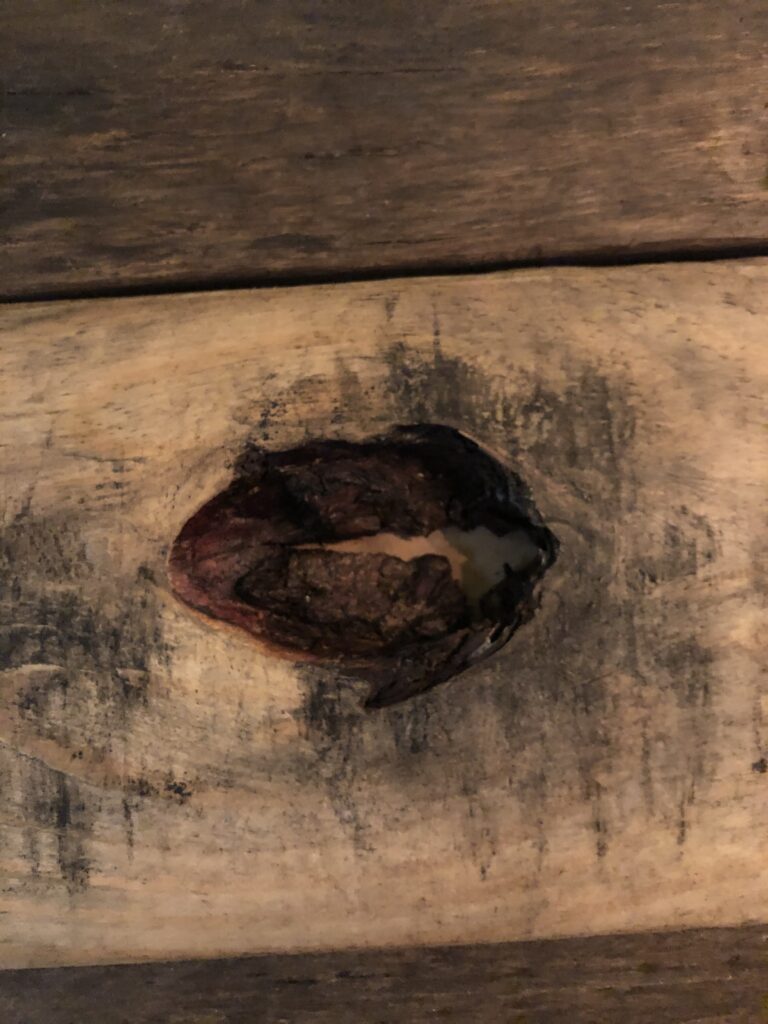
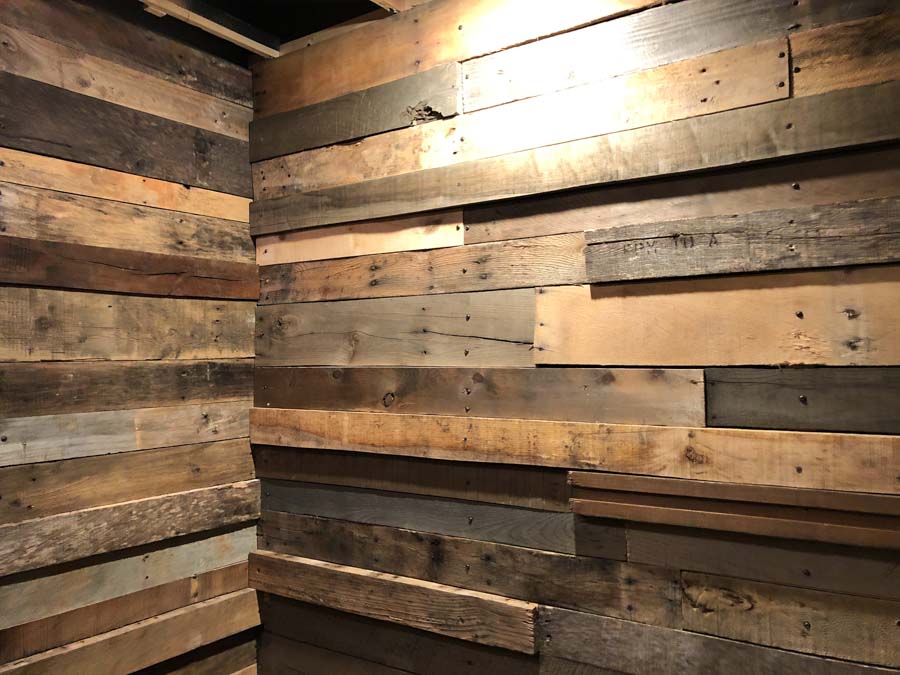
One of my concerns with building the walls was how they would meet on a corner. There were a lot of different options here.
They could meet exactly at a corner or you could have one end of the wall stick out further and have the other and come up to meet it.
Because we were using different widths and depths of boards this would pose some issues with them lining up.
I wanted my hubby to line up the same size width boards on the corners so they would kind of fan out. I think he was tired and so he didn’t do this as meticulously as I would have preferred, but in the end, it’s a rustic room and the imperfect corners still add character.
Step 17: Wine Fridge Area
There was a little space where the room indented and we thought this would be a good spot for a wine fridge.
After installing the electrical outlet, we needed to decide to either cover the walls with more pallets or build shelving.
I didn’t really want to use up all of my pallet boards in this area as it’s not very well seen, so I chose to faux paint it instead, and add shelving.
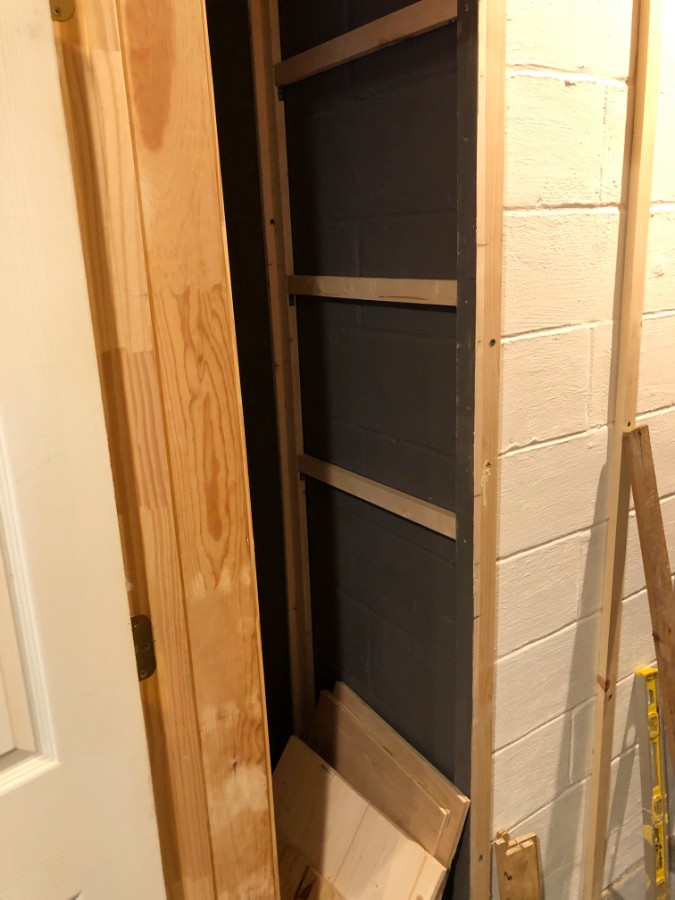
I started by using just the cement paint but visually it looked to plain and unfinished.
I went back over it with some different colors of paint to give it a faux board look. I painted across and even added some pencil lines so it appeared more realistic at a glance.
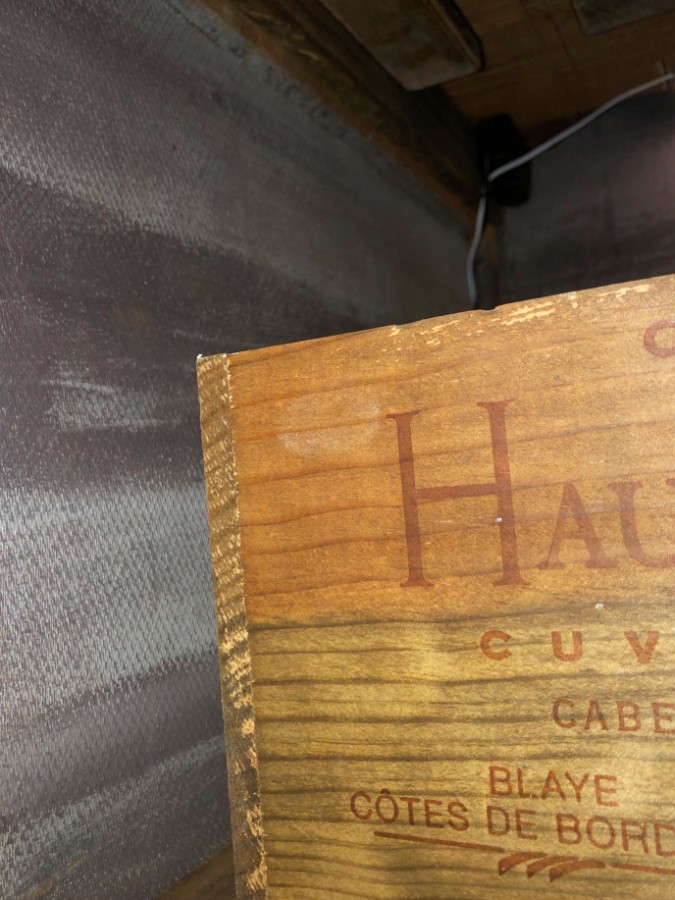
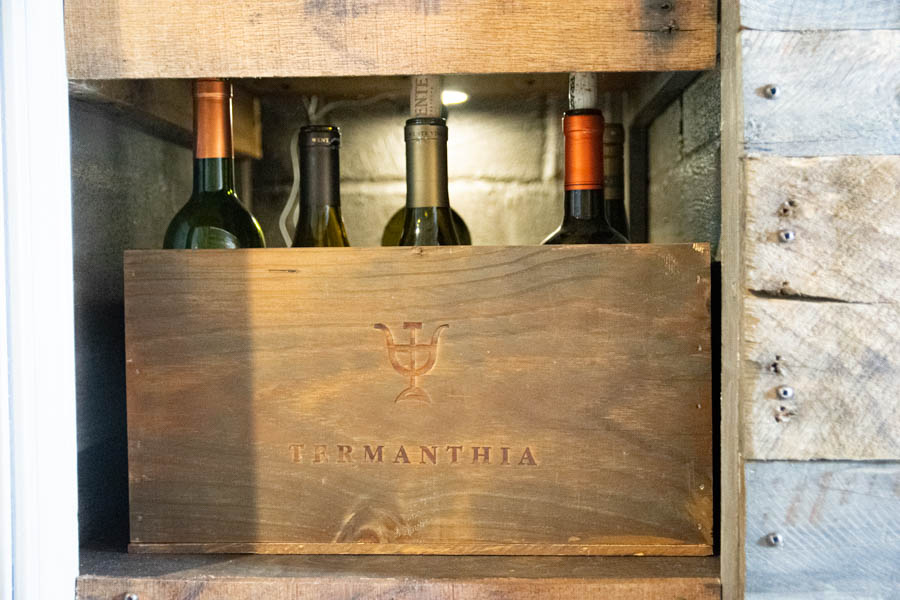
I wanted some shelves to be above the wine fridge to display some wine boxes that I had accrued. These were made out of pine and unfortunately looked new.
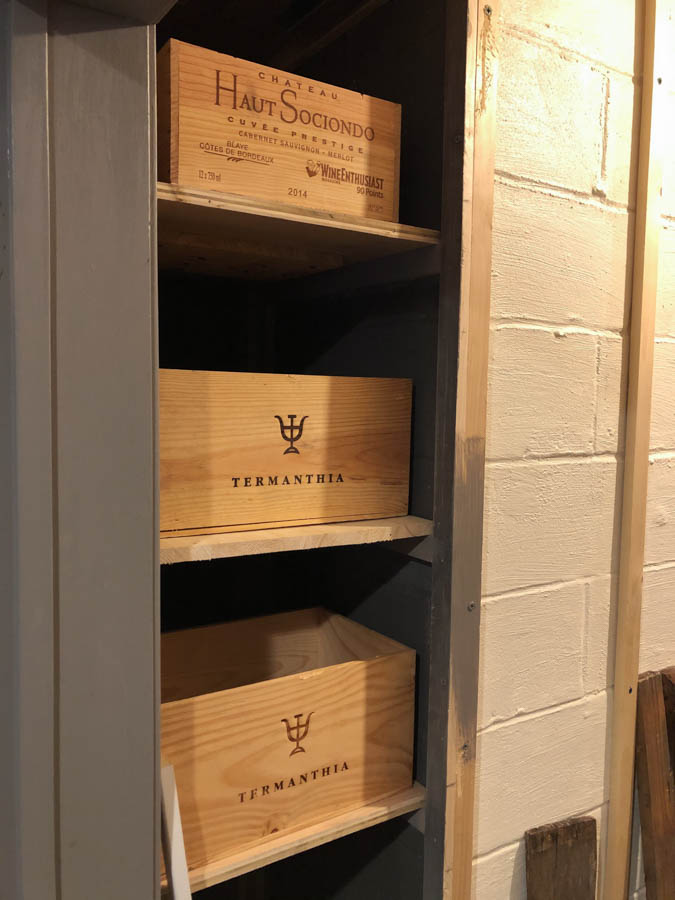
Step 18: Aging Pine Boxes
I decided to age the wood using a steel wool and vinegar technique. I did this so they would blend with the rustic looking pallet wood that I was using in the room.
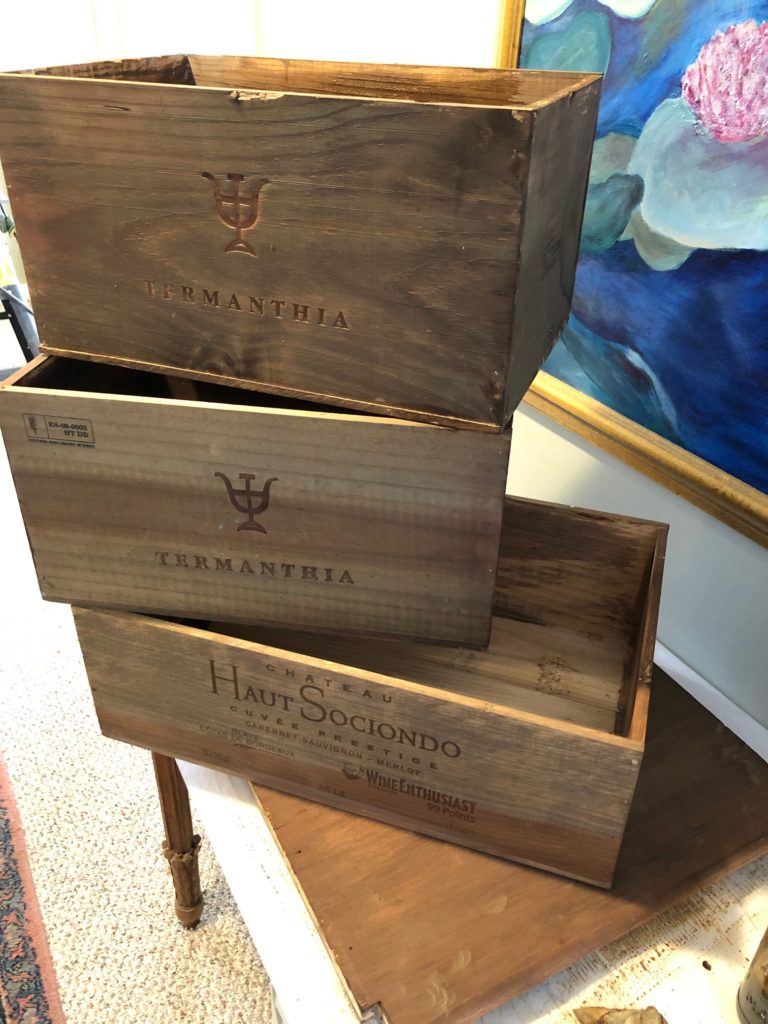
We used scrap wood to make the shelves which I also aged using the above technique. I wanted the whole room to have a rustic flow and aging anything that had a new look made it totally blend to include any fresh cut edges on the boards.
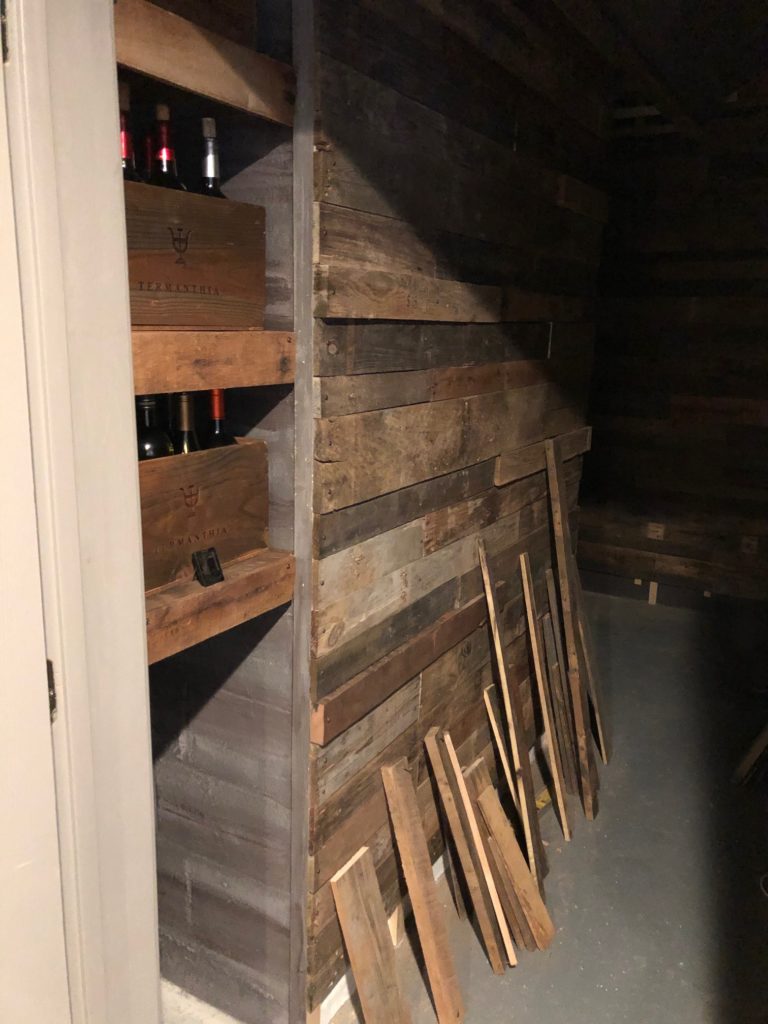
Step 19: Secret Stash
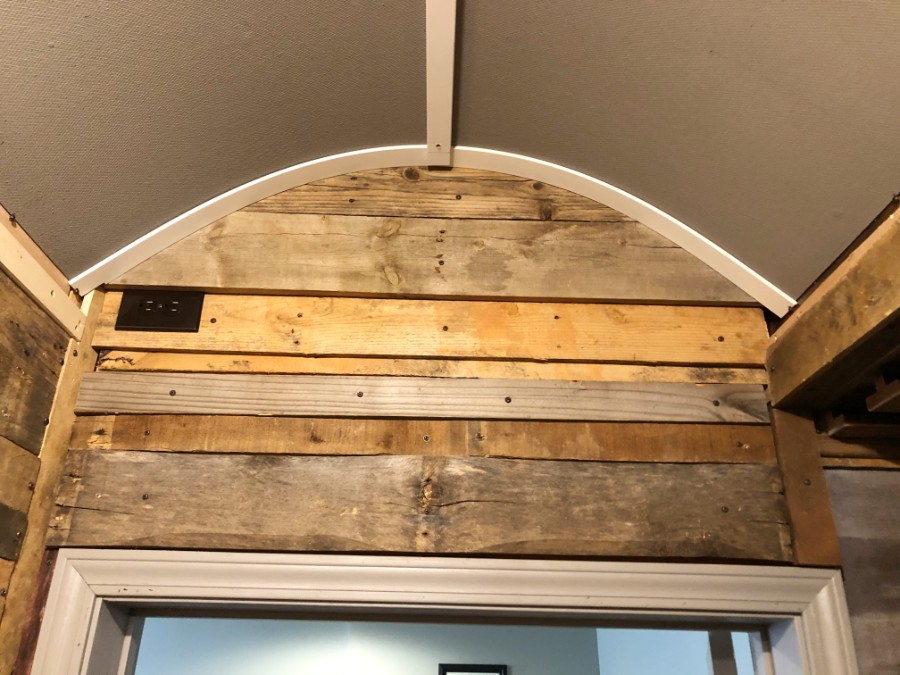
Another thing I thought would be cool was a hidden storage space. I didn’t really have anything to put up here, but it could be a good spot for a little safekeeping.
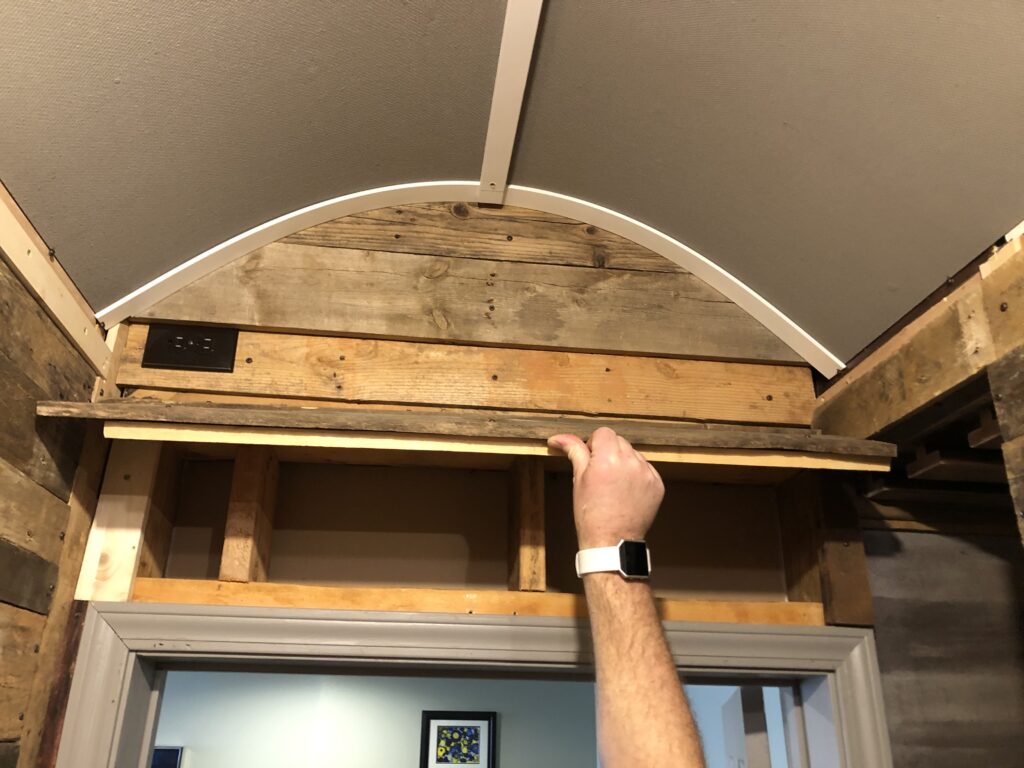
In order for this space to be less visible, the hinges needed to be somewhat hidden. It still needed to easily open with the different sized boards on the sides. This turned out to be a little trickier than I had envisioned, but in the end it turned out great!
Step 20: Wine racks
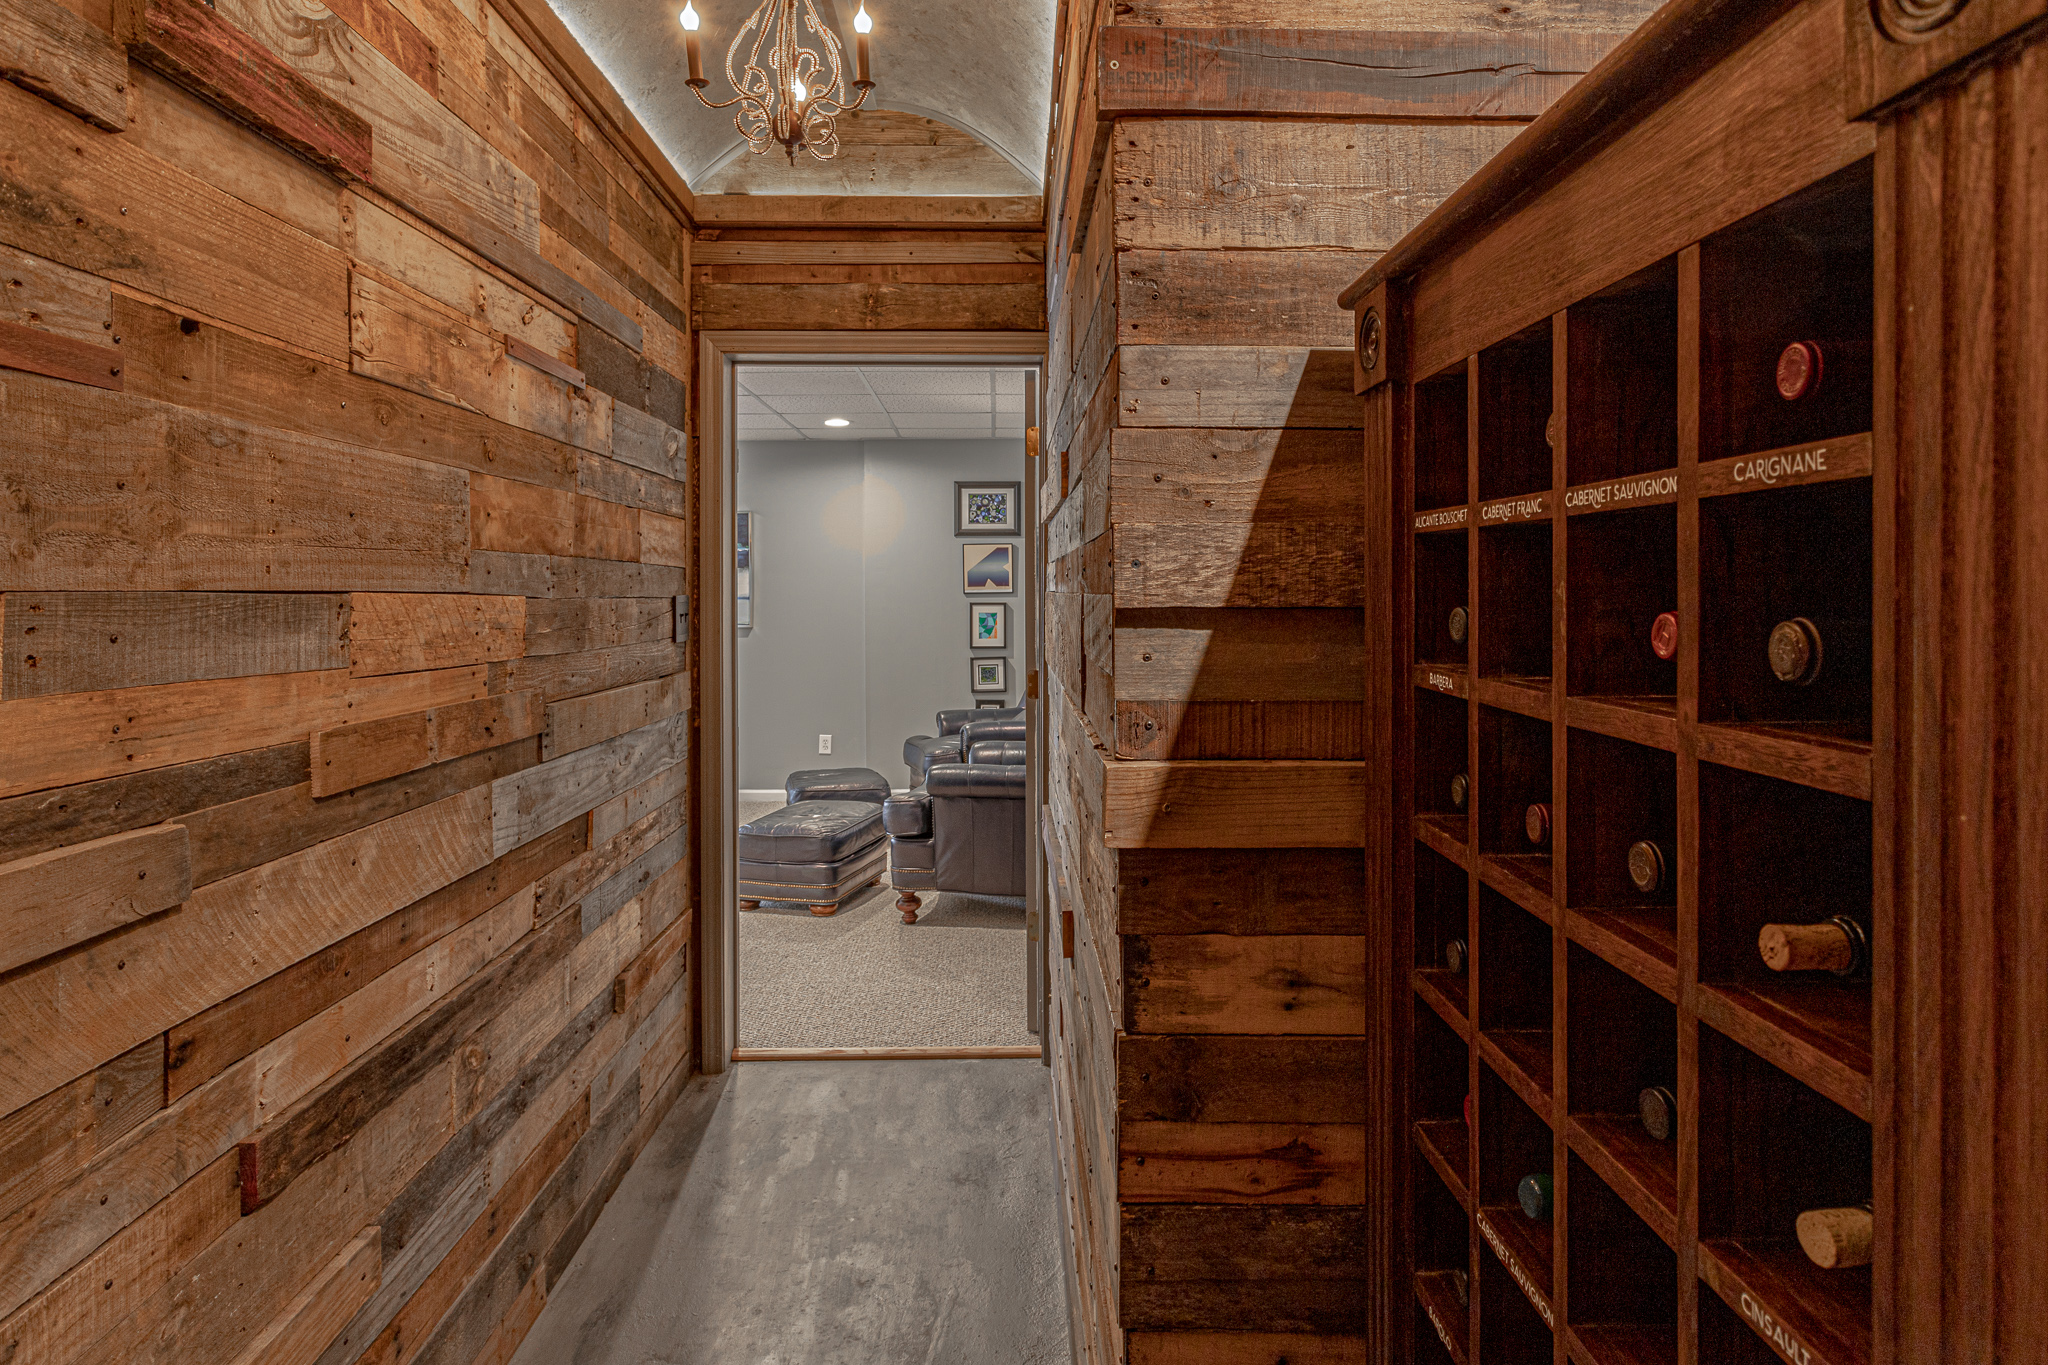
Choosing wine racks did not turn out to be an easy decision. I simply wanted this room done so I was willing to settle with a large Ikea Kallax shelf.
I had also looked at several different types of easy assembly wine racks online. I ended up finding a used bar rack on the Facebook Marketplace and so we decided to purchase this.
It had been used outside in somebody’s little cabana area so it was quite weathered and worn. The polyurethane was cracked throughout and would need to be addressed.
The wood itself was a lovely mahogany so after sanding it down, we expected it to look terrific.
Again, I liked the rustic weathered look so deciding how much refinishing to do needed to be decided upon.
In its current state, it was also too large for my space. So it needed to be cut and separated and made to fit. Deciding how to go about it and which pieces to use required some additional thought.
Step 21: Altering the Wine Racks
This large piece originally hung on a wall with two wine racks separated by an area for a TV. It also had a wine glass holder that hung from the bottom.
My husband started by cutting the wine racks apart from the center piece. One of the areas that made this a little more tricky is that it had trim work going around the top outer edge of the entire piece, leaving the inner side of the wine racks with no trim.
In order for the wine racks to look like a stand alone piece, he needed to match the trim around the top. I think he did a great job using our existing supplies to make it look original.
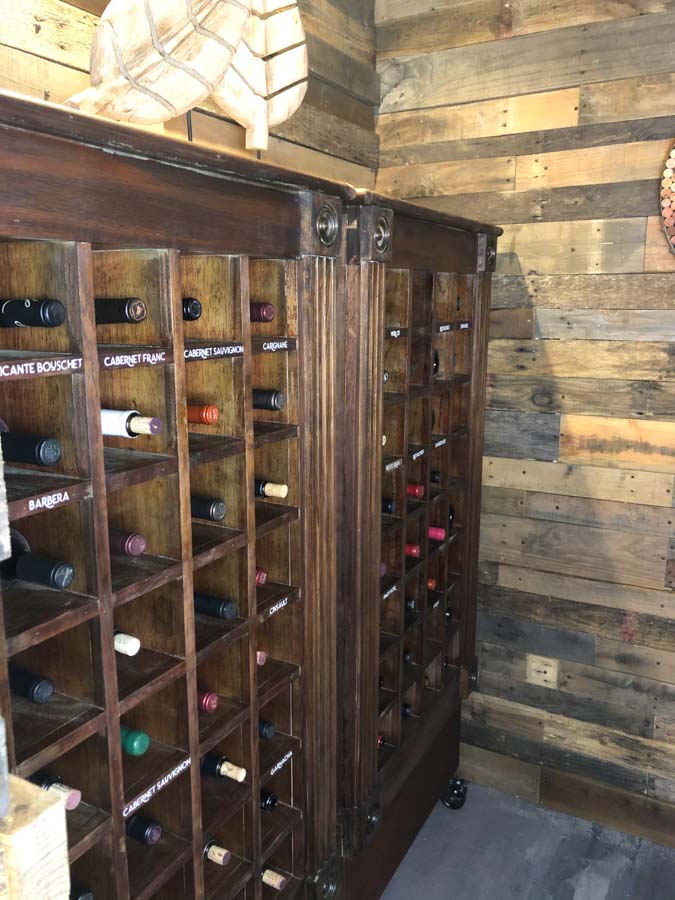
We were at a little bit of an impasse on the heights of these racks. My husband wanted them to stand at about eye level. Currently the height stood at about 52 inches.
I wanted to be able to keep these racks for my future home, knowing that I would have to eventually move, so I wanted to add caster wheels for mobility, instead of building them into the house. The caster wheels however, would only add an additional 4 inches.
We looked at a variety of caster wheels as we wanted something that looked more old-fashioned. We finally found some that fit the look, strength, and price point we were willing to spend on Amazon.
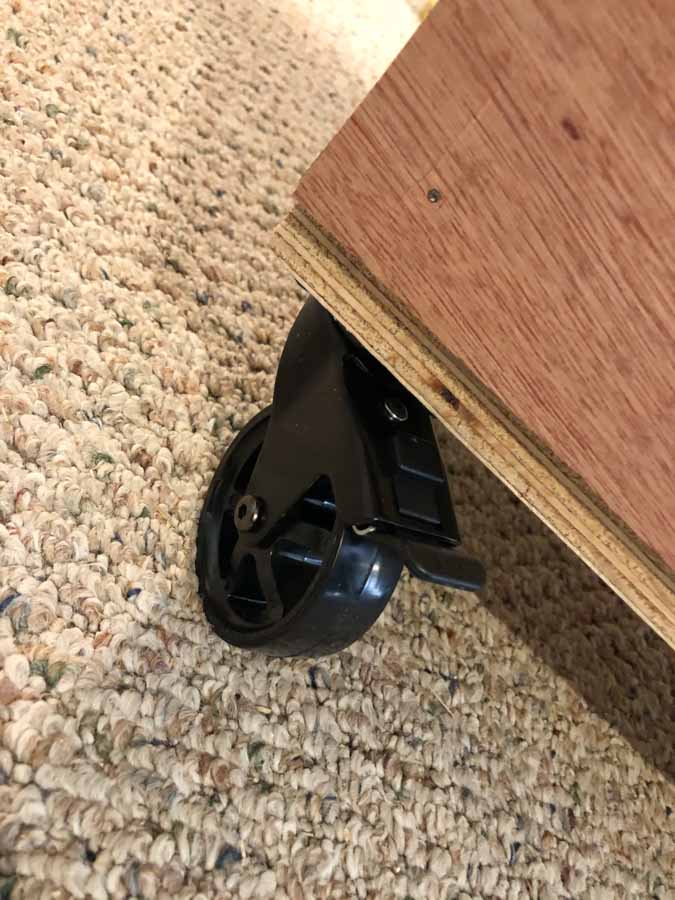
Knowing that they would be holding an excessive amount of weight also played into our choice. These were a little more expensive but at the end of the day, I’ll be keeping them for a long time.
Step 22: Building a Base
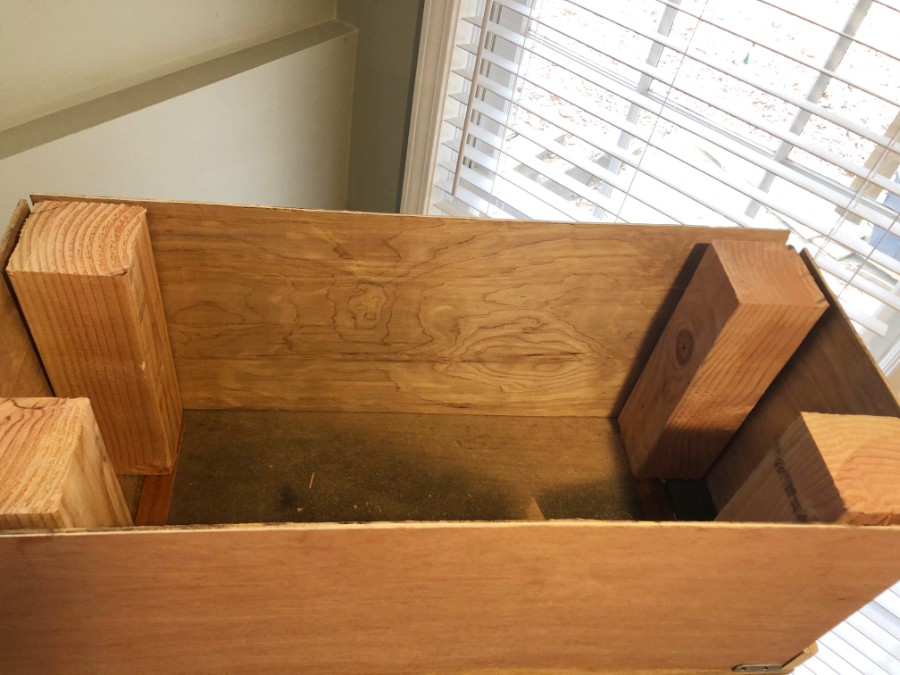
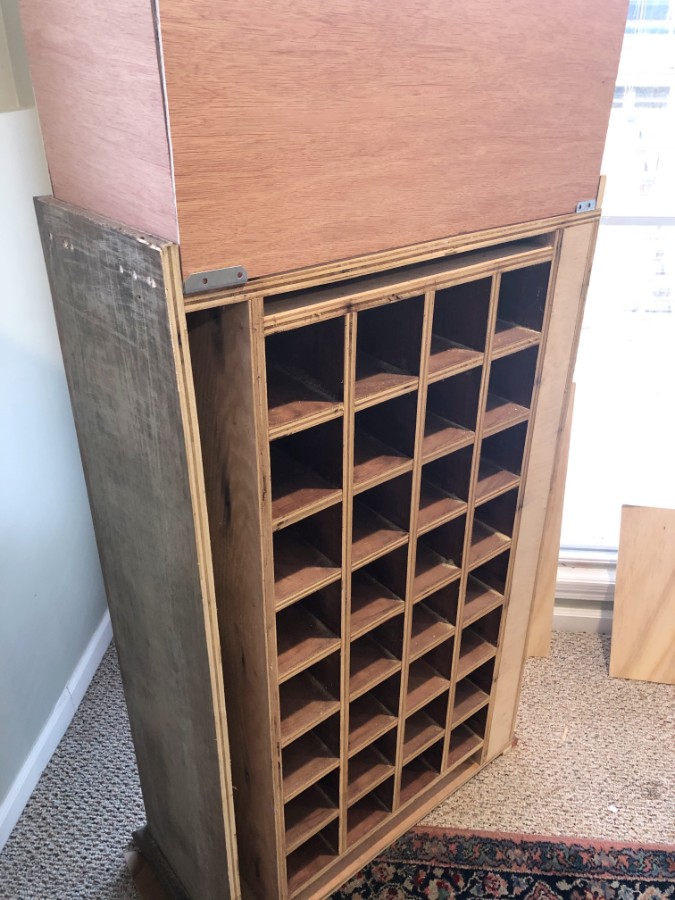
Adding the 4-inch height with the wheels was still not sufficient for my husband. He wanted it considerably taller so he went about building a base.
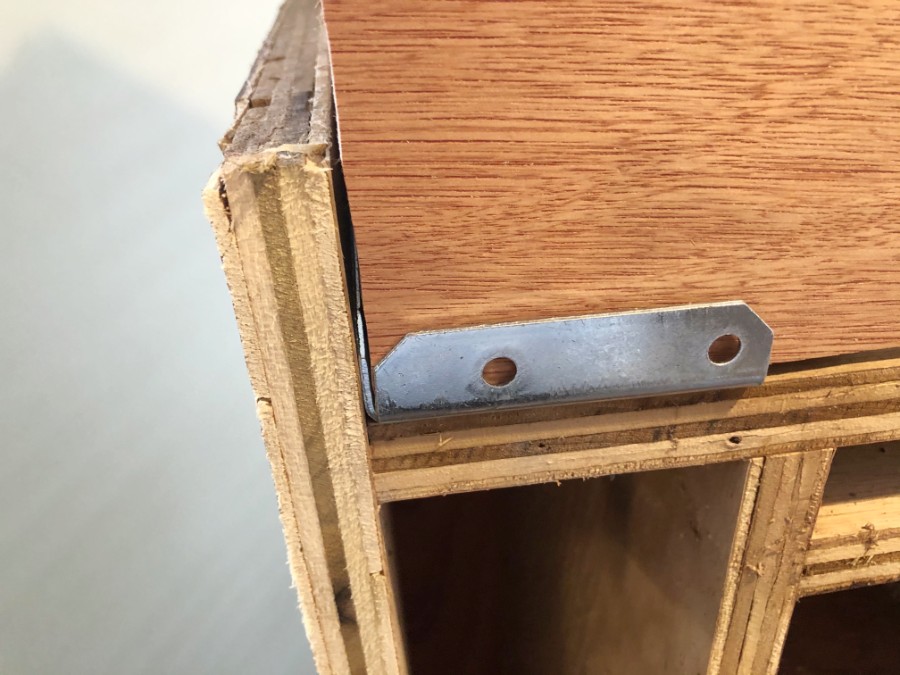
Because the base was going to be holding a significant amount of weight, he needed it to be quite strong. He ended up using corner mount triangle metal pieces along with four by fours and framed it all in with a mahogany plyboard. Eventually we will add a small piece of moulding at the seam.

Step 23: Sanding and Staining
As the wine racks had been out in the elements, they were quite weathered and needed to be sanded and stained. I used an electric sander at first and then used a sponge style in between the grooves.
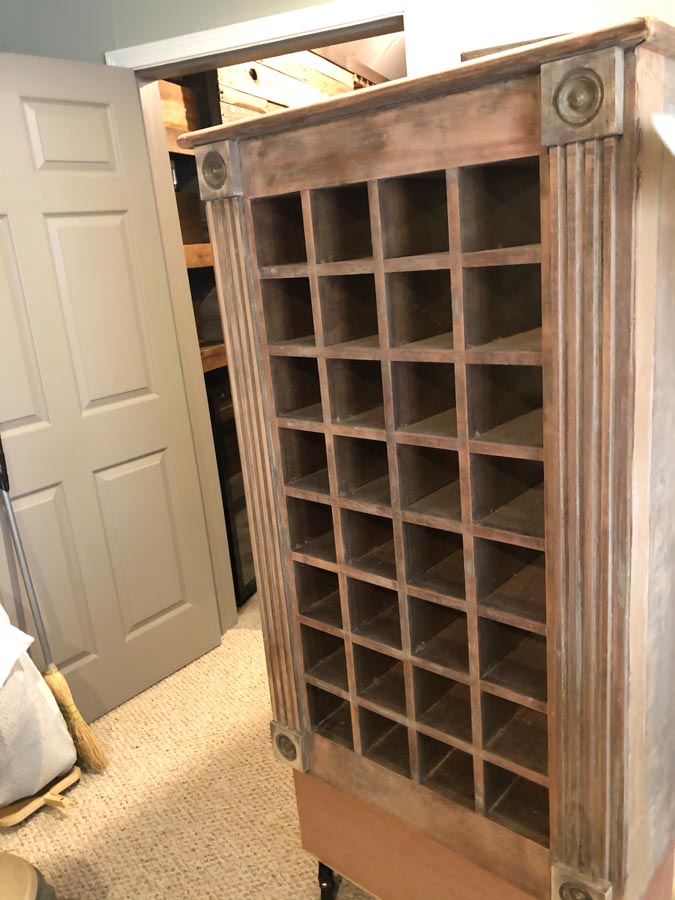
I wanted the new wood that was added at the base to match the existing racks closer in color.
In addition, glue had been used on the sides of the racks and when they were separated, the area where the glue was, pulled the veneer away. This first had to be filled in with a wood filler and stained which as you can see did not absorb the stain evenly.
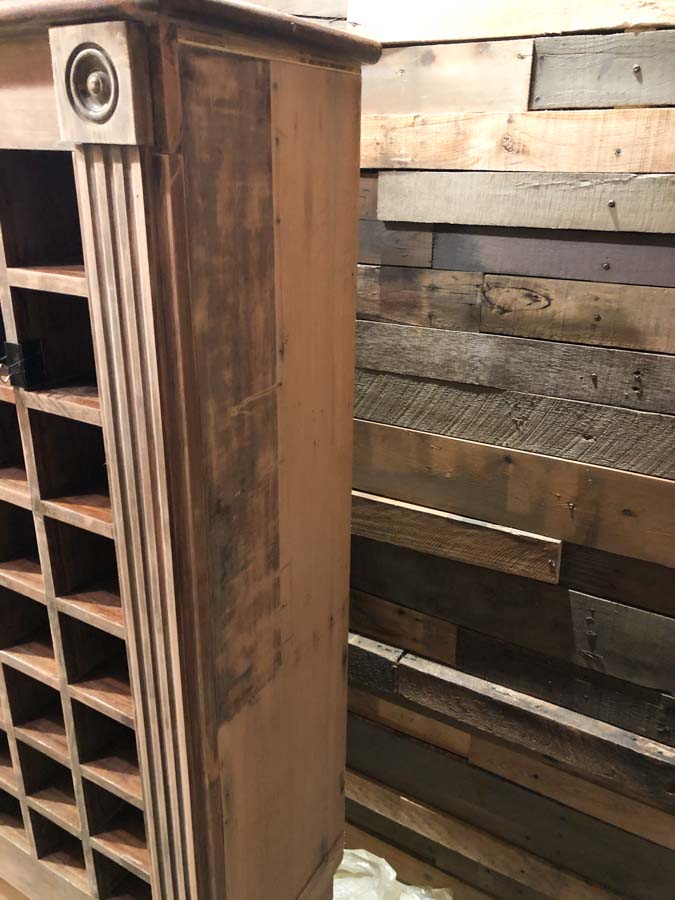
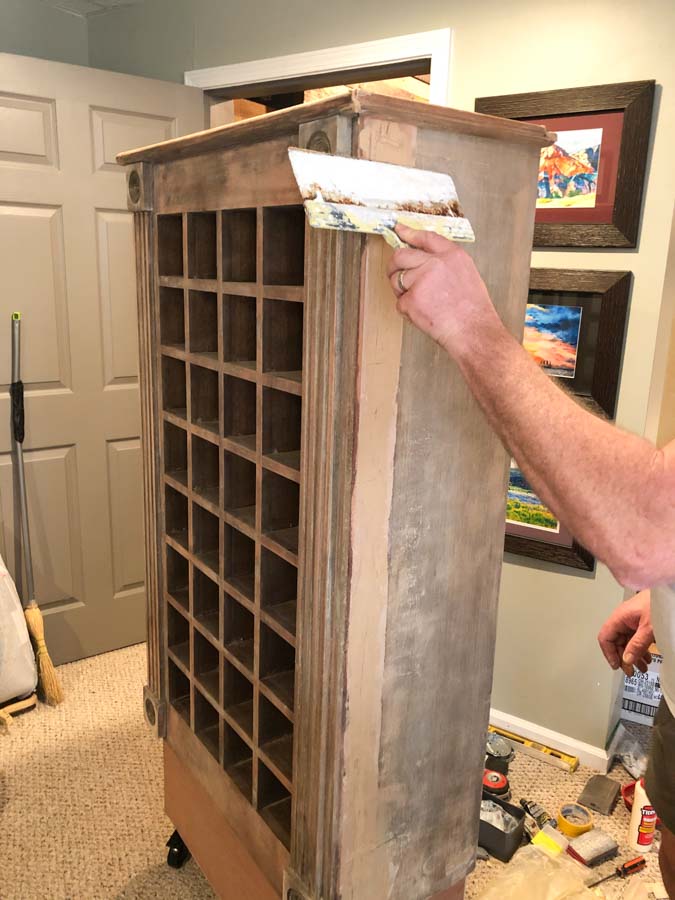
Again they’re rustic racks that will be in a rustic room, so basically it just adds character. Plus the sides of the racks are not very visible.

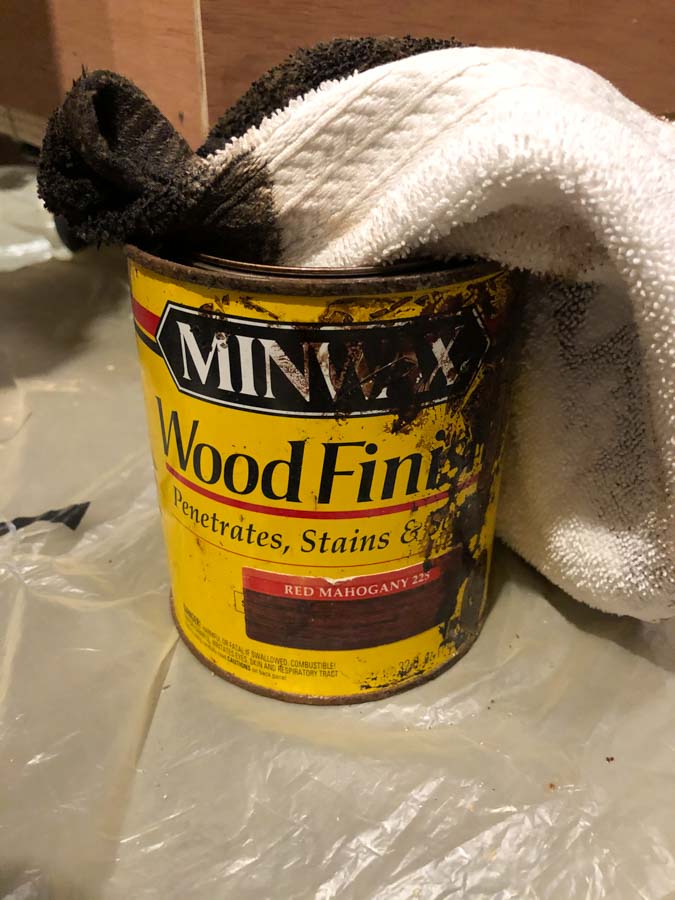
I went over the entire racks with mahogany stain to blend them. As you can see it turned out beautifully. We still plan to add some additional molding but for now we just needed to finish this project.
Step 24: Finding More Pallets
Originally I was going to leave the wall behind the wine racks just painted and hang a picture there. Once I saw the area I thought we really should just finish this room.
I knew my hubby really didn’t want to do all this extra work.
I think I was originally willing to forego the wall as I was trying to make it less work for him, but in the end it wouldn’t look as nice as it would if it were completed.
He agreed to complete all of the walls. He, of course, needed to add additional framework to attach the boards to first.
Because we had come close to running out of pallet boards we needed to go and find more. As Lowe’s was close by, we ended up calling and asking them if they had any pallets sitting around and if so, could we have some. They said sure! Come on over and take what you want.
When we went to pick them up, they did not have very many that looked weathered. I thought let’s just get the best pallets we can with varying woods and I will age them the way I did the pine boxes earlier.

Step 25: Aging the Boards
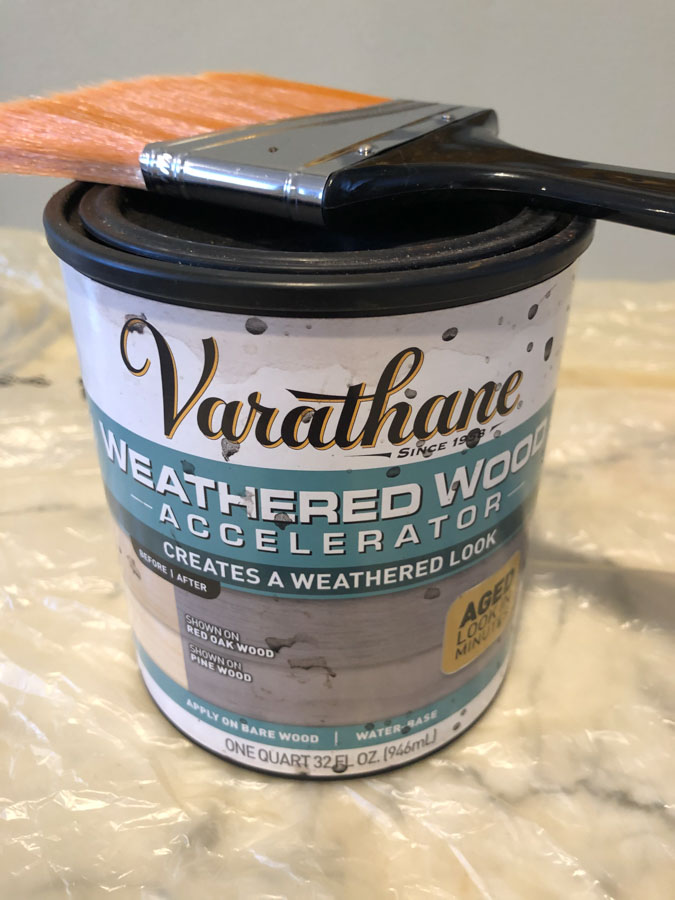
I needed to age these boards and so I used a couple of different techniques this time. I used both the steel wool / vinegar blend and Varathane Weathered Wood stain in hopes of having instant weathering in different tones.
I was trying to do it quicker this time and still have some variance in tone so I added different amounts of vinegar to my existing rust blend and applied it to different boards in hopes of giving different hues.
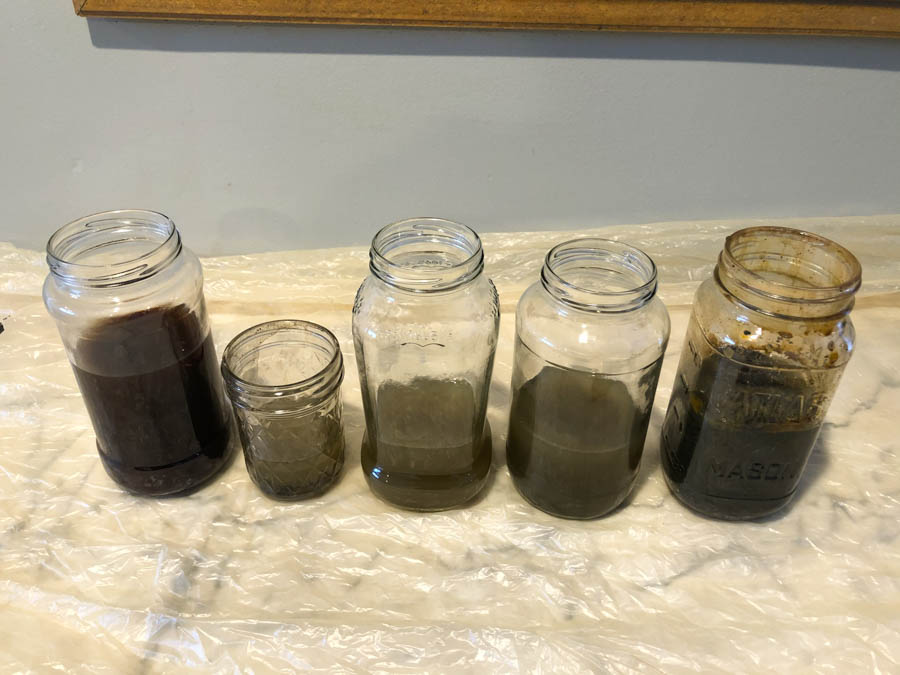
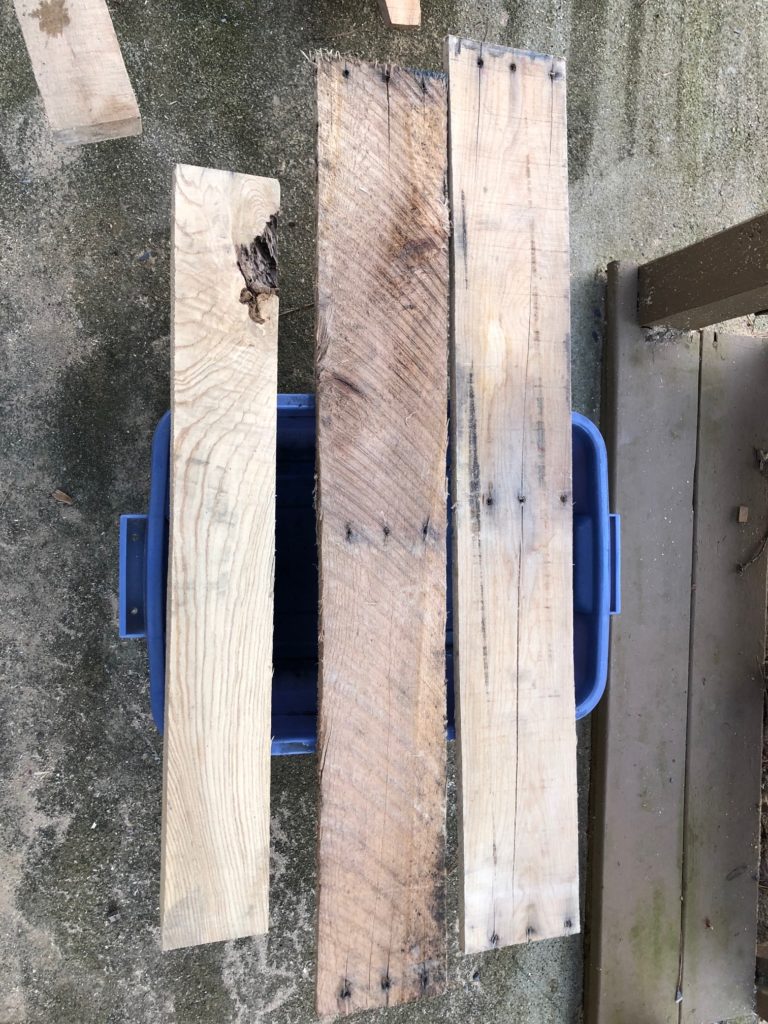

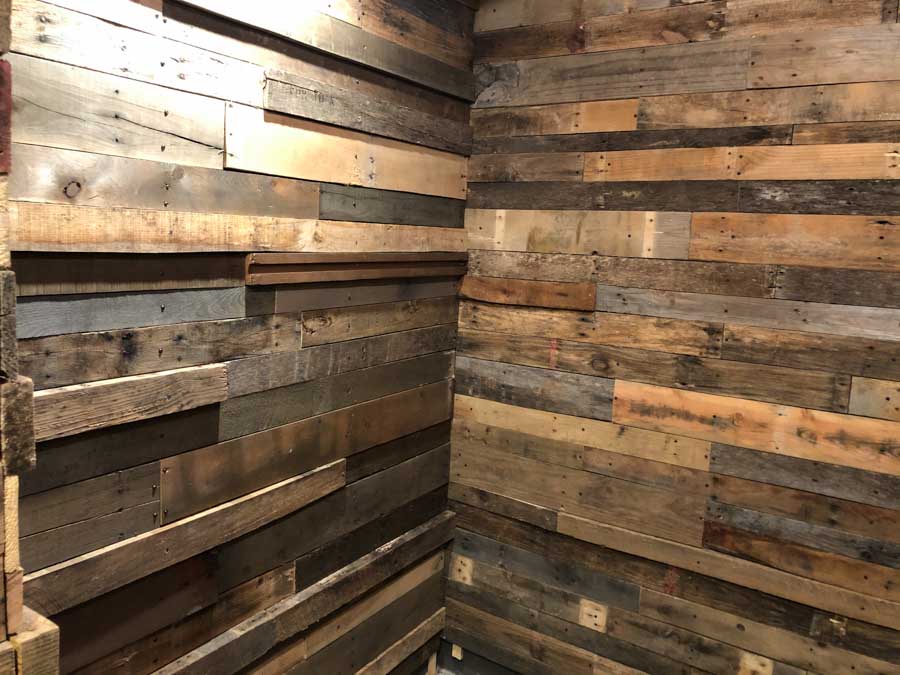
The boards aged well and came out in many different tones. I think they blended well with the previously aged boards. I cannot really see a difference between the old aged pallet boards and the boards that I aged myself. Yay!
Step 25: Building a Trapdoor
We needed to build a trap door for the clean out drain. We wanted it to not be obvious and yet have enough space if a technician or plumber needed to get in there that they could. My hubby used the same technique as the secret door. I think it looks pretty incognito.


Step 26: The Ceiling Above the Racks
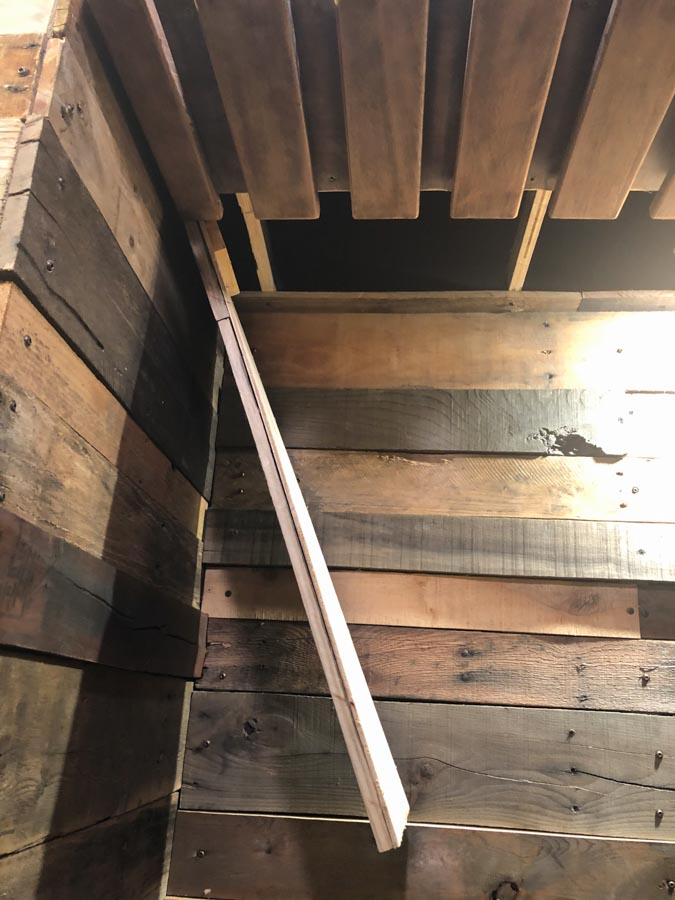
There is a little space above the wine racks that is not part of the arched ceiling. This is next to the trap door for the clean out drain and needed to be completed to blend with the rest of the room.
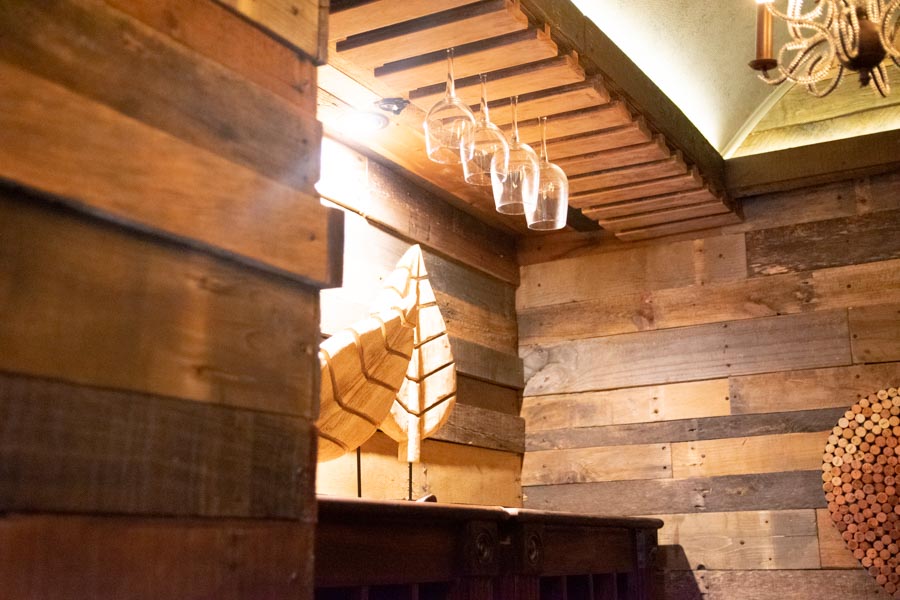
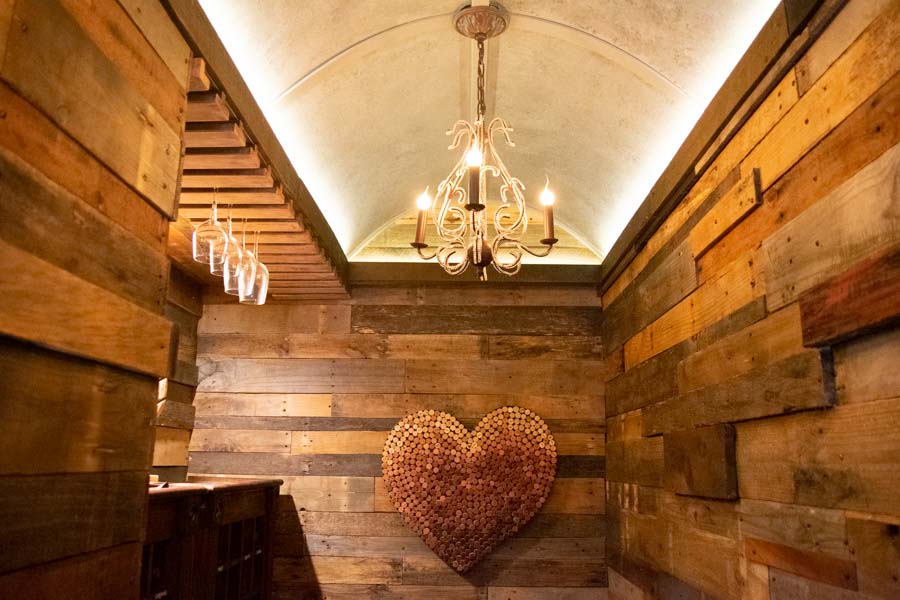
The outdoor bar that we purchased came with racks for glasses that were at the very bottom of the wine racks. We removed these and decided to use it for part of our ceiling above the wine rack area. This was more for a decorative purpose than a functional purpose as they’re quite high up.
Anyway they’re made of lovely mahogany wood and I added a couple of glasses in there anyway just for fun.

Step 27: Labeling the Wine Racks
Once these wine racks were ready to put in place, I wanted to alphabetize my existing wines and basically have enough space for my favorite varietals.
I made labels with my daughter-in-law Cata using the Cricut Joy. Her website is DaydreamIntoReality.com where she gives many tutorials on how to use the Cricut if you’d like to learn more.
We printed them out and put them on using an EasyPress Mini. Basically a tiny little iron. Sometimes the letters didn’t come out perfectly and we needed to redo them.

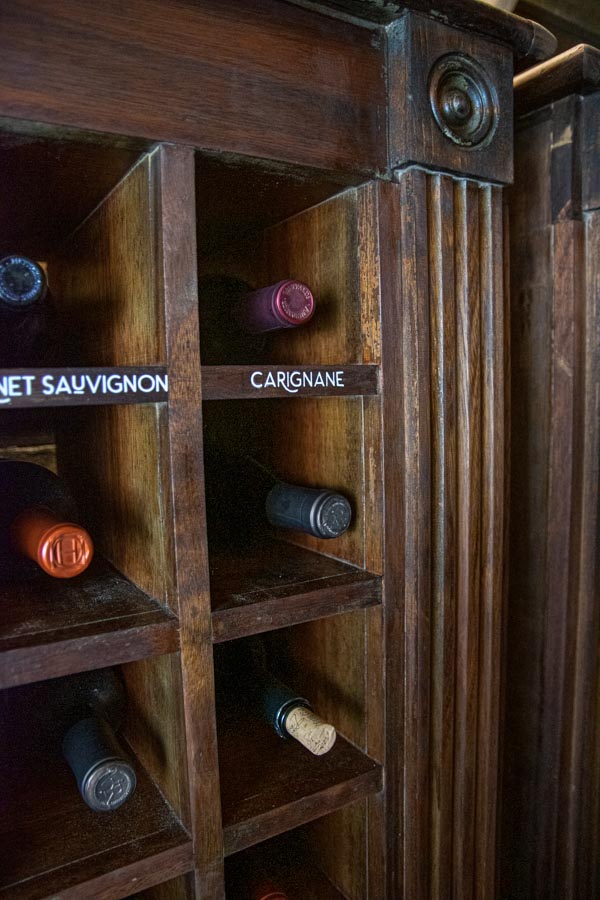
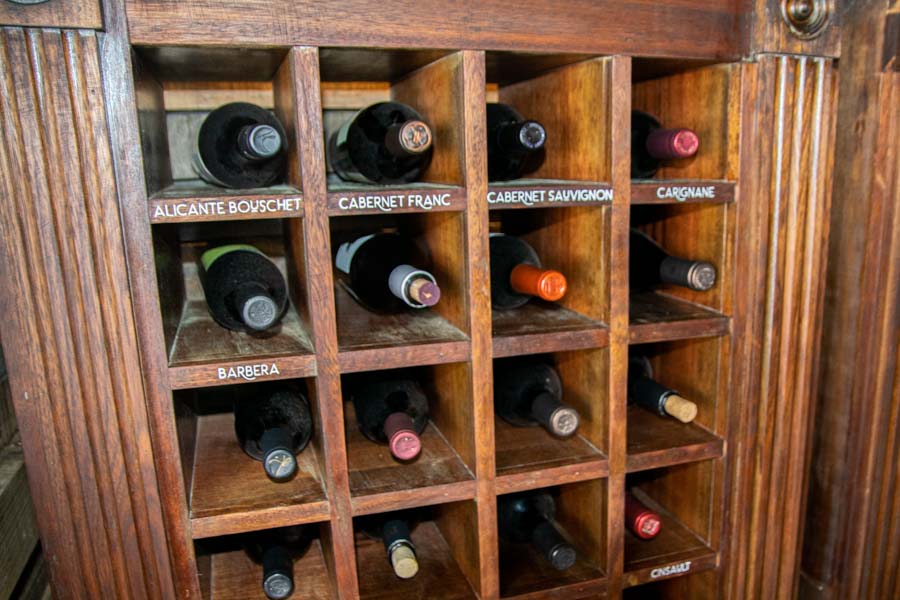
I would recommend you wipe down the woodwork that you stained with alcohol to have better adherence before you add the lettering.
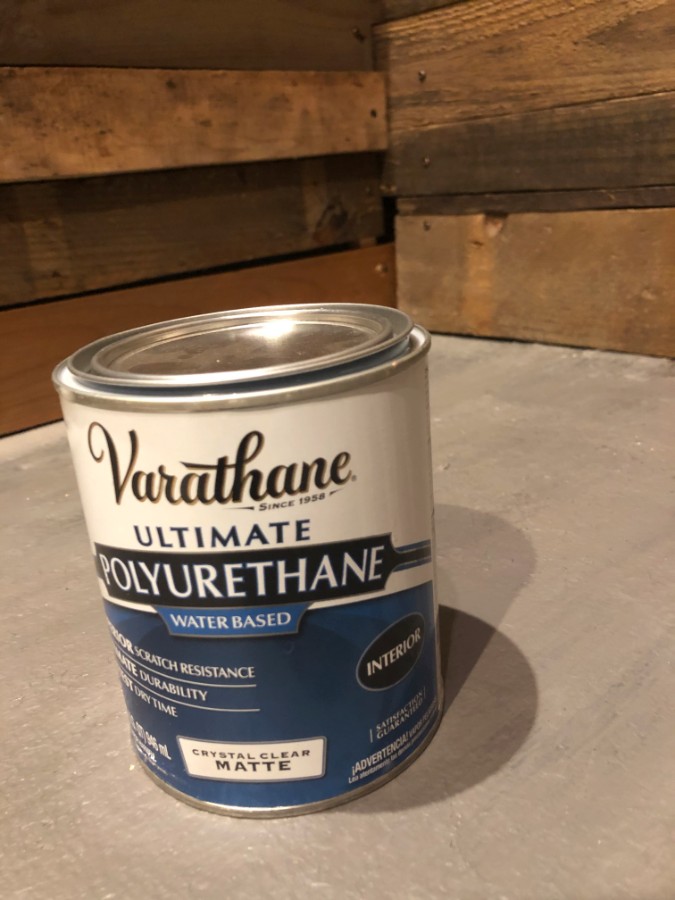
Also recommend going over them with a matte polyurethane to keep them in place.
Step 28: Lighting
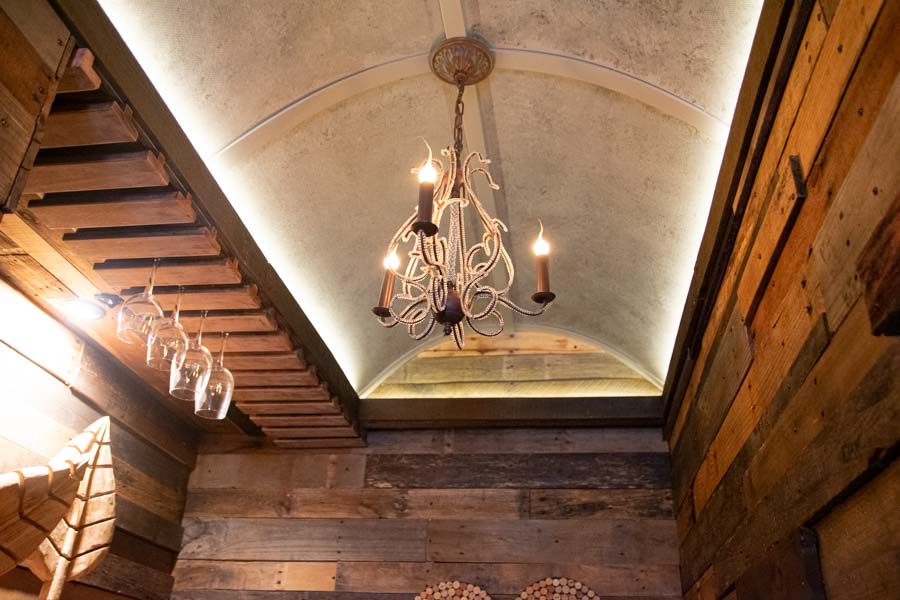
As discussed before, my hubby wanted to add recessed rope lighting around the arched ceiling in addition to the old chandeliers we were going to repurpose.
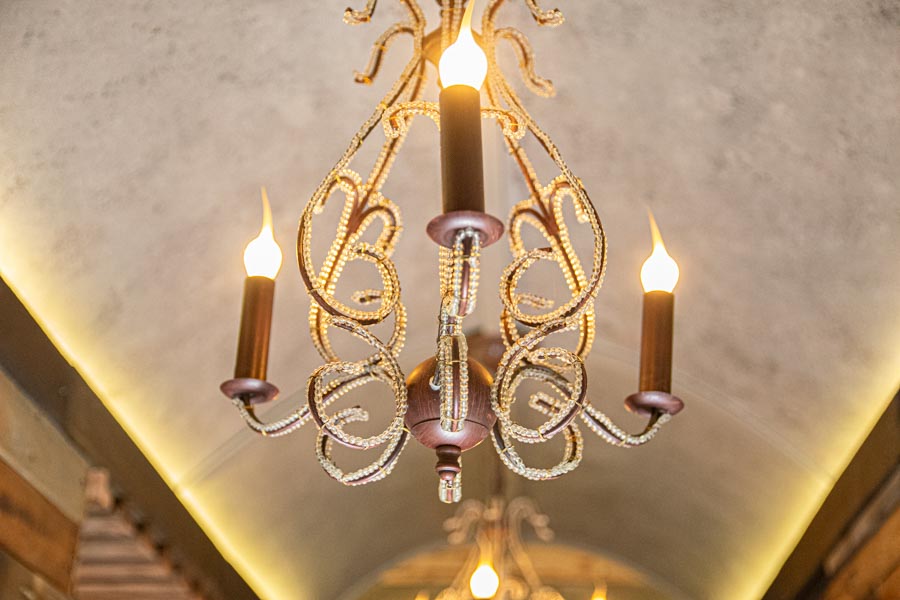
The old chandeliers I have owned for many years. They were full of beading, dangles and glass plates and needed some serious updating. I still felt they could be a good fit for this room so I set forth to start eliminating the extras.
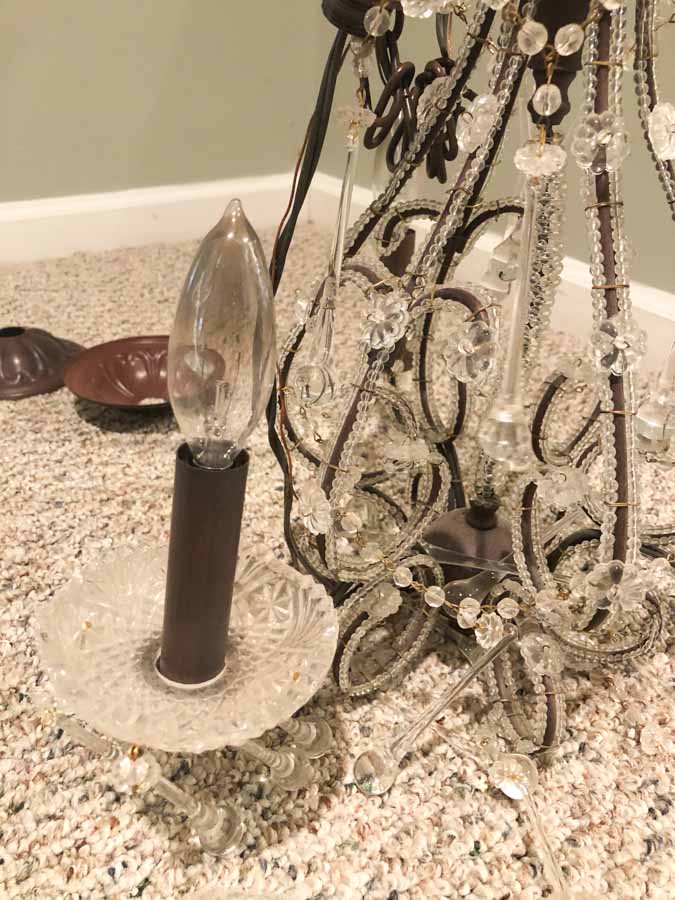
Basically I needed to remove some of the old-fashioned parts and give them a more modern look. I chose to remove a lot of the hanging beads and the little flower shaped glass pieces as I thought they looked quite dated. I used a wire cutter and removed a lot of these little pieces, then I gave it a good cleaning.
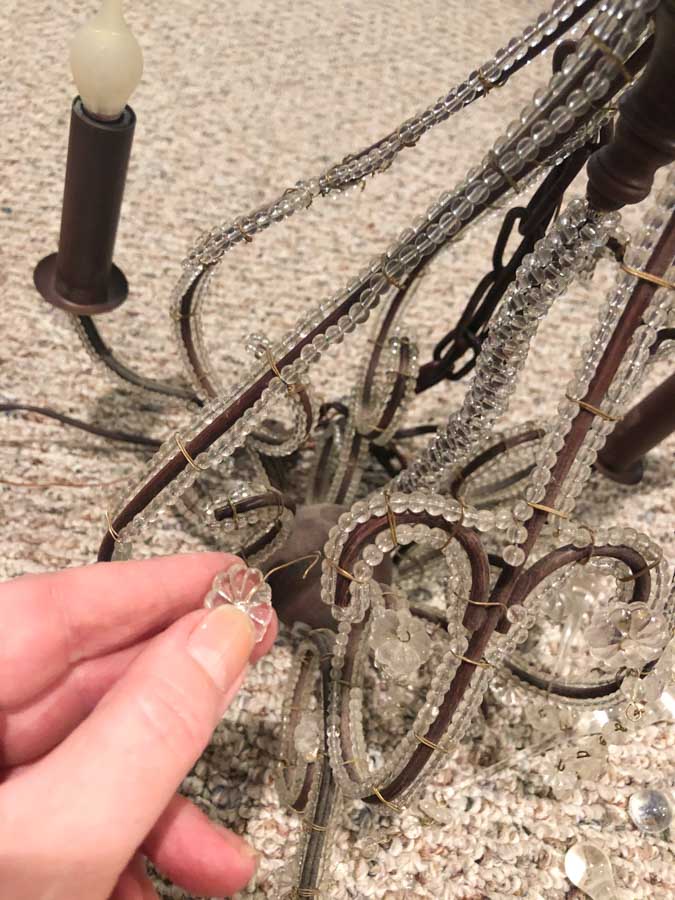
Adding to the rustic nature of the room, I thought using bulbs that looked like flames would be super cool. My dad had these old silicon style bulbs that worked perfectly!
Recessed Rope Lighting
This was the thing that my husband wanted to do for me that I didn’t really want. Turns out I did, who knew?
Anyway it looks fantastic!
Yes, it was a lot of extra work to figure out which boards to put around the top that were going to allow the appropriate amount of light to come through. It needed to reflect matching light on both sides even though they were slightly uneven. We achieved this by raising the wood on one side slightly.

He started with boards going all around the ceiling area and leaving a gap for the lighting to be strung on the inside. He then put up a taller board that would cover the rope lighting leaving a gap in the top for it to reflect on the arched ceiling.
He purchased a 30 foot flat rope lighting that’s super duper thin. This is not like the old fashioned round rope lighting. Not only that, but it is LED.

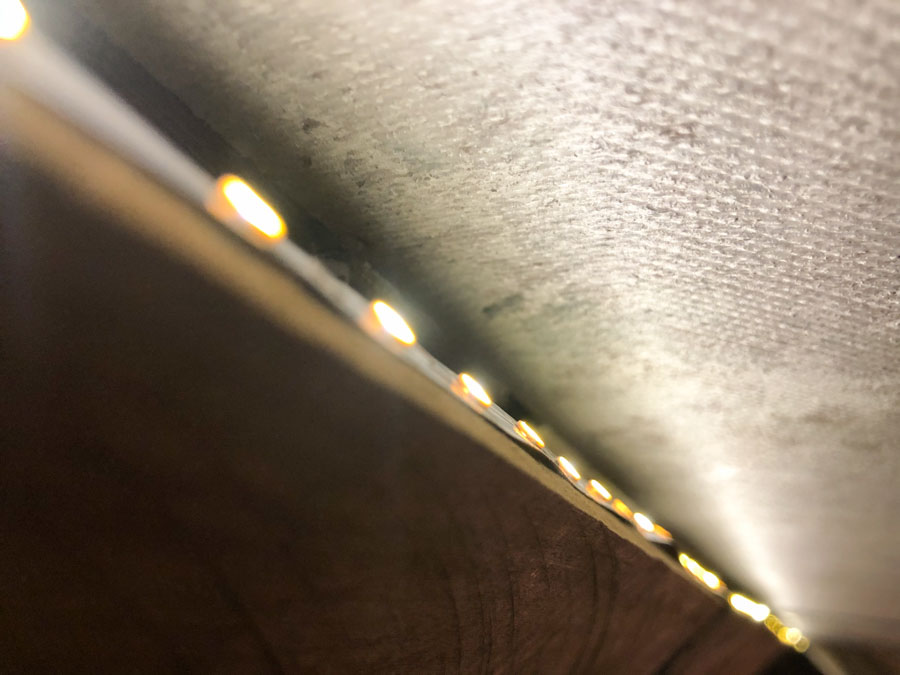
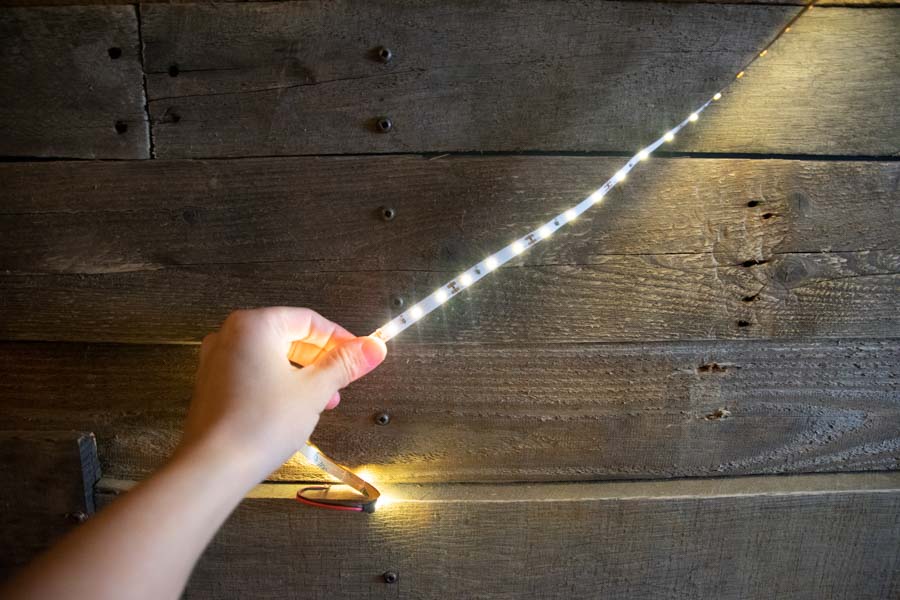
He was super picky about the kelvin, meaning the color of it, as well as the brightness, placement, etc. He ended up choosing a 2700 kelvin to achieve the look.
In addition he put in these little spot lights over the shelving area.
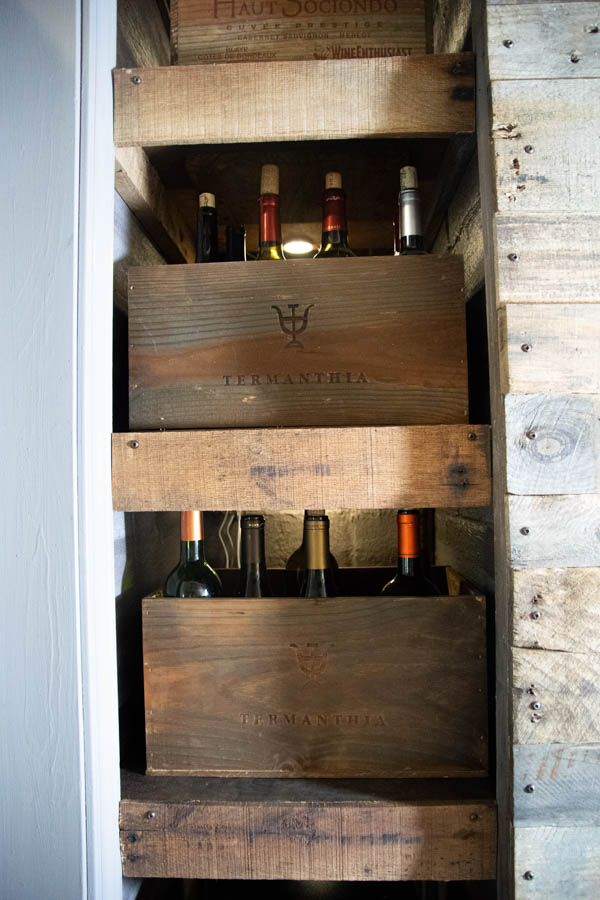
He had installed an outlet up at the top having the foresight that he’d be putting in this lighting.
Step 29: Flooring
Deciding what to do with the flooring was another consideration. Because this is in a basement room, we needed to either use a below-grade vinyl or we would need to make sure that the cement is completely level if we chose to do tile.
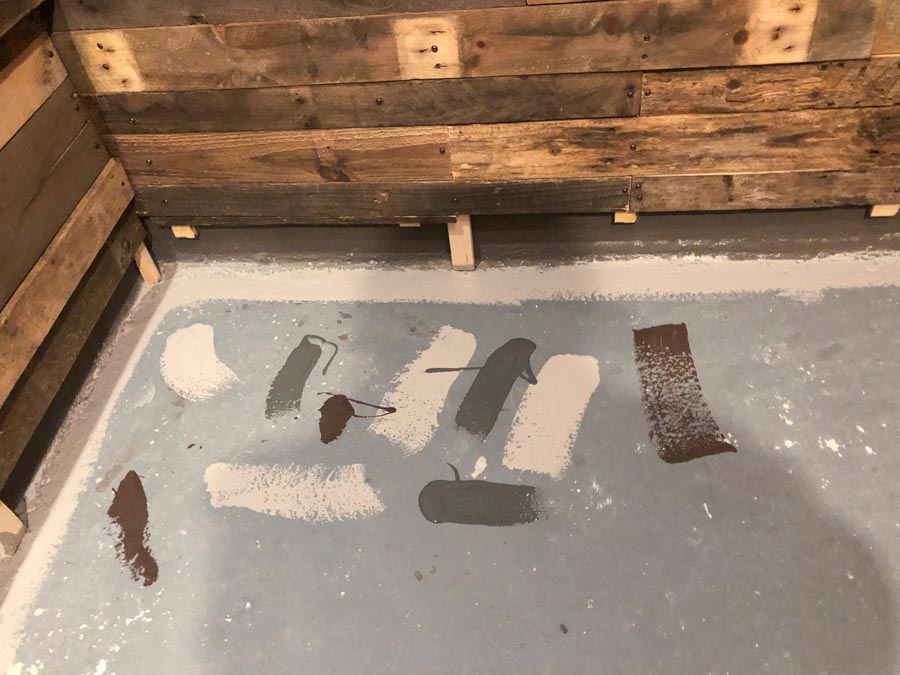
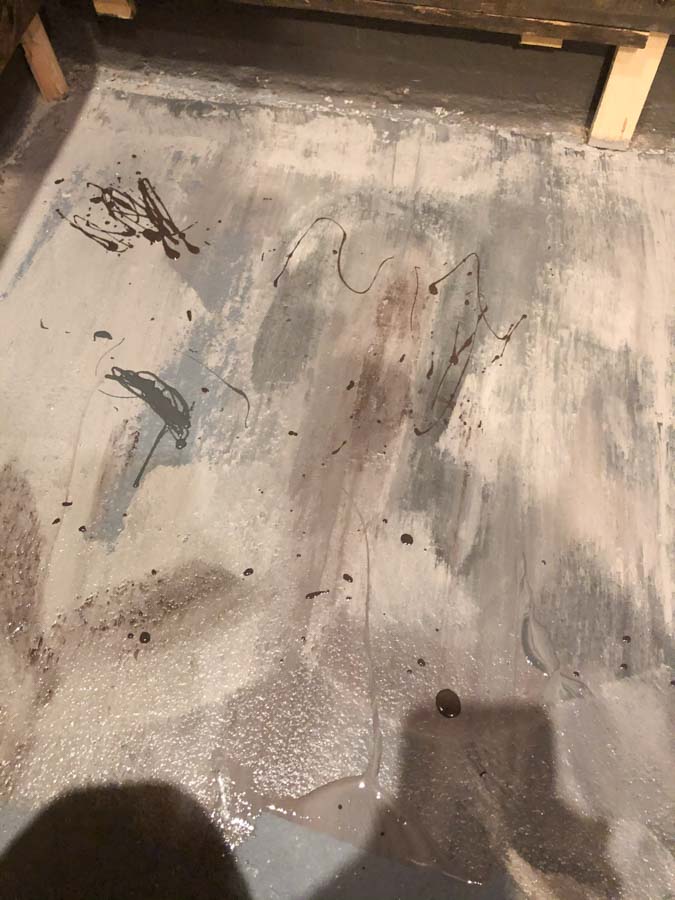
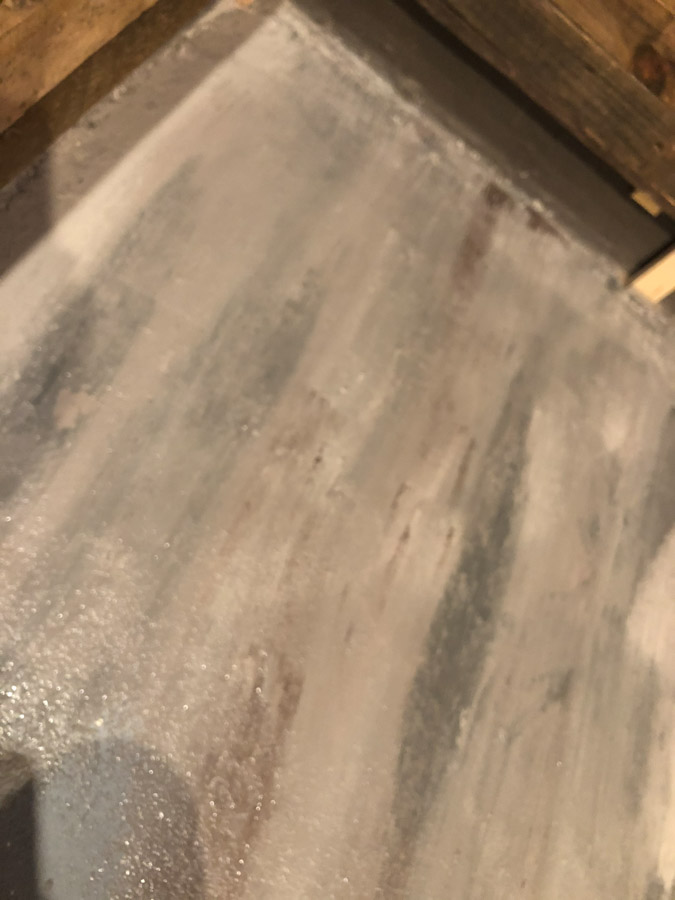
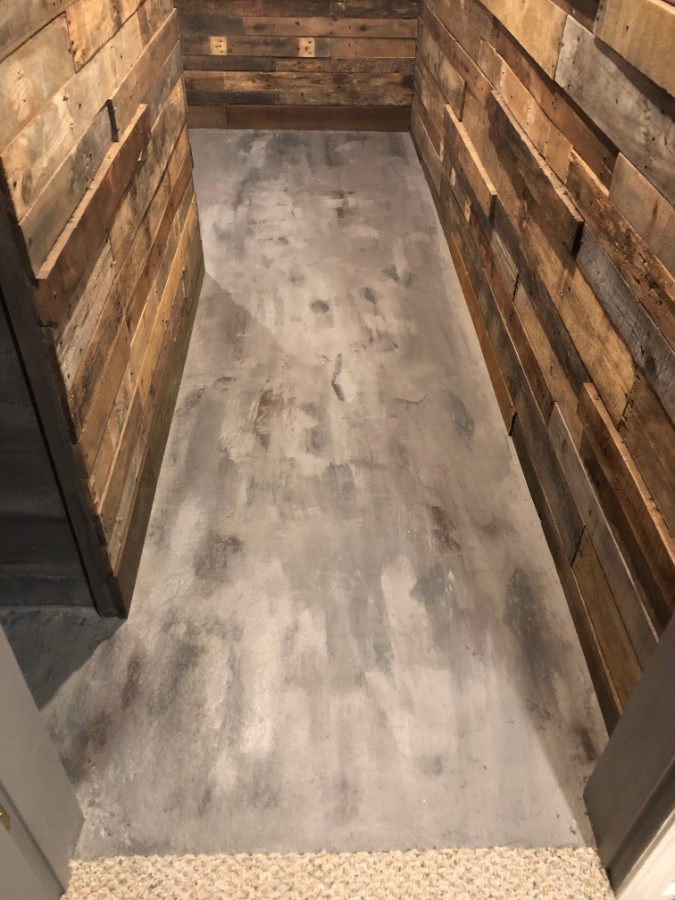
This floor was uneven. It’s slightly slanted and has uneven little divots everywhere. I didn’t want to spend a bunch of time and money to make this work. I decided I would just paint it.
Walking into the Home Depot one day, I saw a counter surface display that almost had a metal look to it. Almost like a rust, black and aged metal scraping look. Anyway, I thought that’s a really cool look. I would like to try to duplicate that on the flooring.
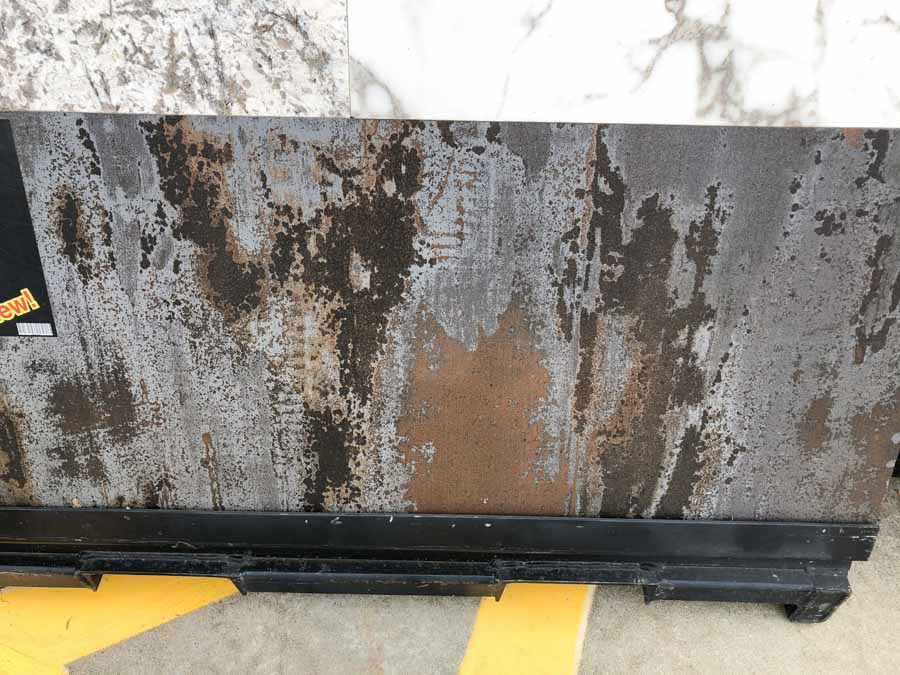
I brainstormed on what kind of tools I might need to create that kind of scraped look. I ended up finding a little foam scraper type of thing that I used. This worked pretty well and cost about $5.
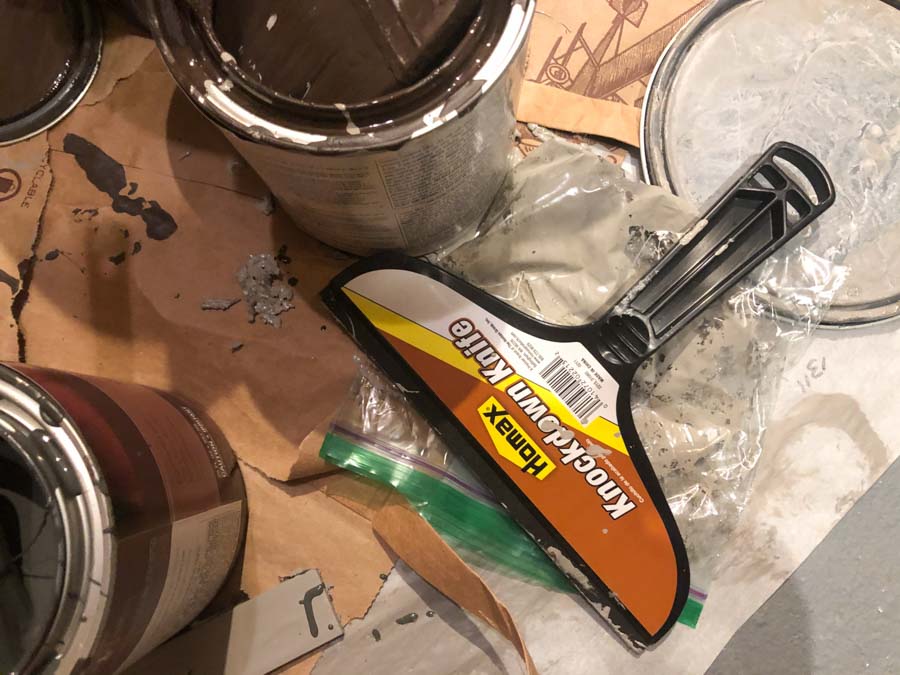
Before I could paint, I needed to clean the floors.
When I got nice and close, I realized the previous owners had painted right over dog hair which had now become part of the paint, so that first needed to be sanded out.
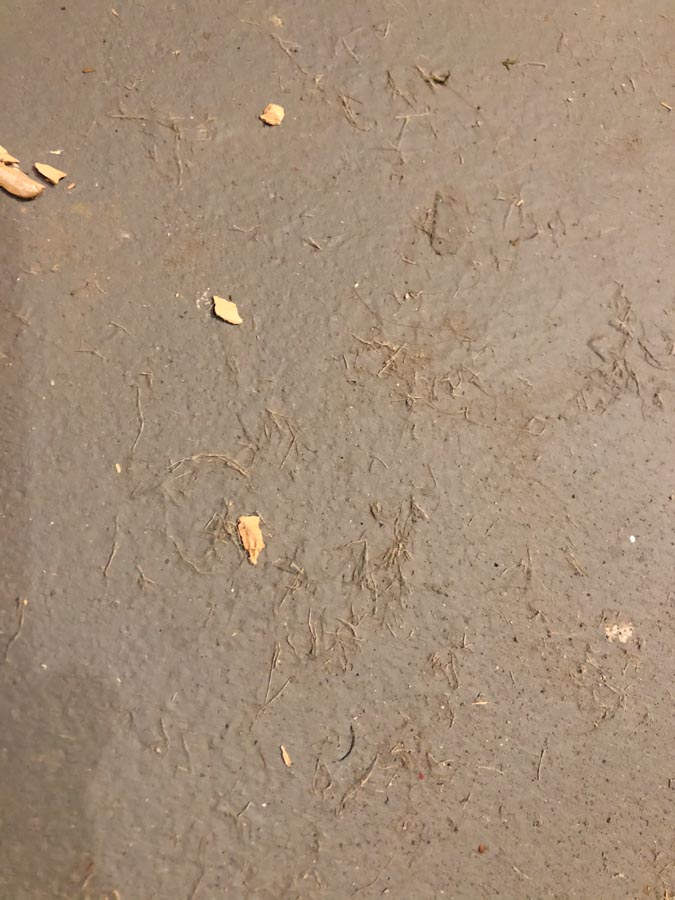
This ended up being a more tedious task than I had initially thought. Thankfully after trying a few methods, this little drill attachment cut down on the time.

I painted the floor before the final boards were put up to give a polished look. My hubby then added the final boards next to the floor. We chose to not add a visibly different baseboard and instead to keep the wall line going all the way down.
The technique I used was to add some patches of paint and scrape them together until I achieved the right look.
Step 30: Finishing the Project
After all the boards were up, I wanted to make sure people couldn’t potentially get a sliver. I lightly sanded any areas that were not smooth making sure to avoid the areas near the screws so as to not take off the finish.
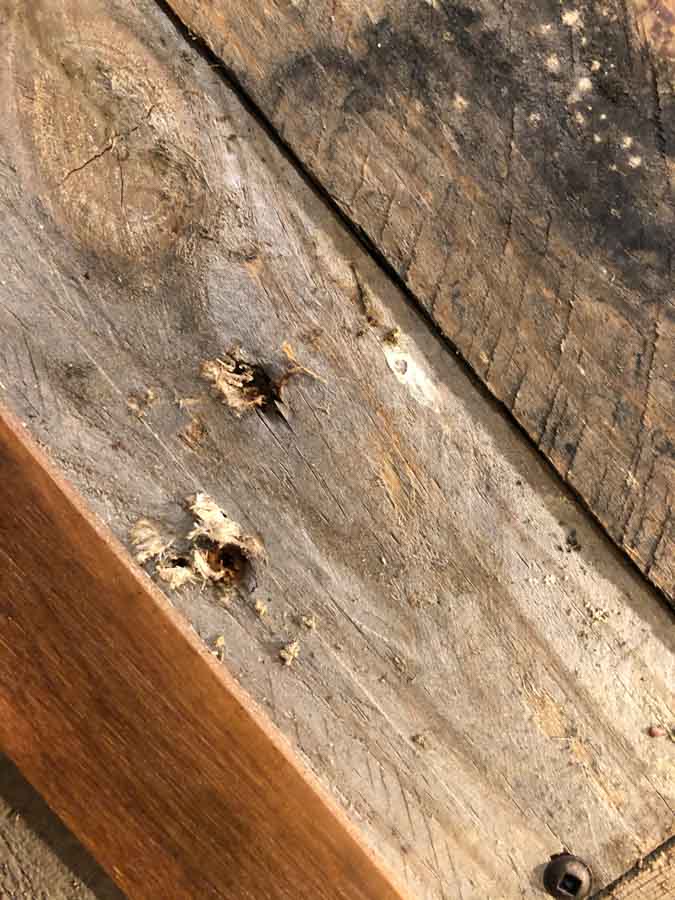
Once these areas were sanded, I went over all of the walls with a matte polyurethane. I basically wanted to seal the wood and alleviate any issues for potential buyers.
Costs:
Overall it was a relatively inexpensive project. I do not have an exact estimate of cost, but it probably ended up just under $500.
The pallets were basically free. The actual expenses are insulation, numerous boxes of screws, the wood for the framework, caster wheels, mahogany wood, ceiling pieces, electrical, paint, polyurethane, and of course, the rope lighting and spotlights.
There are always a few additional things that come into play with cost. In the end, you can do this as elaborate or simple as you choose.
I think the finished product is better than I could have ever dreamed! I absolutely love the way it turned out! I’m hoping you will get some inspiration and tackle a project like this too!




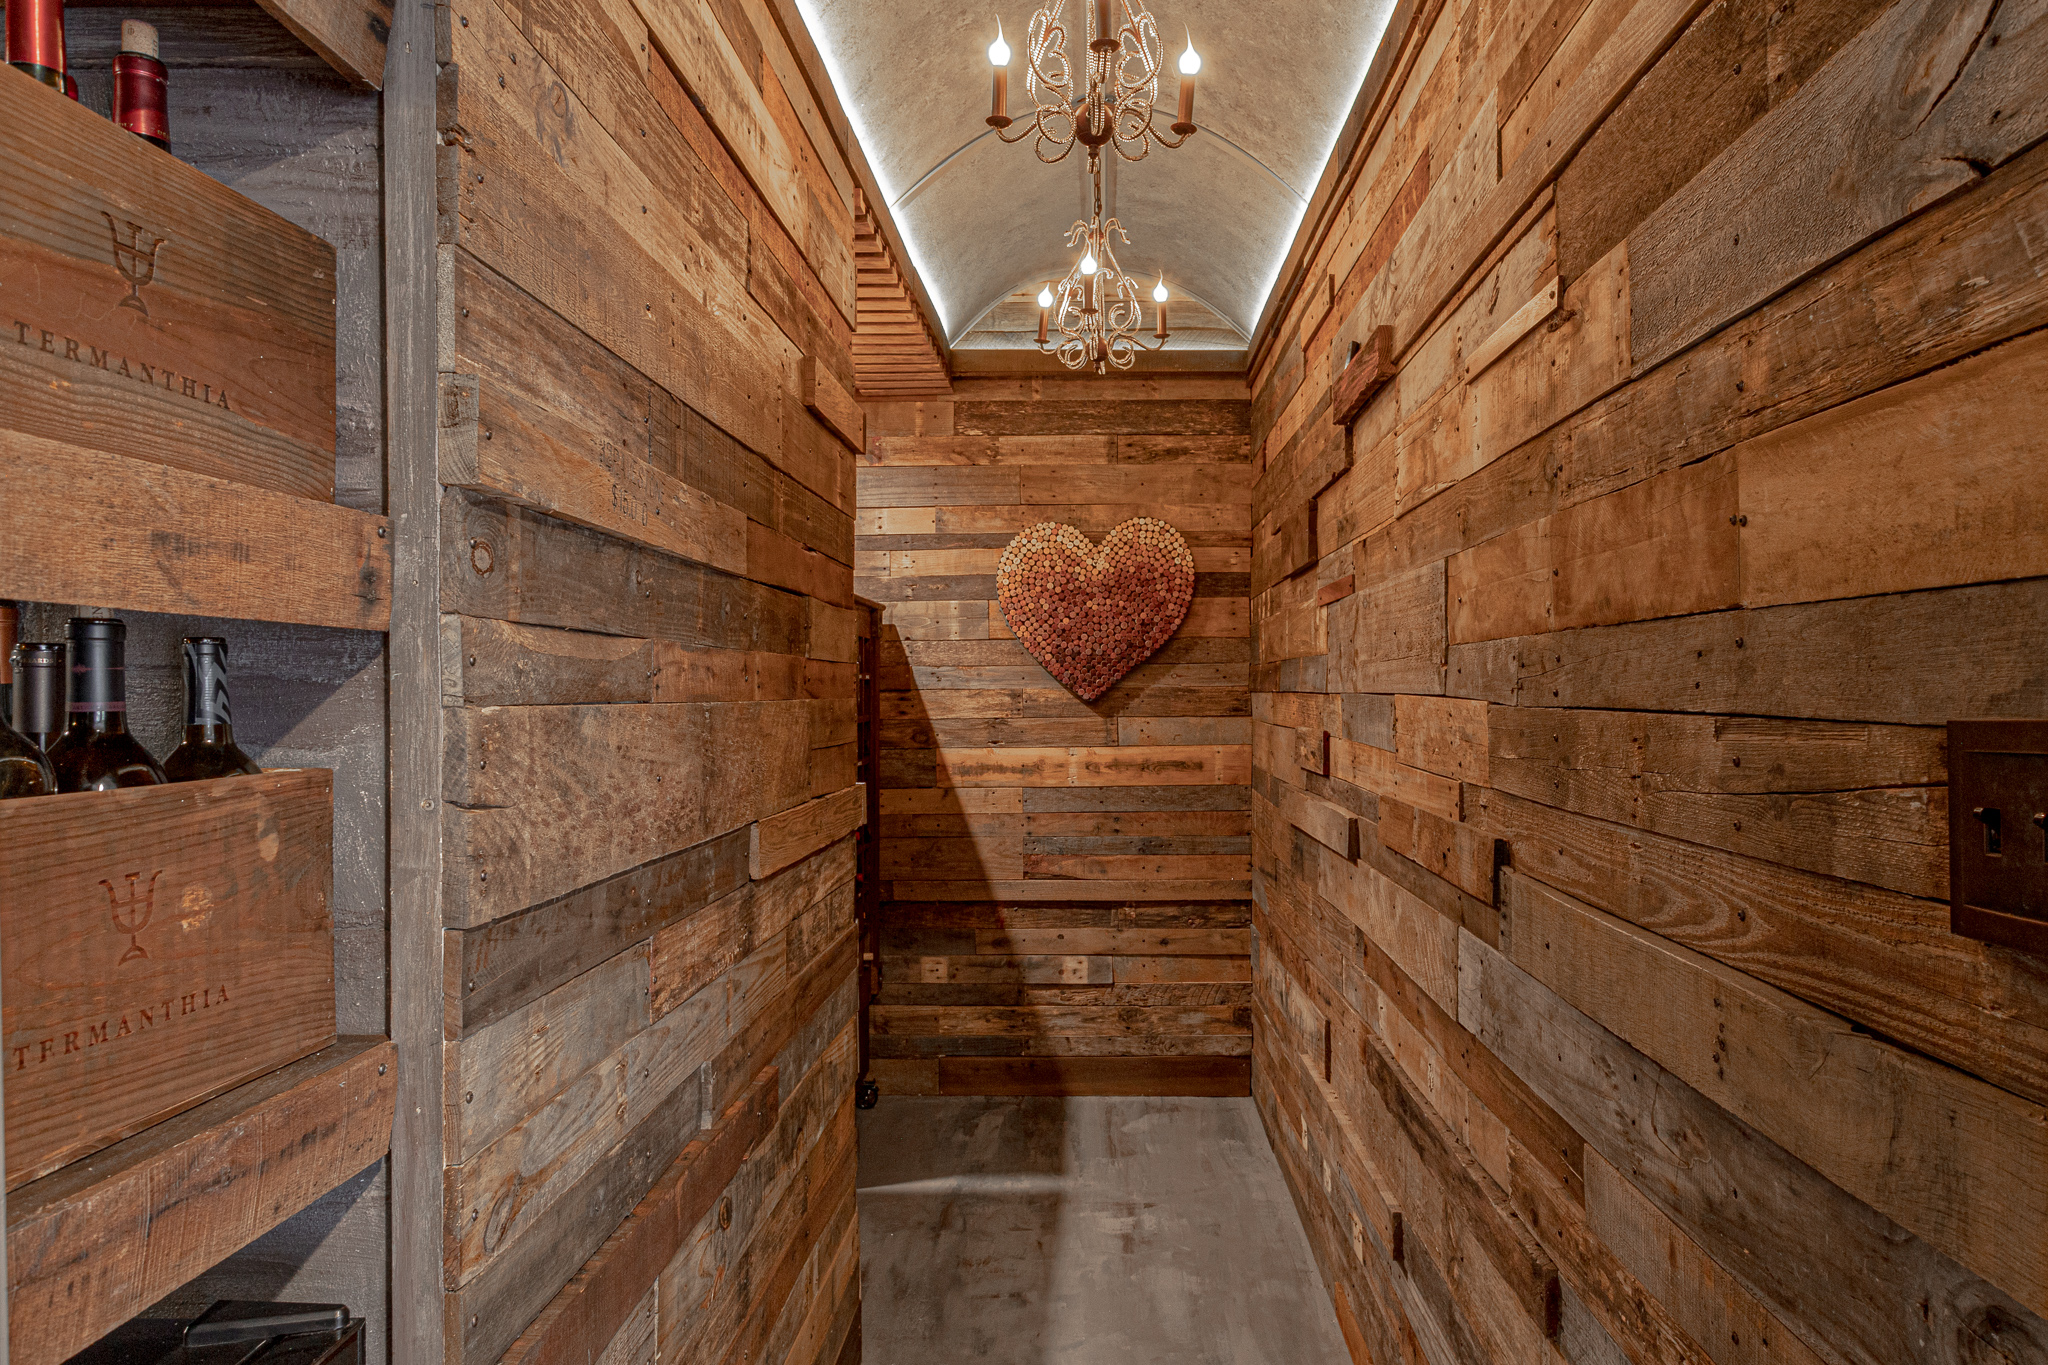
Wow! What a marvelous job and beautiful space. Well done ❤️