If you have an old chandelier sitting around and want to give it new purpose, think about the usage and the look you could achieve.
I had a pair of chandeliers that I had already owned for likely nearly 20 years. I had originally used one in my daughter’s bedroom with little beaded shades on it and the other over a dining table.
At one point, I had both hanging above a large dining room table.
In another house, I had burgundy shades on it in the dining room. I’m sure that gives a perspective of timeframe. Hello 90’s, Haha! Needless to say, these have served me well!
As we moved they ended up just sitting in a box. I probably should have just donated them or left them in a previous home, but I thought someday they could come in handy.
Well when we moved into our current house, there was a little space in the basement we thought we could use to make a wine room.
After figuring out how to work the space, I remembered these chandeliers and thought maybe they could work.
In the process, I actually thought several different types of light fixtures would look great in this space.
There are so many things available on the market right now and at so many different price points that I really could have chosen any number of styles.
I personally liked nautical, barn style, industrial spherical, and some of the cage styles available today. I thought they may even fit the theme of the room better than what I owned.
There are many chandeliers that you can find in a thrift shop or garage sale too. These could be altered and changed to be a more modern light fixture in your home as well.
I have seen people take common brass light fixtures and spray paint the whole thing. This could be done in any color to include shiny white or kept a more neutral and modern bronze.
When people do this, their light fixture can go from having an old outdated look to something fresh. If it’s done in a color, it can set the theme for the room.
This can be especially useful if you are planning on selling your home and need to give it some updates for a low cost.
A side note: Everyone is not a professional spray painter. Myself included. My husband is quite good at this as he grew up painting bicycle frames. After watching him, I have learned from his technique.
It is best to not hold the trigger down the whole time. It’s better to do it in little bursts of paint moving along so that you don’t have any dripping.
I also recommend doing it over cardboard or a tarp and away from anything that could catch paint in the air, like a nearby vehicle. Preferably having low wind, moisture and a reasonable temperature too.
I’ve seen where people can use old chandeliers and add embroidery hoops that have been painted bronze to give them a fresh spherical look.
When it comes to choices, the sky’s the limit, there’s literally thousands and thousands of options.
In the end, I decided I liked the idea of using something I already owned and recycling it for a new purpose.
These lights really did have a granny style look to them. They had flowery beads made of plastic that attached the strands of beads that were hanging everywhere.
They had several teardrop pendants hanging all over them too.
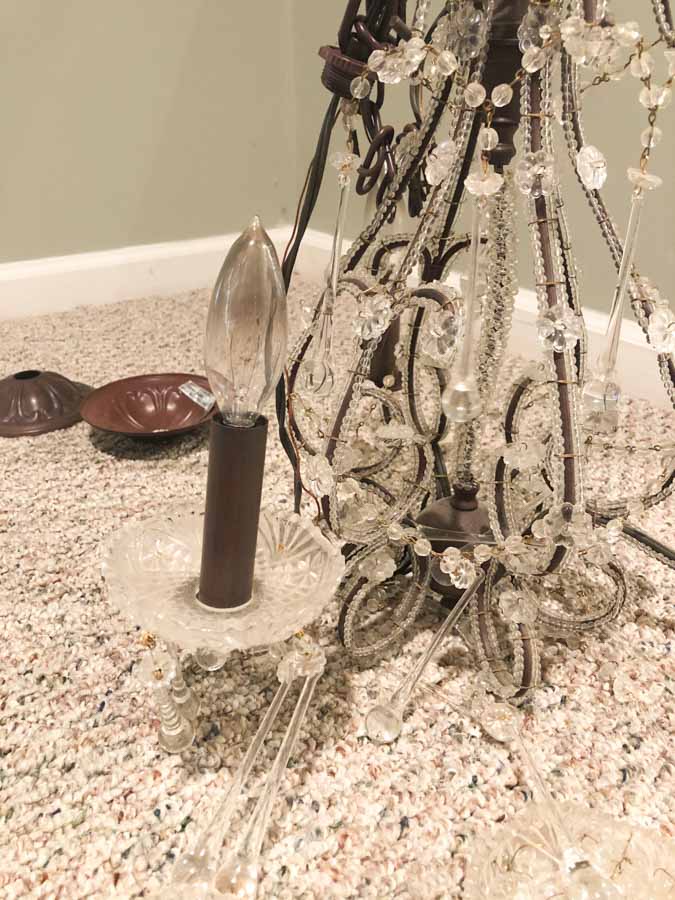
The bronze paint that was on them was an old fashioned streaky style instead of the newer powdered look. The metal itself was also kind of chintzy.
So, they weren’t exactly fantastic, but I already owned them, so I was going to make it work.
Determining what part to keep and what part to get rid of was the next choice. I decided I would “edit” them. Basically, remove any non-essential or unattractive features.
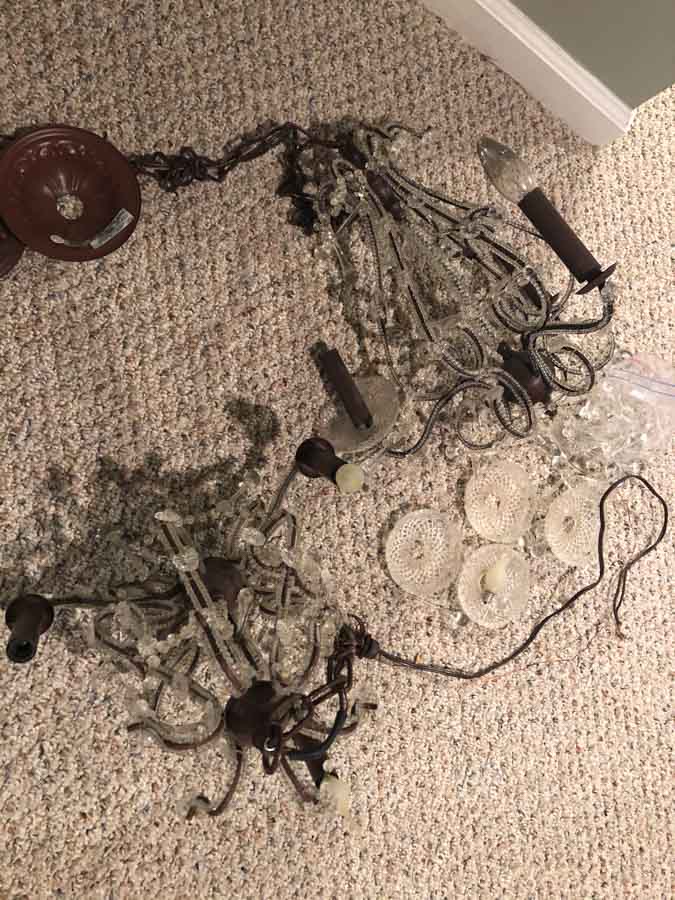
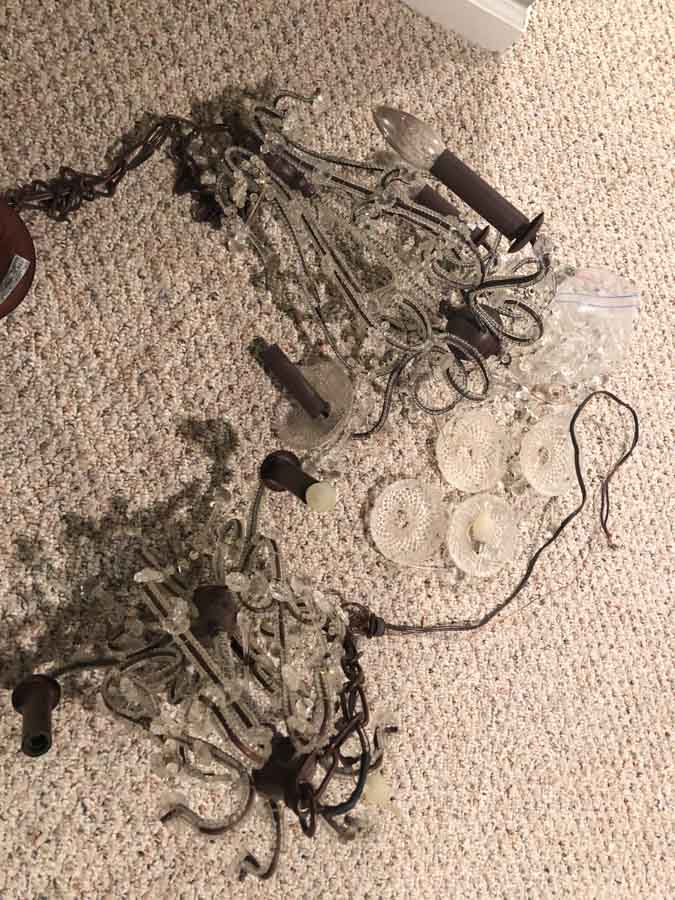
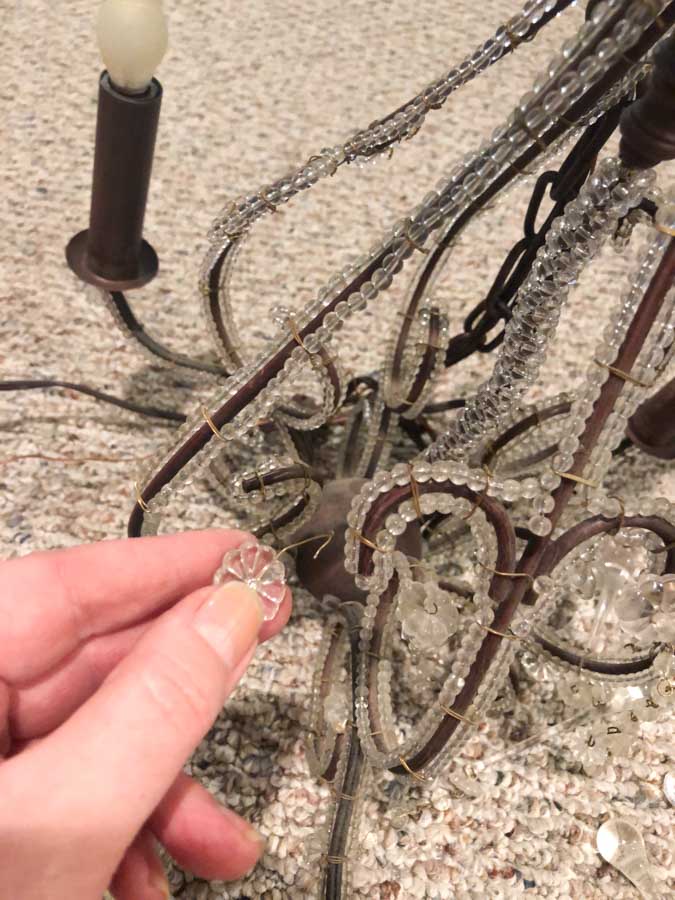
I started off by removing all of the dangling beaded strands and pendants. To remove these I used a wire cutter and clipped the little wires that were holding the strands in place. They were held on by a little plastic flower.
I also removed the glass plates that went around the candlestick part. Once I had removed all of these pieces, I cleaned the chandelier with a damp cloth.
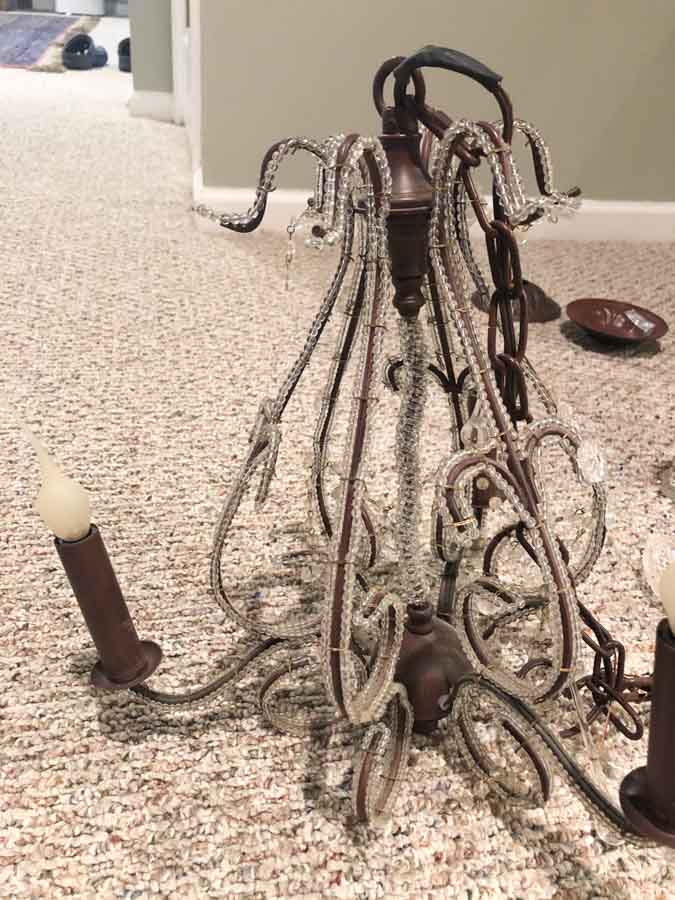
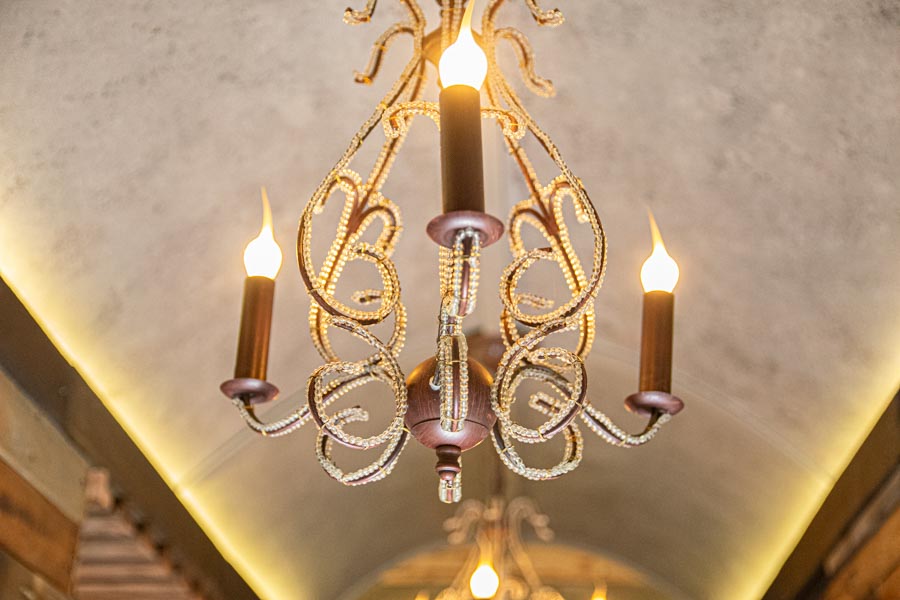
I then straightened all of the little beads that went alongside each of the metal pieces. I kept these parts because they also encircled the electrical wire that went straight up through the center of the chandelier.
I thought it would look silly to have a wire in the middle of the chandelier if I were to remove all of these little beads.
We chose to hang these in our wine room. We added some silicone style light bulbs to give it more of a flame look.
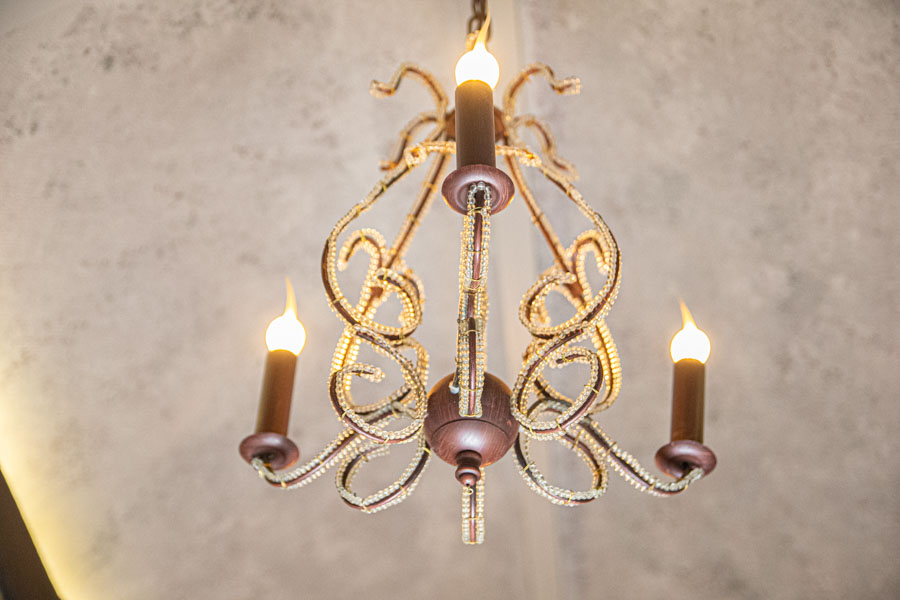
Once they were installed and the height adjusted for the space, I thought they worked pretty near perfect, and they were free to me.
It really completed the room and gave it a cozy, rustic vibe with a hint of glam.
If you’d like to read more about how we created the wine room, click here.
I saved my little parts in case I wanted to do another craft project with them someday.
They’d make some great Christmas ornaments after all! You never know when something can come in handy and be repurposed.
Are you saving any little crafty pieces for a rainy day? What is your next repurpose project?
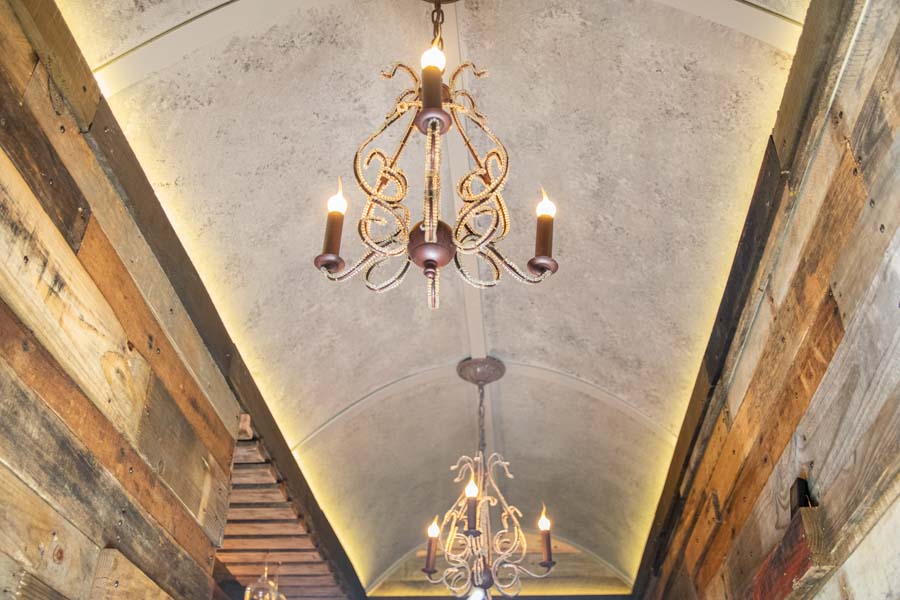
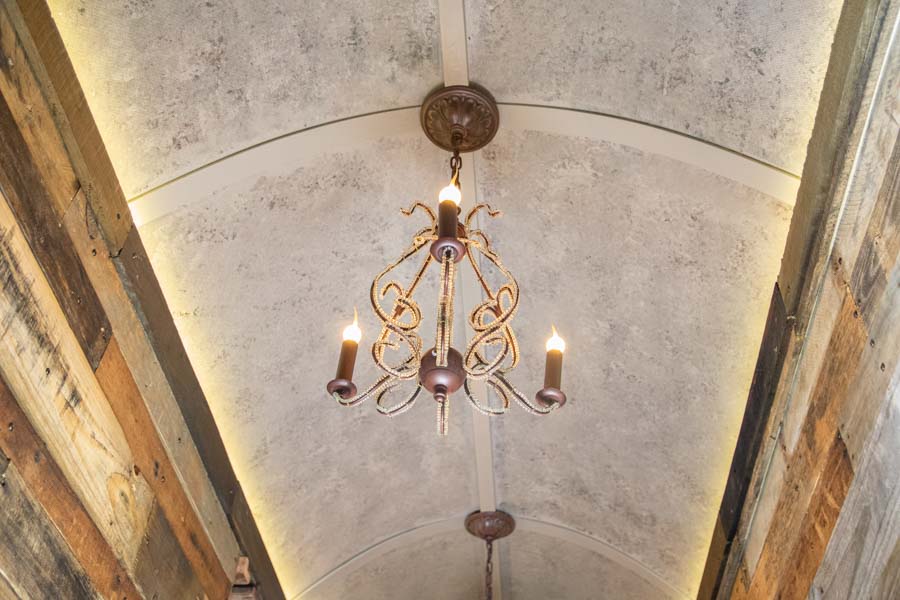
[…] before, my hubby wanted to add recessed rope lighting around the arched ceiling in addition to the old chandeliers we were going to […]