We had purchased a new to us home in a new state. One of the first things we wanted to do was to make it feel like our own personal space.
We were now living in the south. The land of big brick homes and tall trees. Inside our home we had hardwood floors, updated painting, and lovely French windows, so a relatively neutral living space.
Our living room had shelving on both sides of the fireplace. The fireplace happened to be the matching red brick to the exterior of our home.
This red brick did not match anything we owned so I knew it was going to be one of the first updates I did.
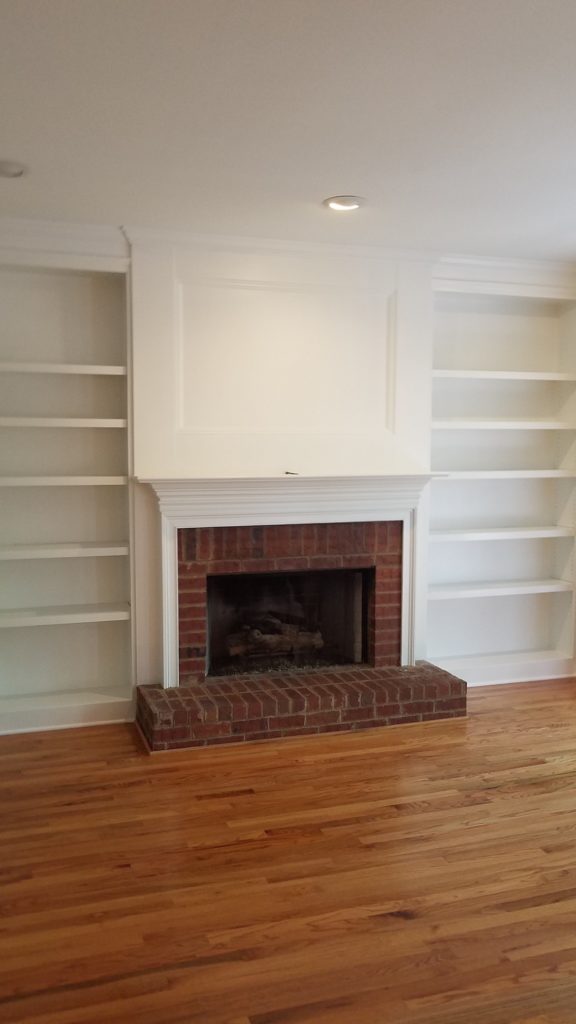
One of the things I needed to decide was whether I wanted it to be a white-wash look, paint it white, or go over the entire surface with some form of rock or tile.
Well knowing me, I did some exploring on Pinterest and decided I would go with a look I liked as well as was economical.
Clean it First
The first thing I did was to remove all of the old fireplace logs and just give it a good cleaning. I washed down the inside surface as it was quite stained with black.
I tried a couple of different things here. First I tried just using a scrub brush on the soot. That did not work. I then used a bucket with water and dawn dish soap. On the really tough areas, I used a magic eraser.
The reality is, the flames had permanently burned the stains on the surface, so clean was as good as it was going to be for me.
My hubby considered re-tiling back there with a fireproof tile, I figured that could stain too, plus, I am not a patient person, I didn’t want to wait a long time to get this room presentable. I wanted to use the fireplace and still have a look that let me not fuss so much over keeping it white.
Our fireplace has the versatility of both burning wood and using gas, which as lovely as that is, I was hoping to not have to do additional regular cleaning in the future. Instead, I planned to just use the gas.
My fireplace came with sand at the base along with particles that would give it a look of glowing embers. I cleaned the area out a bit and got rid of some of the leftover wood pieces that were there.
Removing Wax
In the process of giving the fireplace a good washing, I discovered the previous owners had left melted wax on both the brick and on the top of the mantle.
In order for paint to adhere, I needed to remove the wax. I scraped off as much as I could using a razor blade and an old butter knife.
With the remaining wax, I used a washcloth with water that I boiled in my tea kettle. I just kept going over the surface to melt the wax until I had my surface washed and prepped.
Tape
Tape any areas that you don’t want to get paint on. I put it around the floor and the back part of the fireplace. I also put it over the the lever area with instructions on how to open the flue. I think making sure your corners are tight, meaning squared off, is important to give it a clean look.
Choosing Your Paint
I chose my paint color to match my shelves and trim. I did not want it overly shiny, like a high gloss, but still wanted it to be washable, so I chose a semi-gloss.
I started off with a very light coat as I wanted to test the surface and see if I wanted any of the brick to show thru.

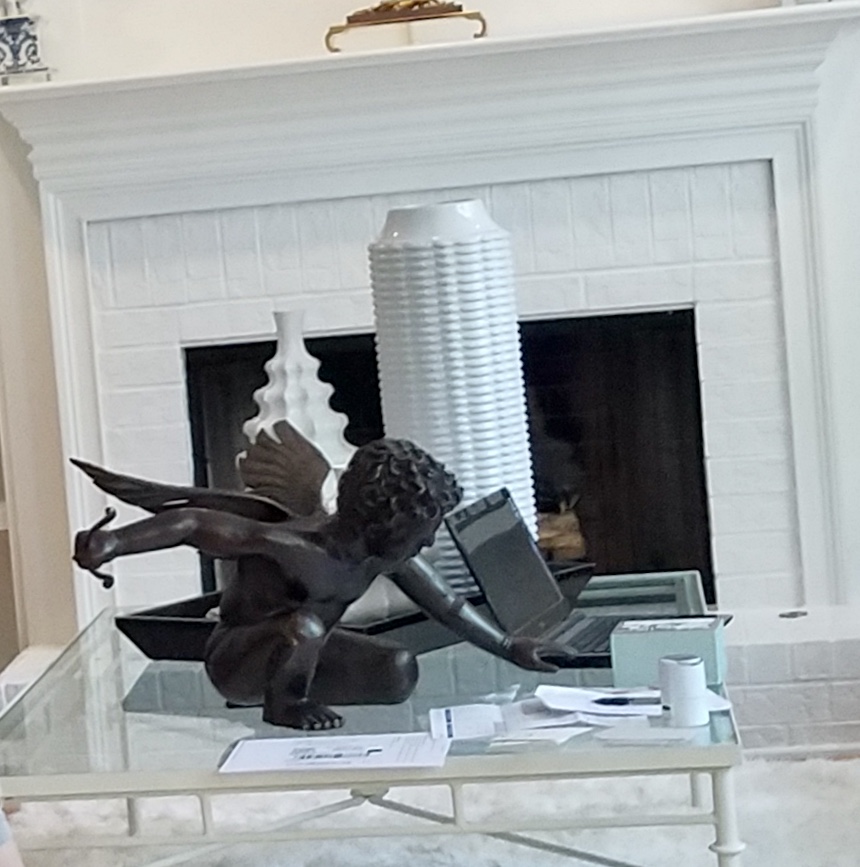
I decided I was just going to paint it solid white. To me, the whitewash was just too busy as I already have a lot of accessories in my living room.
I wanted to simplify the look and just keep it plain so, I went over the entire surface with the first coat of white paint, including the grout.
I needed to do a total of three coats. I recommend allowing the paint to dry for a few hours in between coats. I also recommend that you let it “cure” for at least 24 hours before you start accessorizing.
Adding Some Glam
After my fireplace was painted white, I decided I wanted to make it a little fancier. Adding a touch of sparkle varies from person to person.
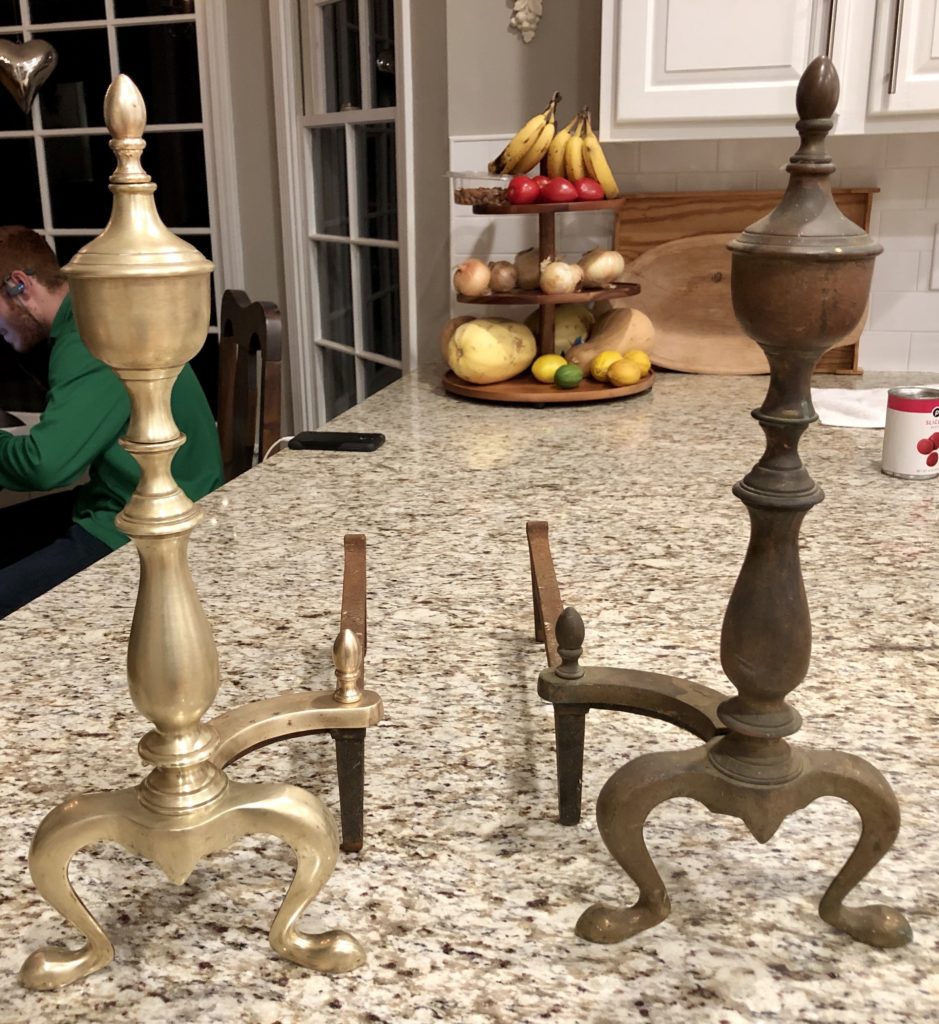
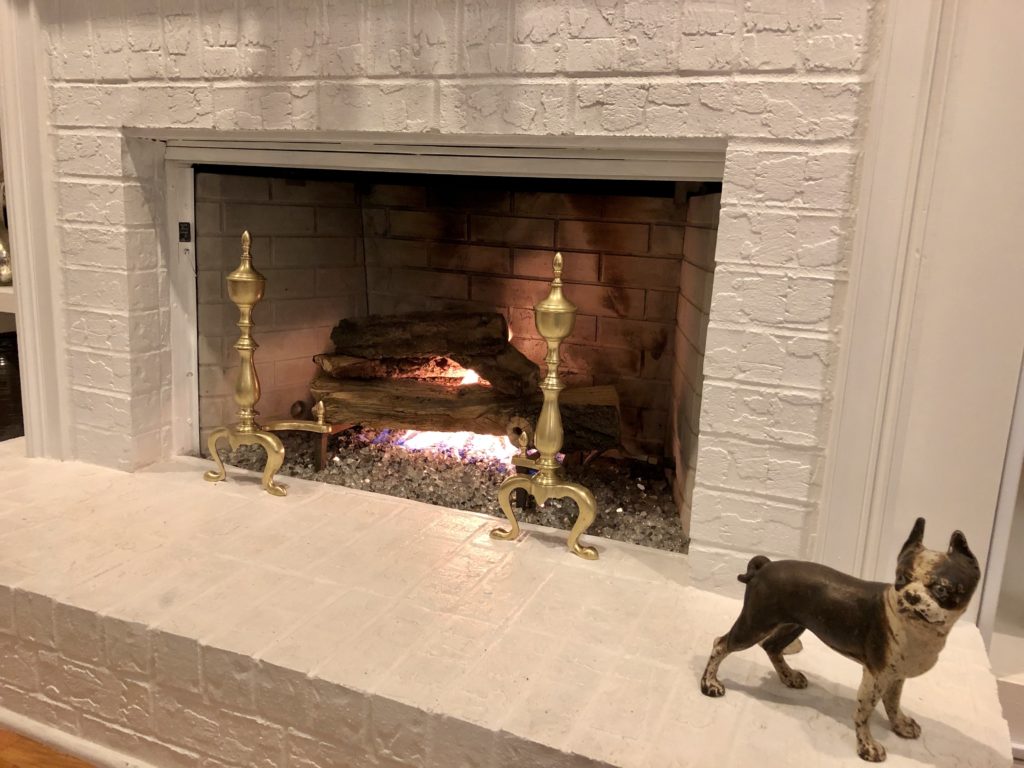
In my Pinterest searches, I came across a number of things I liked. Well I happened to come across a pair of very tarnished brass andirons that were in an antique store. I ended up purchasing the pair for $35.
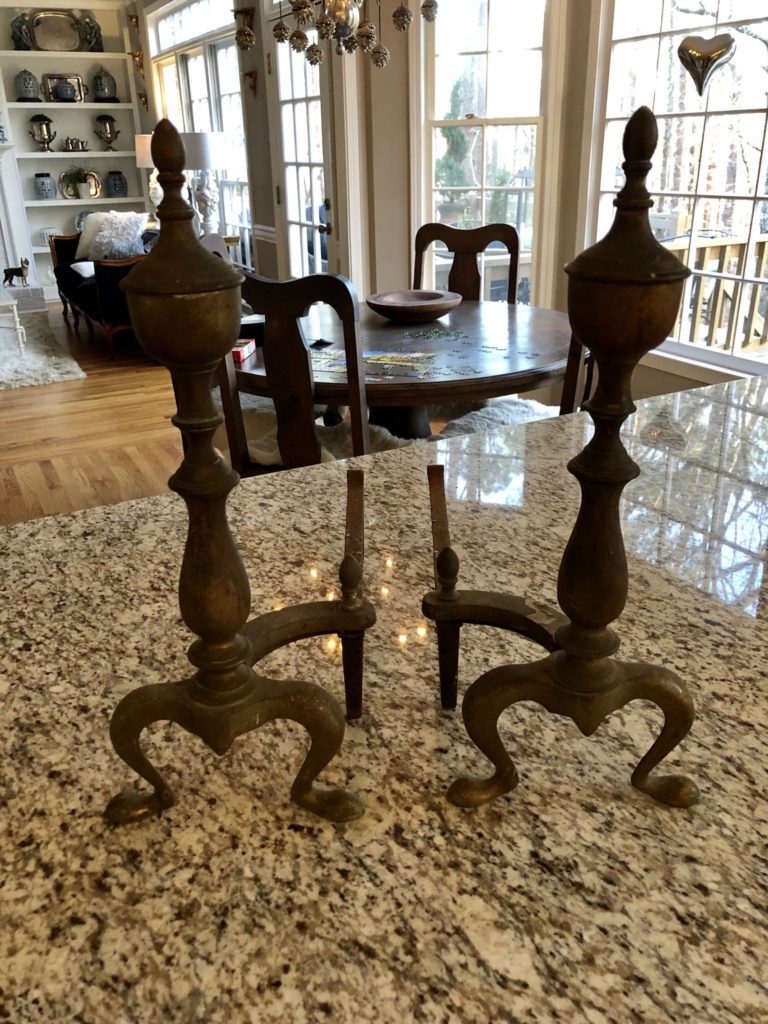
My husband spent some time polishing them with Brasso. In my book, he made them shine like gold! I like the brass as I have some gold frames in my living room, so I feel it ties everything together.
Fancy Glass
Another thing that I did was to order some fireplace glass and put it in. I looked at different ones and really wanted it white.
Some are clear, some iridescent. Actually quite a number of colors available to choose from and at a fairly reasonable price, if you do some homework.
I ended up just ordering one bag to cover this area which cost around $35. I left some of the silica sand underneath that was already in the bottom of the fireplace and I also sprinkled some of the ember fiber pieces back on top to give it the glowing look when it is lit.
One of the things I learned in doing the research for my fireplace is that the heating element can burn differently if the logs are not placed in there correctly.
The objective is to not inhibit the gas flow as it can cause additional soot build up.
The logs typically come with some holes that you can line up. I placed mine slightly different, but allowing the best openness for the flames. Even so, mine still produce some black soot.
In getting this all set up, I started with the silica sand, then added the glass fireplace stones to cover it and spread it out to the front edge. I then sprinkled the ember fibers on top. I then used a shish-k-bob skewer to go straight down into the sand to allow the flame to come through.
I did this with the flame on so I could decide where I needed a bigger flame. (Please do this with extreme care, as you do not want to bang on your gas element. You just want to make a path through the sand.)
In Conclusion
Overall, I prepped one day, painted for two. Installed the andirons and glass in just over an hour. Total cost: About $100. No regrets! Some might say, what if the next owners don’t like a painted fireplace?
Well, when buying an older home, you get to update it however you like. I love the clean simple look this gave to my living room.
Chances are someone with similar taste will be buying my home when the time comes. Until then, I will enjoy the work of my hands.
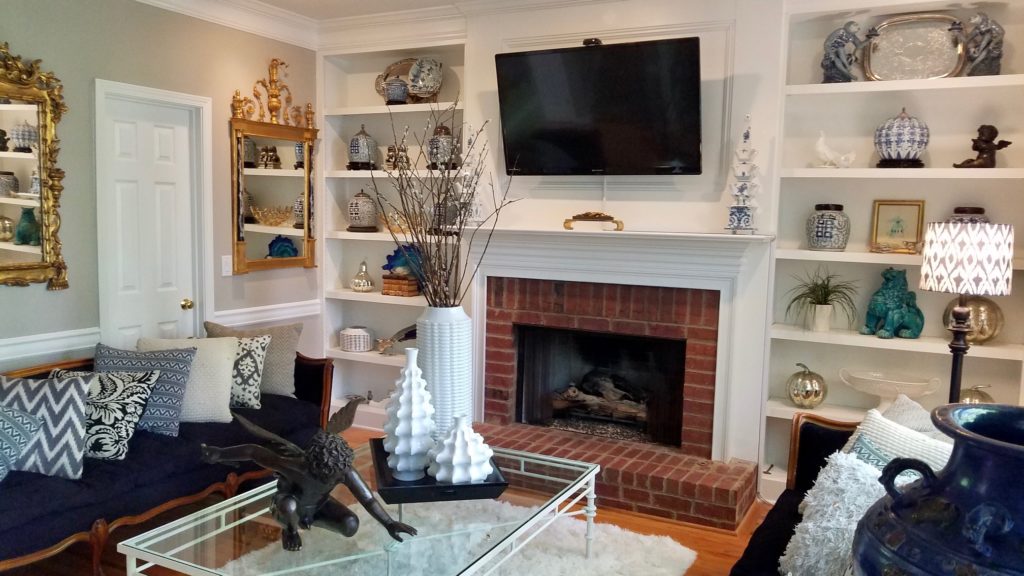
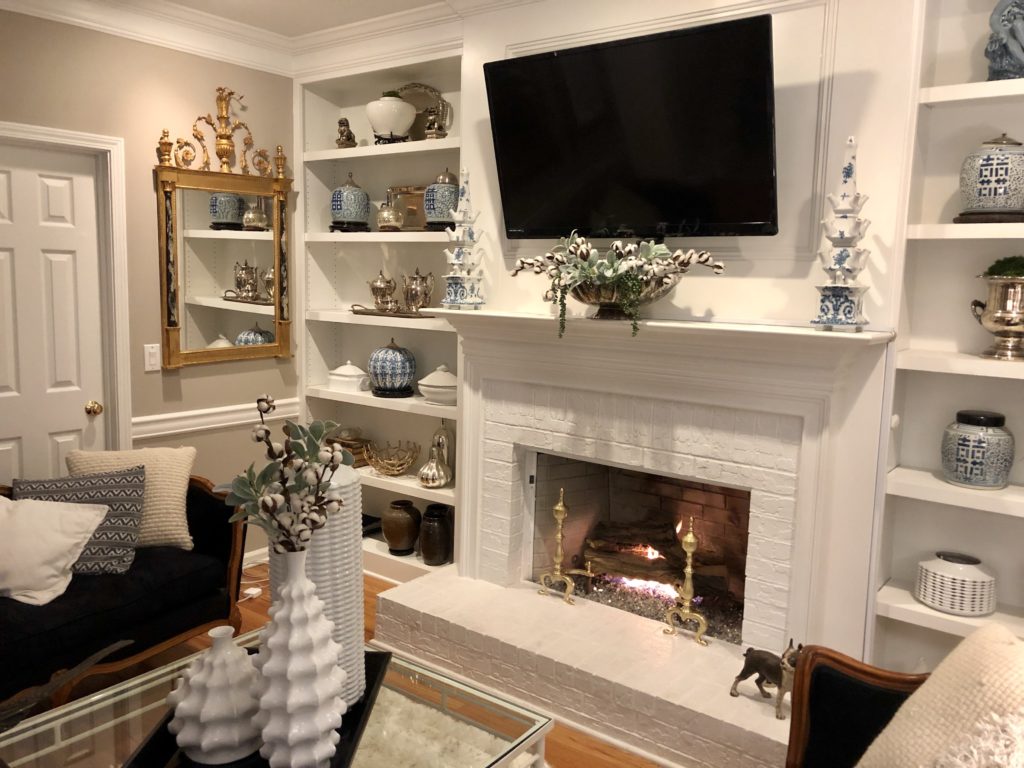
I like the simpler look with more harmonious coloring. I feel like it’s still homey and not distracting. It’s so rewarding to do little updates that make your space feel like your own. Your style, your dreams coming true!
Leave a Reply