One of the great things about purchasing a home is making it your own, your style and taste preferences.
We had purchased a lovely southern style brick home built by a well-known builder. What we didn’t know at the time was that this well-known builder also liked to cut a few corners. We found this out the hard way.
Updating the Stairs
One of the first things we wanted to do was to remove the carpet from the stairs as we are not carpet people. From the look of the stairs, we thought they were a solid oak tread with carpeting over them.
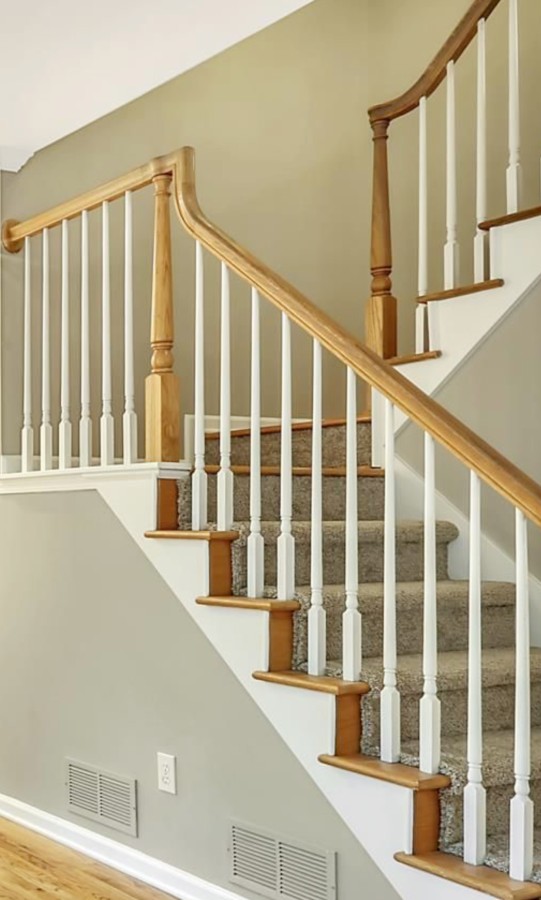
The carpeting on the stairs was relatively new and they really looked just fine. Carpeting just wasn’t our thing so we wanted to remove it and put in some kind of a runner instead.
We were wanting to bring an update to this visible area and were thinking about a jute runner or something that tied in with our furnishings.
We considered painting the risers of the stairs white, leaving the treads oak and having a runner going over it.
What We Discovered
Once the carpet was removed, we were in for a bit of a shock as we had expected the stairs to be solid oak, based on the oak edges sticking out from the carpeting.
The reality was that only about 8-12 inches underneath the railings were actually oak. The rest of it was pine. Boo. Who does that?
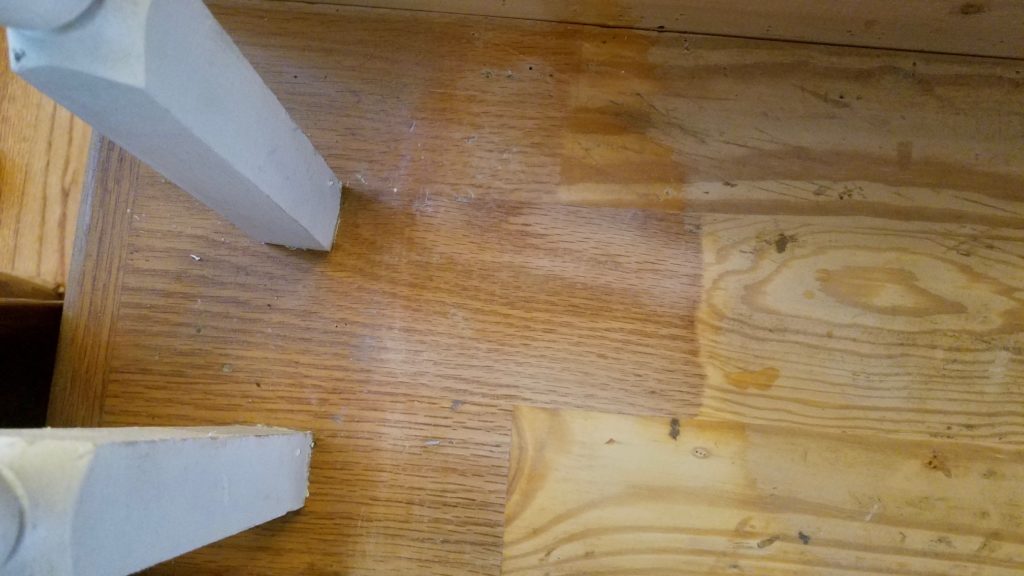
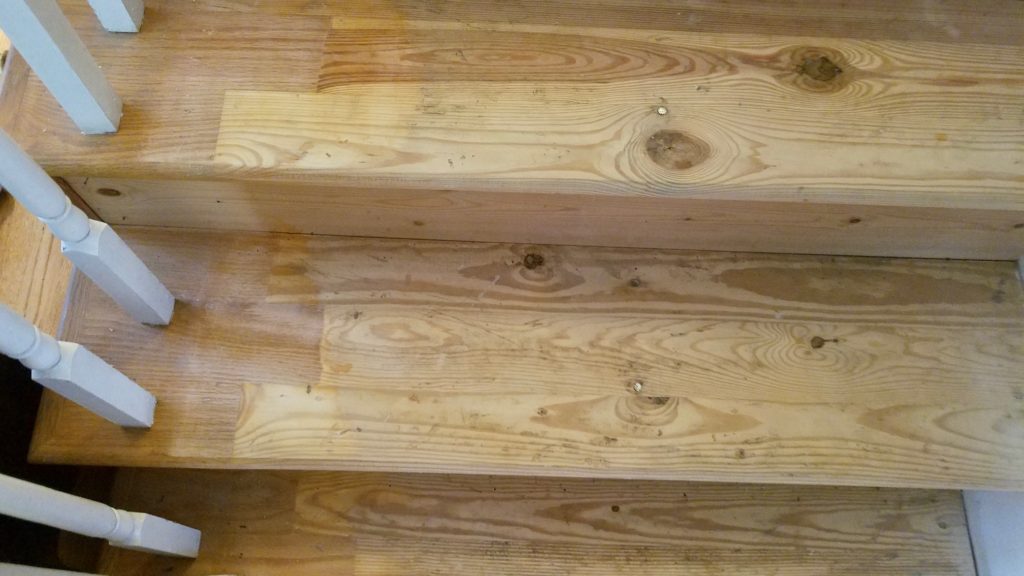
Not only was it pine, but some of the stairs had deep crevices where the boards didn’t even line up. This was quite disappointing.
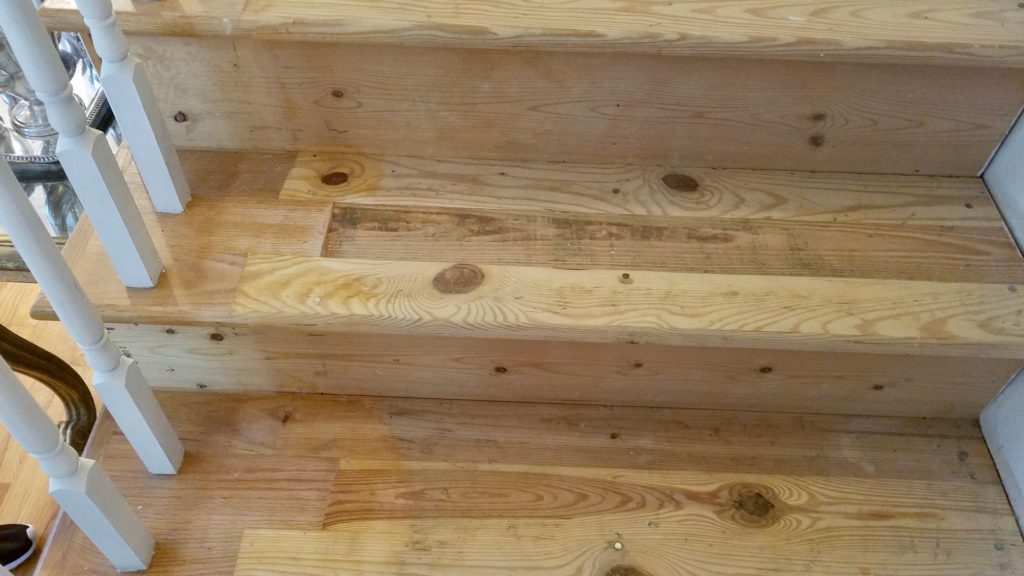
This was an area where the builder cut a corner and at what savings to the builder?
If an oak tread is $37 retail today and the home is 27 years old, can you imagine what a wholesale rate would have been back then?
This may have cost him and extra $100 to do right, but now here I was having to troubleshoot how to move forward at a much greater expense with time and resources. Quite frustrating indeed.
How To Begin
The first thing, of course was to remove all of the carpet and sweep up all the dust and debris.
After removing the carpet, we discovered the risers on the bannister side, only gave an illusion of being oak too. They had only a few inches of veneer to give the look of a solid oak stair. Obviously any oak on these stairs was for illusion purposes only.
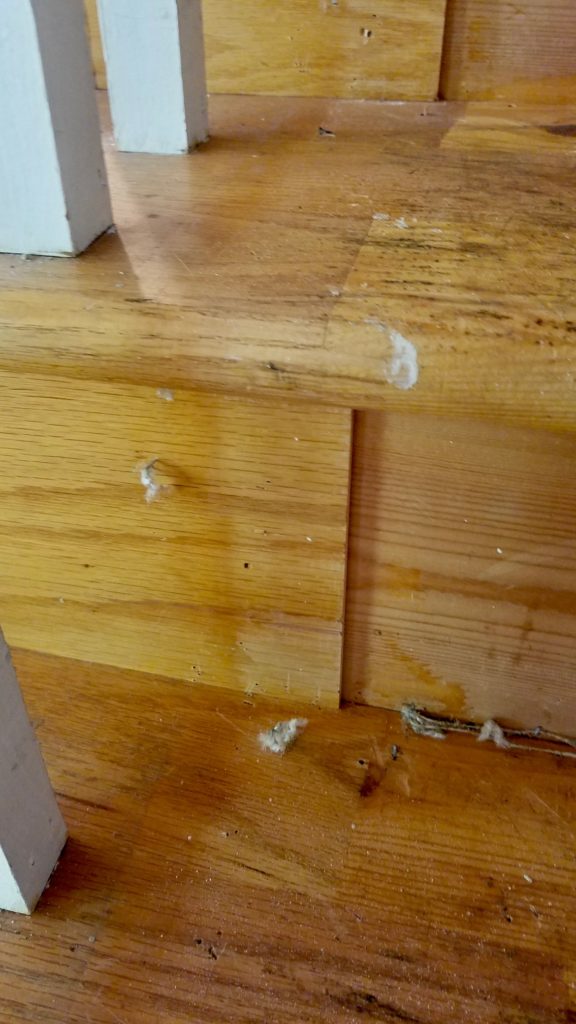
The first thing I needed to do after removing the carpet and decorative veneer was to remove all the staples and sand down any glue residue.
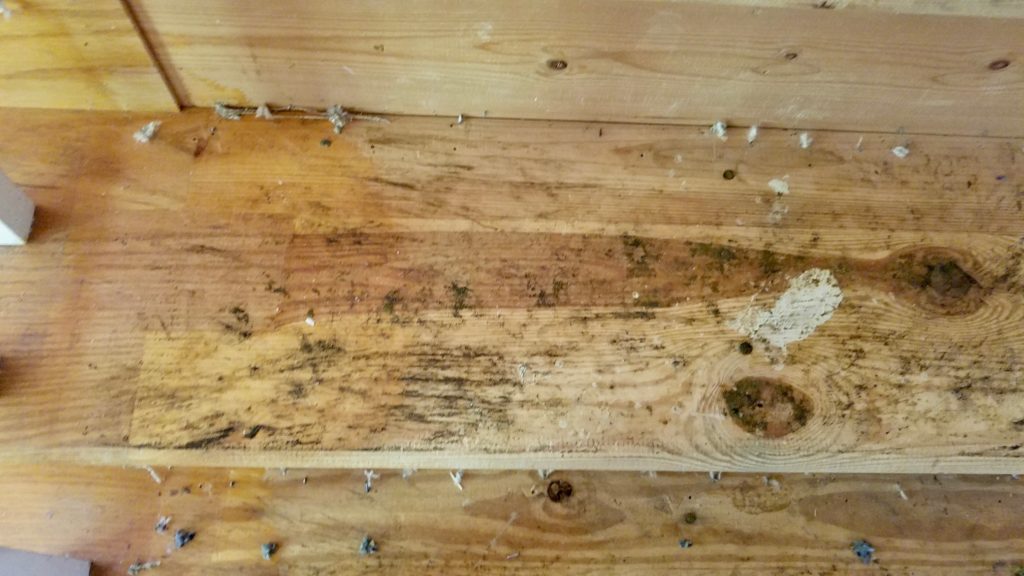
I sanded each stair. Then wiped them all off with a clean damp washcloth.
After the initial disappointment, I thought I would try to make the pine on the stairs match the oak as close as possible. I would do my best to fill in the wood pieces with wood filler and then stain them to match the current oak tone.
I filled all the low points with wood filler. This took several coats as the depth of unevenness was over ¼ of an inch and if I filled it all in at once it could crack. I allowed this to dry overnight in between coats and then sanded everything down again. I wiped all the stairs down again too.
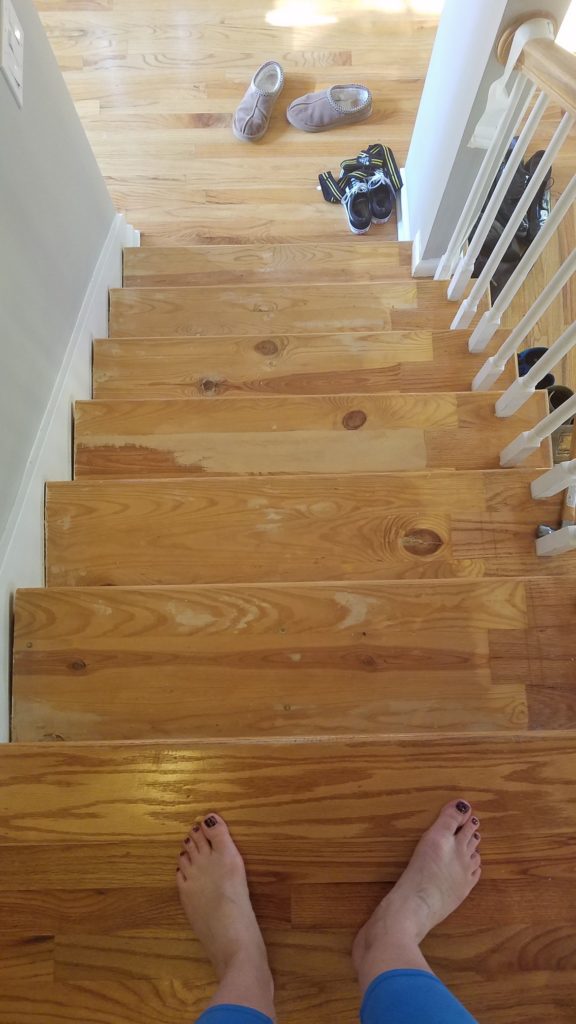

I figured when I put a runner down, the side closest to the wall would not be too obvious that it was pine if the color matched.
Side note- the sanding makes a huge dusty mess. So be prepared for major cleaning of everything near the area.
“Stainable Wood Filler”
There was a noticeable difference in color with the wood filler. It was definitely lighter than the remaining wood.
Even though the wood filler said “stainable,” the reality was, that it was not. I attempted to “match” the existing wood with a stain. I tried red oak and natural oak. Neither of these penetrated the wood filler.

I was discouraged and did a little research. What I read was that if I had wanted to stain the wood filler, it should have been done before I filled in the wood.
So basically I needed to color match the wood filler to the wood using stain while it was wet. I wished I had known this beforehand, and I would have given it a try.
Now it was dry and a different color. The pine also didn’t really match the oak.
Options
My options now were to dig it out and start over, or to paint the stairs instead.
This left me very discouraged. I didn’t like the current look of the stairs and I felt basically I had two options going forward: I could replace the treads of the stairs or I could paint over them.
The workload and expense of replacing the entire treads of the stairs was daunting. It would mean that I would have to completely remove the banister and all of the spindles. If I were going to do that, I would have preferred to give it a real update and add wrought iron spindles instead.
In addition, to do this kind of update was definitely out of my budget. I was hoping for an inexpensive fix and now I was running in to more than I had bargained for.
If I were to replace just the treads, I would still have to disassemble all of the stair pieces, purchase new stair treads at a cost of about $37 each, with a total of 12 treads, costing nearly $450. Not to mention anything else that was unforeseeable.
It was a new home to me, so a purchase this size was out of my budget at the moment. I chose the cheaper method which was to get a can of paint and paint the stairs. I chose to use a white porch and patio paint since it matched all of the trim in my home.

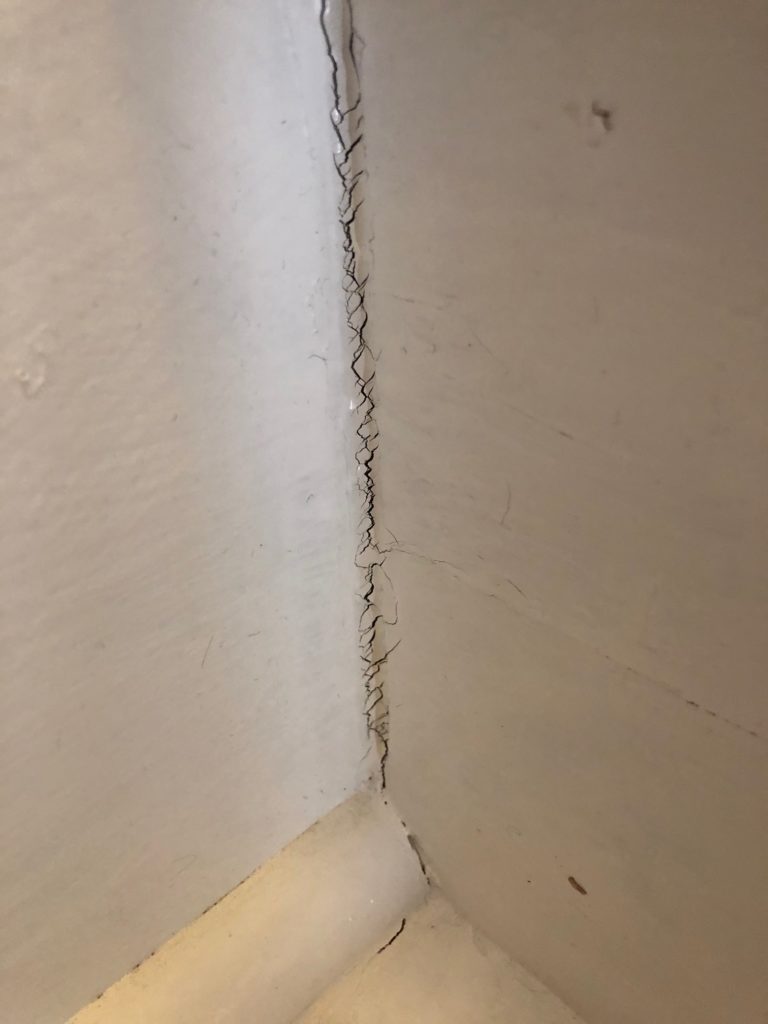
I went ahead and painted the stairs. I ended up doing three coats of paint and allowing them to dry overnight in between. Some of the stairs had large cracks at the corner joints so we filled those with some flexible caulking ahead of time. We tried the wood filler but the wood filler left some cracks too.
Personalizing
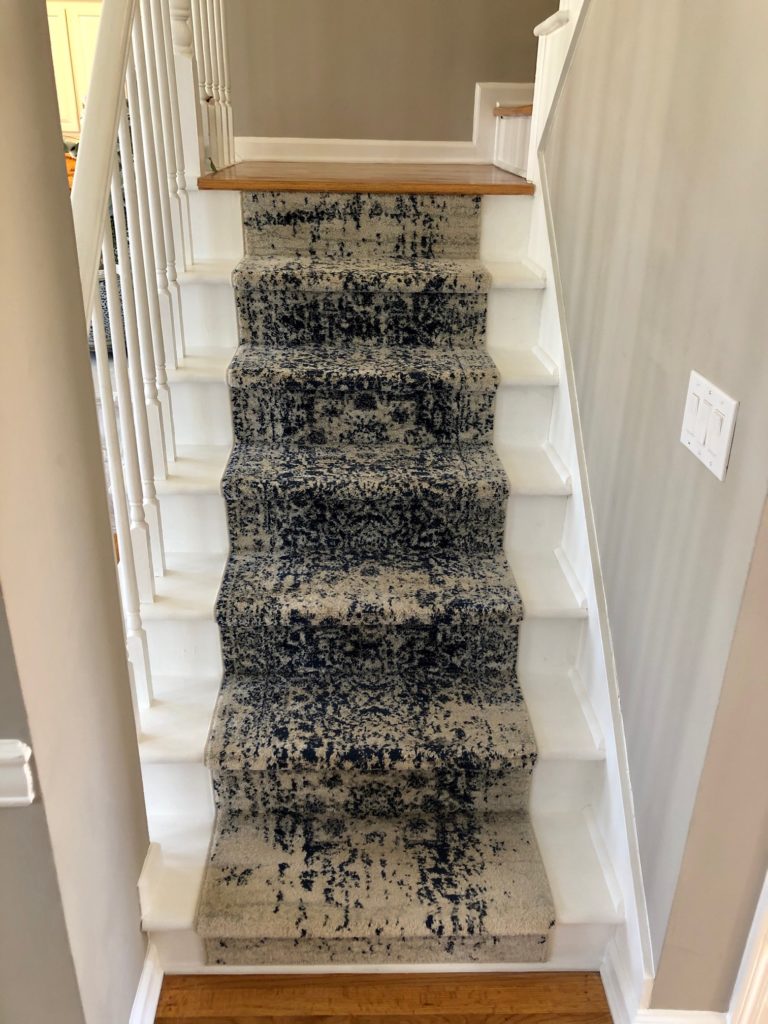
I ordered two carpet runners that matched my furnishings off of Wayfair for about $50 a piece.
We took measurements for the full length of each set of stairs. We used a cloth sewing type tape measure.
We held it tight against all the curves of the stairs to get an accurate measurement of what was needed. We added a little extra to ensure we would not run short. We wanted it tight under the edge of the stair and not leaving a gap so we took that into account with our measuring.

Installing the Runner
We started at the bottom, just above the base moulding piece and worked our way up holding the carpeting very tight next to each stair and using a staple gun to staple them in.

Another option would have been to use one of the little metal rods at the back of the stair, but again, this put us into another price bracket. I didn’t feel it was worth the extra expense for the look that it would represent for me.
The carpeting was cut off about 2” below the top stair to give a nice finish. We tucked it under and again stapled it nice and tight.

This really is a two-person job as one person needs to hold the carpeting nice and tight while the other person staples.
Draw a Guide
It’s important to draw a little pencil line to use as a guide as you’re putting on the carpeting so it lays straight instead of crooked.
Finishing the Bannister
After doing the carpeting and having the stairs white, I decided I wanted to go ahead and paint the banister part white to match. I thought it would tie the space together and have more of a clean harmonious look with everything matching.

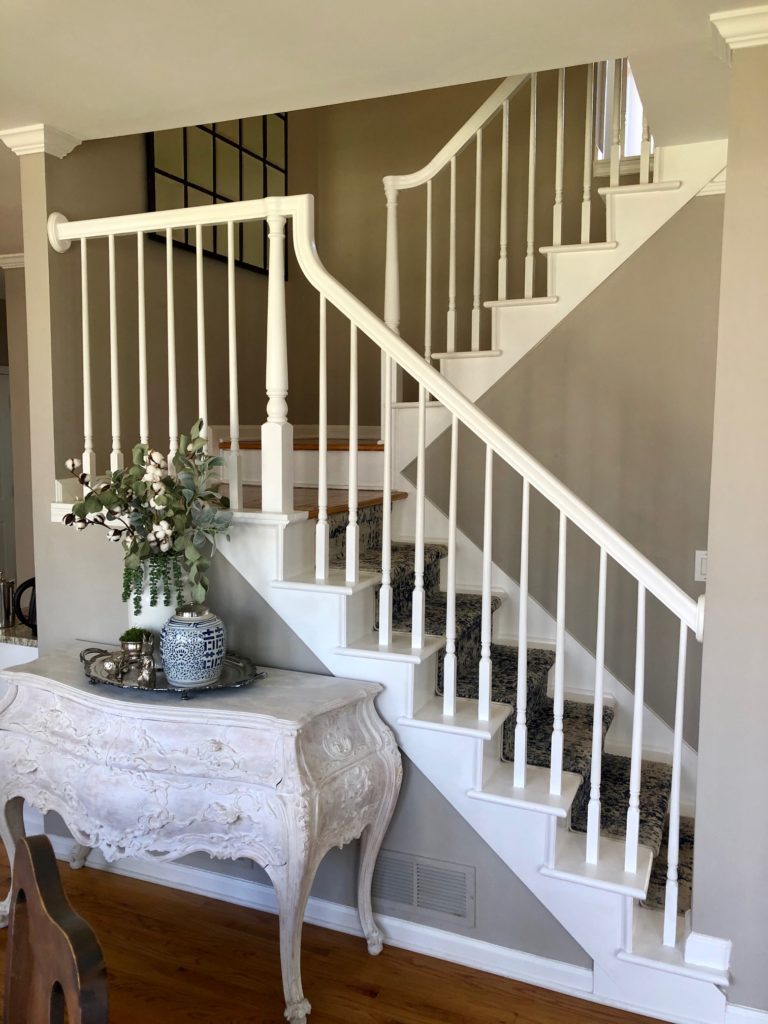
I washed everything well before I did this because railings tend to have a lot of oils and dirt on them from people’s hands. I went over them with a clean wet washcloth to remove any soap residue. I then began the painting process. Again, I did three coats of paint and allowed it to dry for a full-day in between. I am very happy with the end result.
Overall Costs
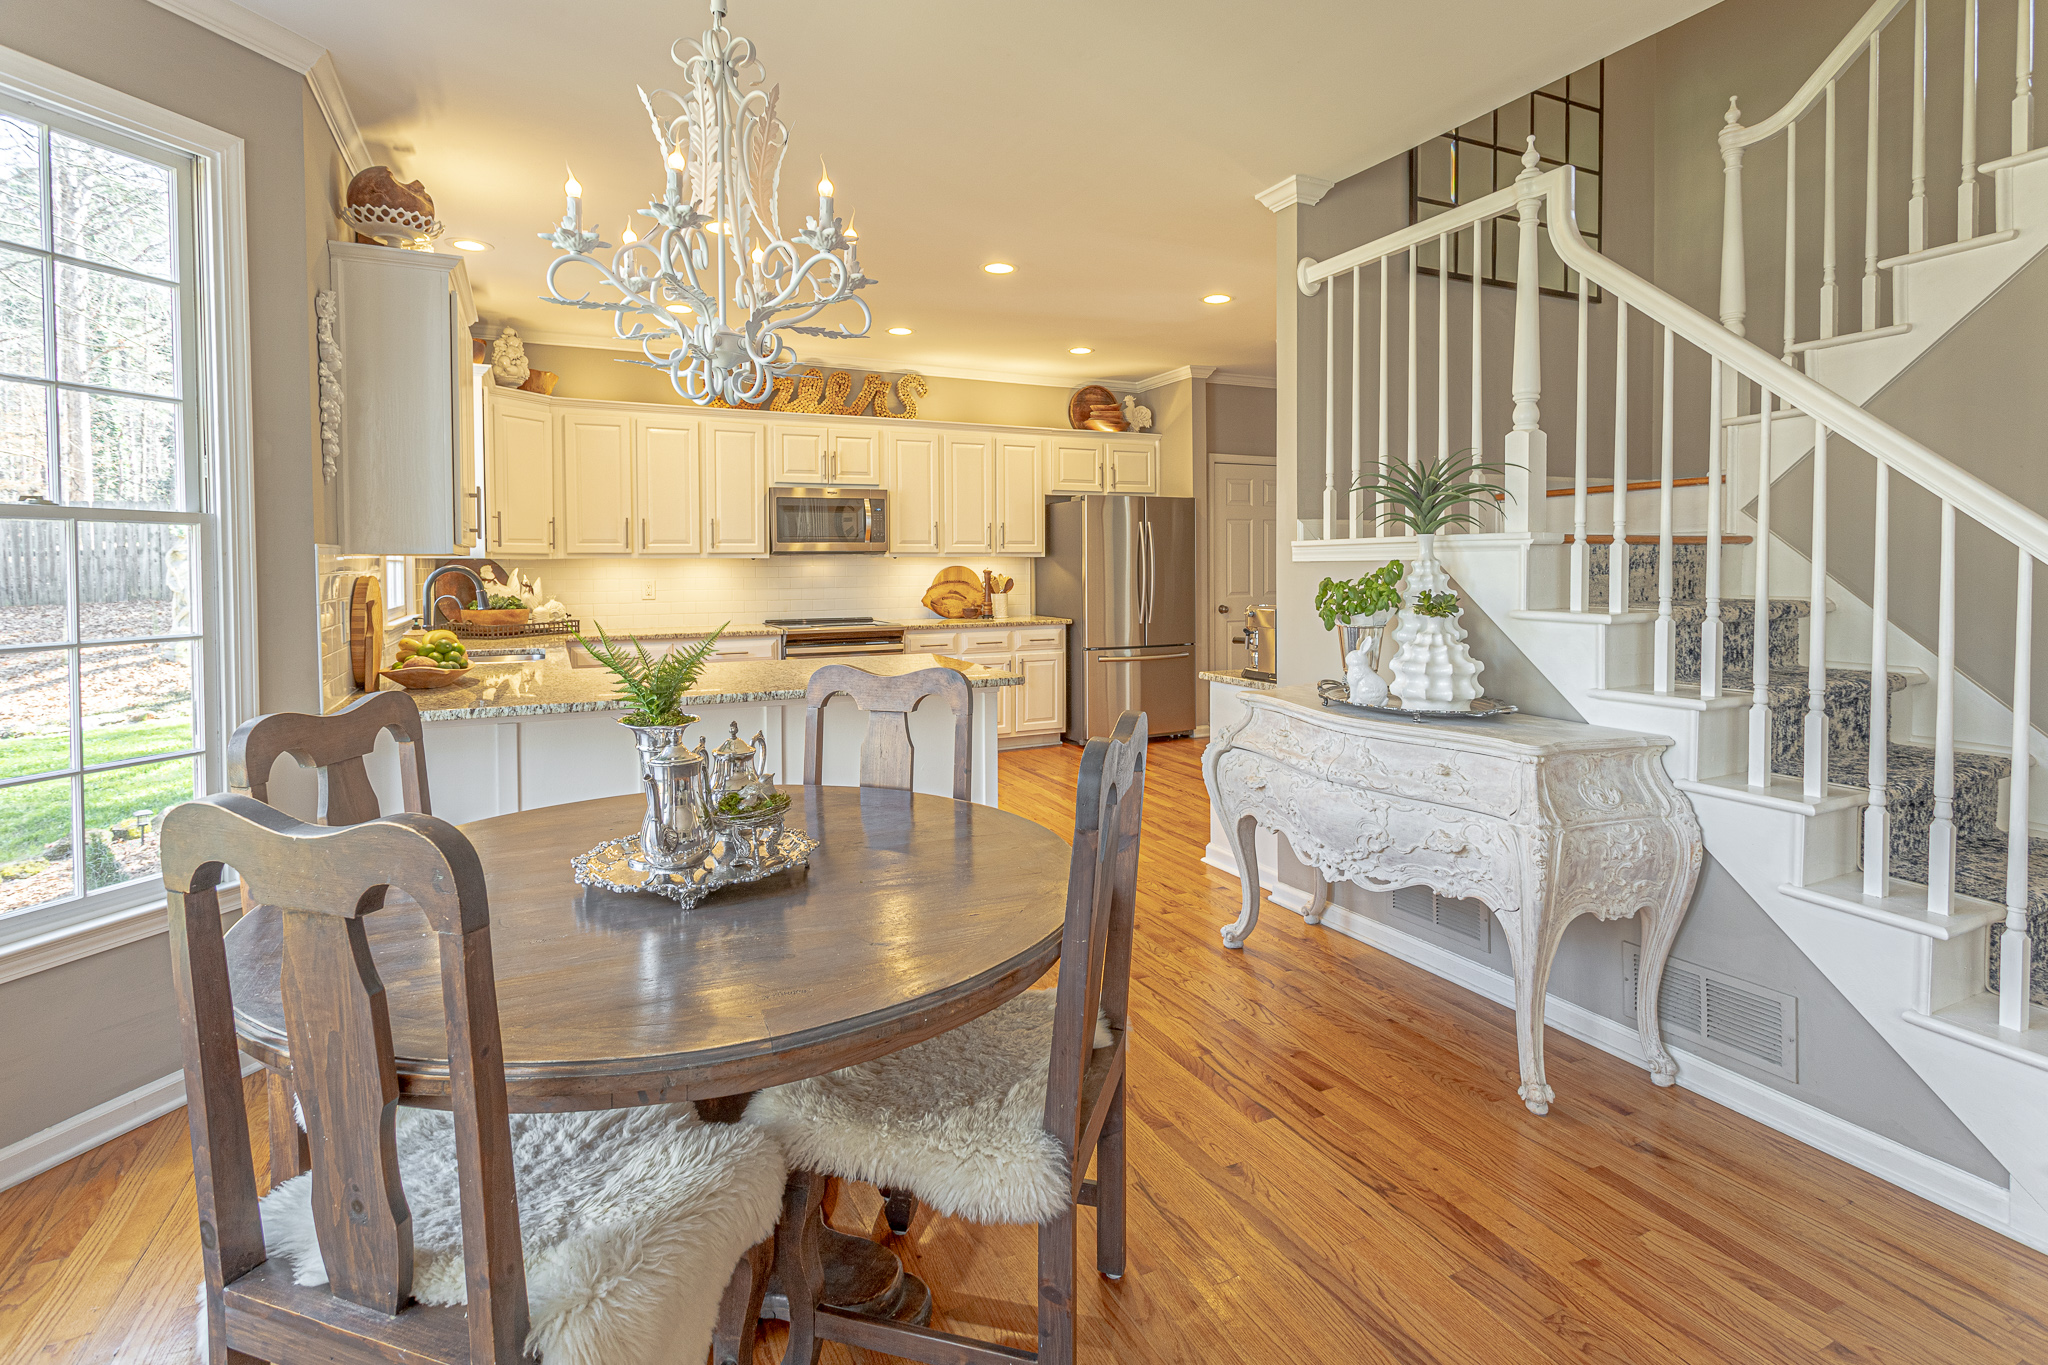
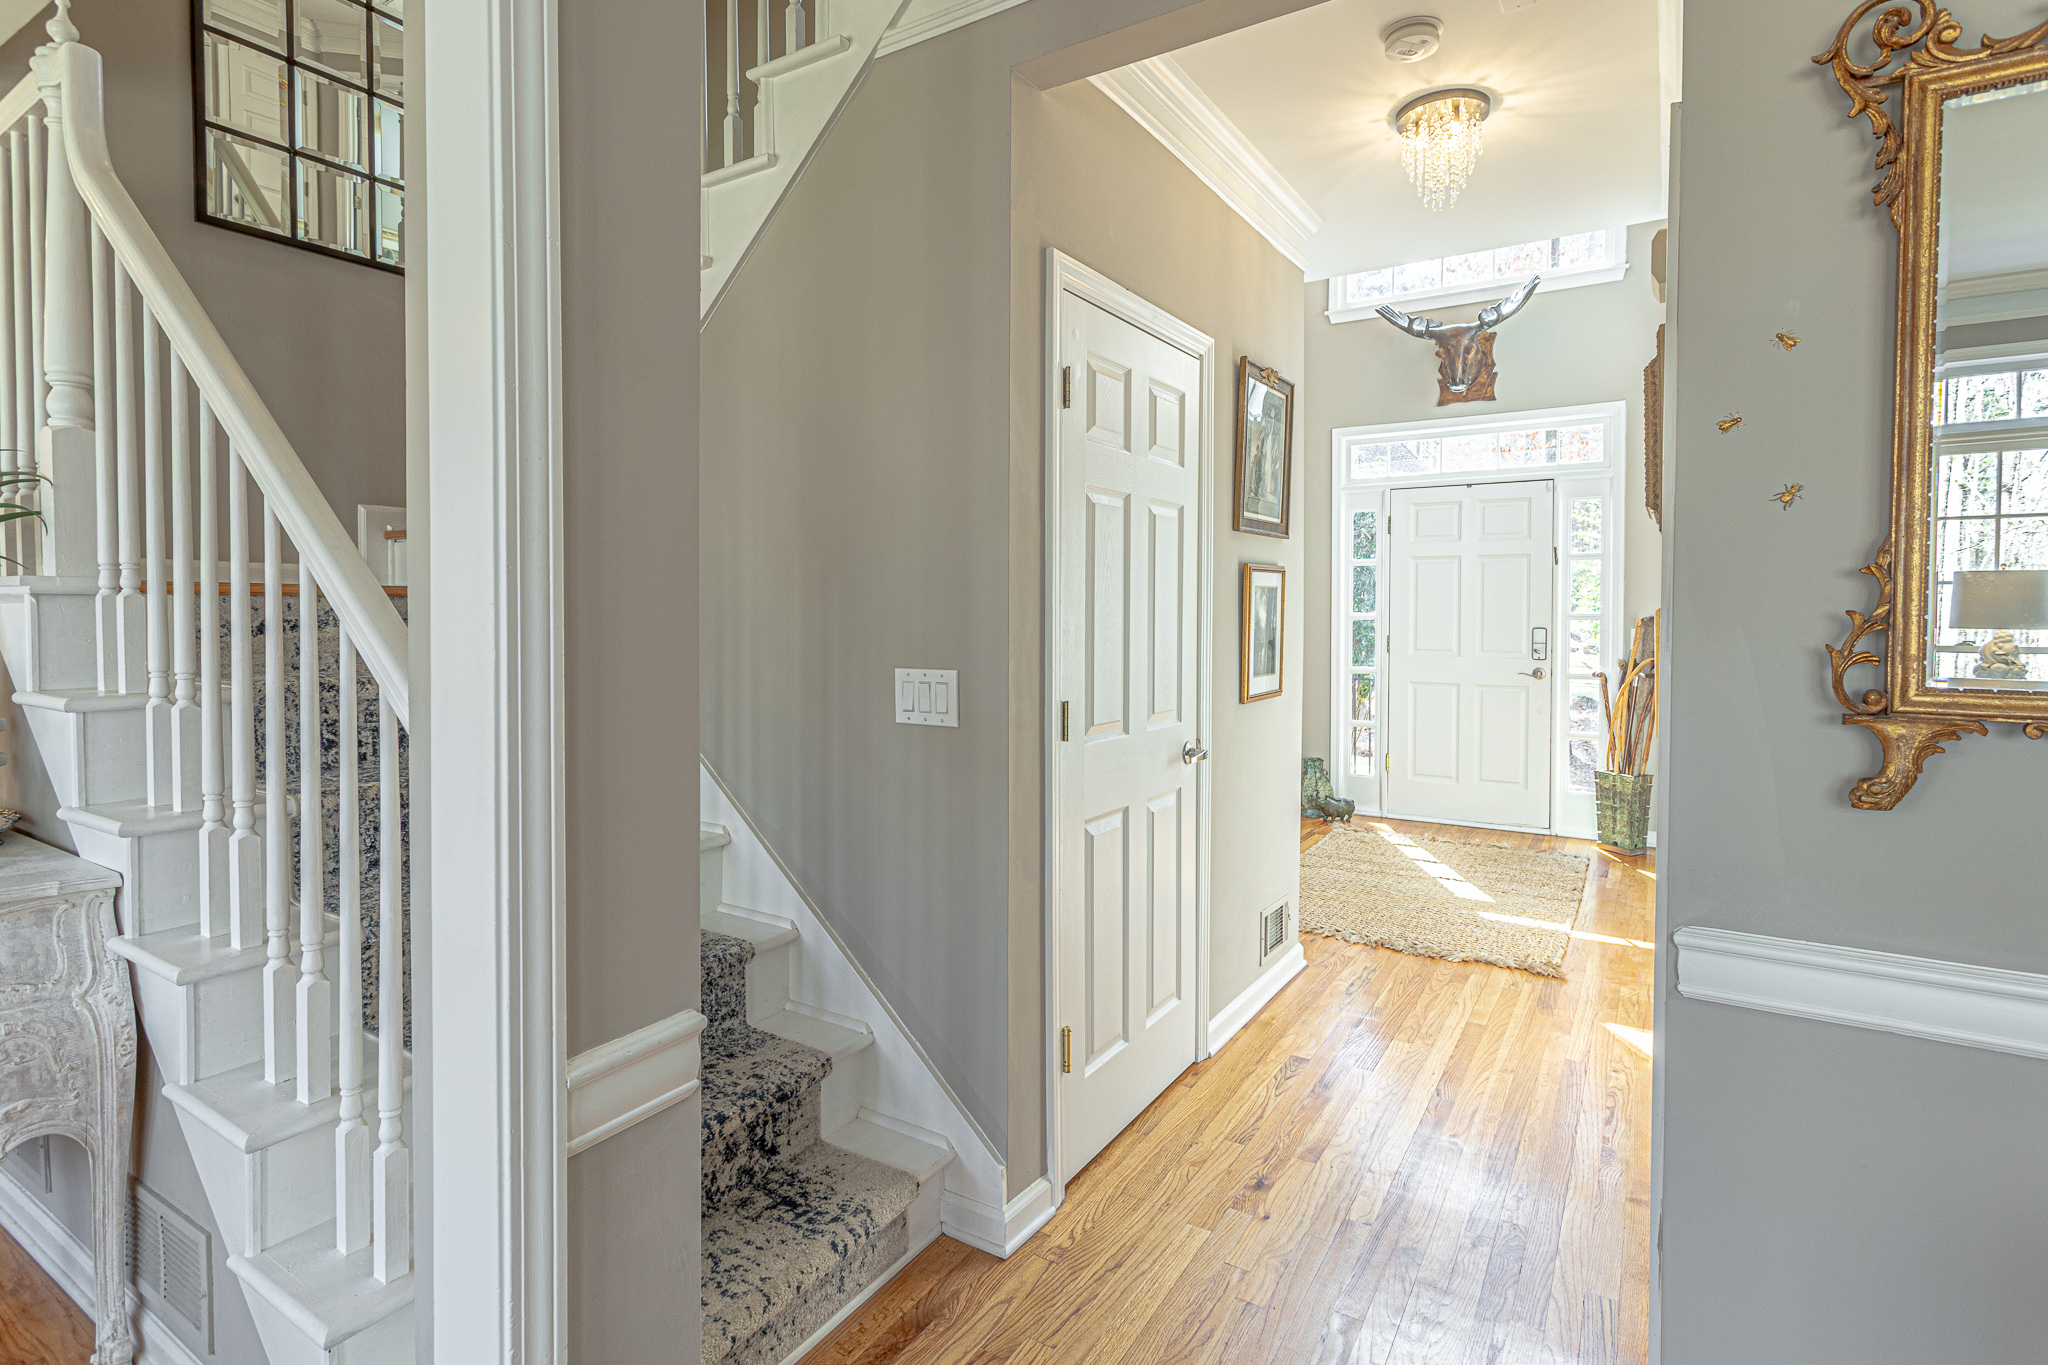
The paint was about $30 for a can and the rugs were about $50 each including delivery. The nice thing about choosing runners is that they are relatively inexpensive and can be changed out if your tastes change. There are thousands of options available at every price point.
We wanted something relatively neutral and we have a lot of navy blue and white in our home so we felt this was a good choice for the moment.
Hopefully you will have learned from my mistakes and won’t have the same troubleshooting failures that I had.
If I had it to do over, I may have not pulled the carpet up at all. Or I would have at least checked to see what I was working with first.
I just never would have imagined a half oak stair tread. This was a live-and-learn moment for sure.
Had I known, I may have waited to change out the treads, bannister and spindles all at the same time. After doing it, I am content. Thankful to have it done.
Best to you on your next project! Hoping you have success and joy as a happy homemaker!
Leave a Reply